Fabricare Center Cleaners Atlanta Dry Cleaning Delivery Blog

Category Archives for "Fabricare Center Blog"

How To Make Homemade Laundry Soap: A Step-by-Step Guide

How To Make Homemade Laundry Soap: A Step-by-Step Guide

Laundry

Are you tired of harsh chemicals and expensive prices on laundry detergents? Homemade laundry soap is easy to make and uses simple, safe ingredients. This guide will show you the steps to create your own effective detergent that’s kind to both your wallet and clothes.

Let’s get started!

Key Takeaways

  • Homemade laundry detergent saves money and reduces exposure to harsh chemicals found in commercial brands.
  • You can customize your own soap with natural ingredients like borax, washing soda, and essential oils for personalized scent preferences.
  • To prevent homemade laundry soap from becoming chunky, ensure all ingredients are completely dissolved and store the detergent in a properly sealed container.
  • Making your own laundry soap is eco – friendly; it minimizes harmful chemicals released into the environment.
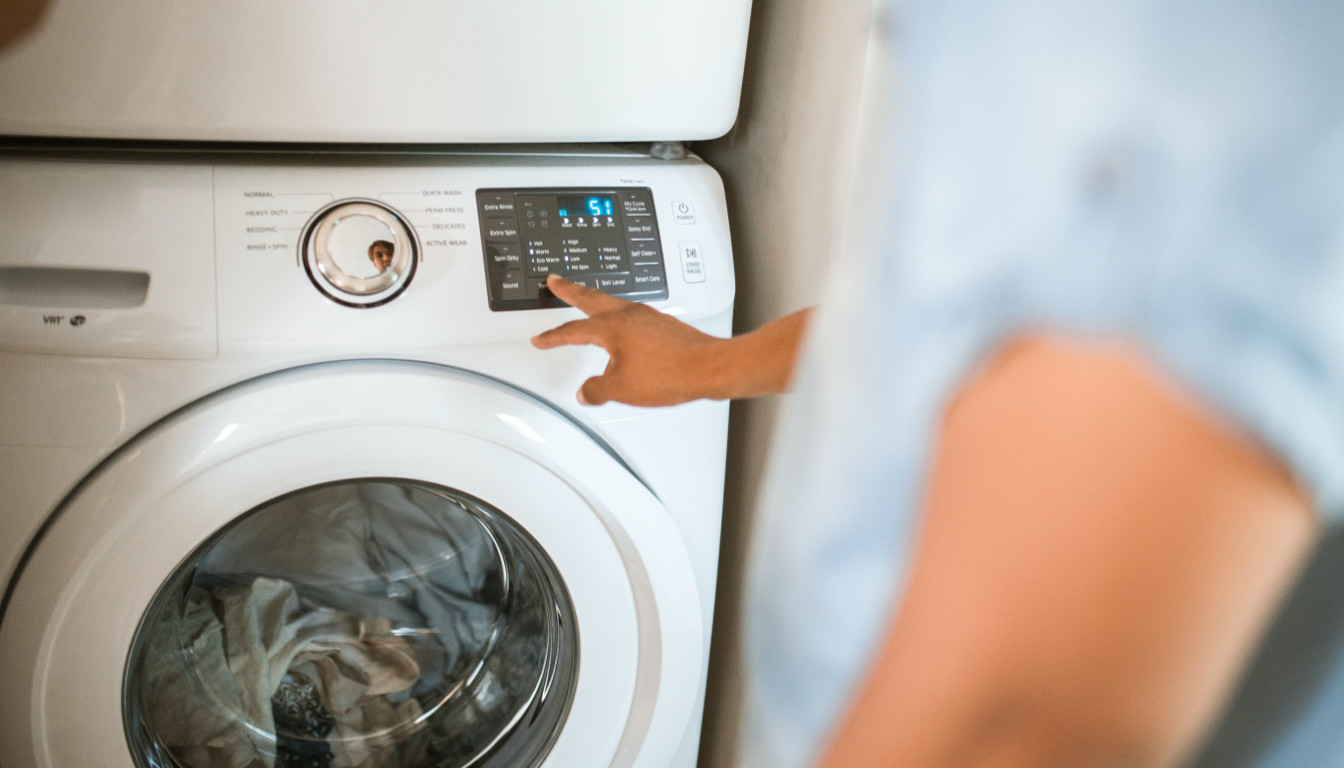
  • Homemade laundry detergents can be used effectively in both standard and high-efficiency washing machines if created with low-sudsing formulas.

Benefits of Making Your Own Laundry Soap

Benefits of Making Your Own Laundry Soap

Making your own laundry soap has several benefits. It’s cost-effective, safer for your family, and allows you to customize the ingredients to suit your needs.

Lower Cost

Making your own laundry soap doesn’t just cut down on chemicals, it also keeps your wallet happy. The ingredients for DIY laundry detergent usually come in larger quantities and cost less than buying commercial brands over time.

You’ll find that with each batch of homemade laundry soap, the price per load plummets, leading to significant overall savings.

Switching to homemade laundry soap is a budget-friendly choice that adds up month after month. Instead of spending dollars on store-bought options, you mix natural ingredients by yourself for only pennies per load.

This economical approach not only benefits your household budget but also offers a cost-effective way to handle everyday chores without breaking the bank.

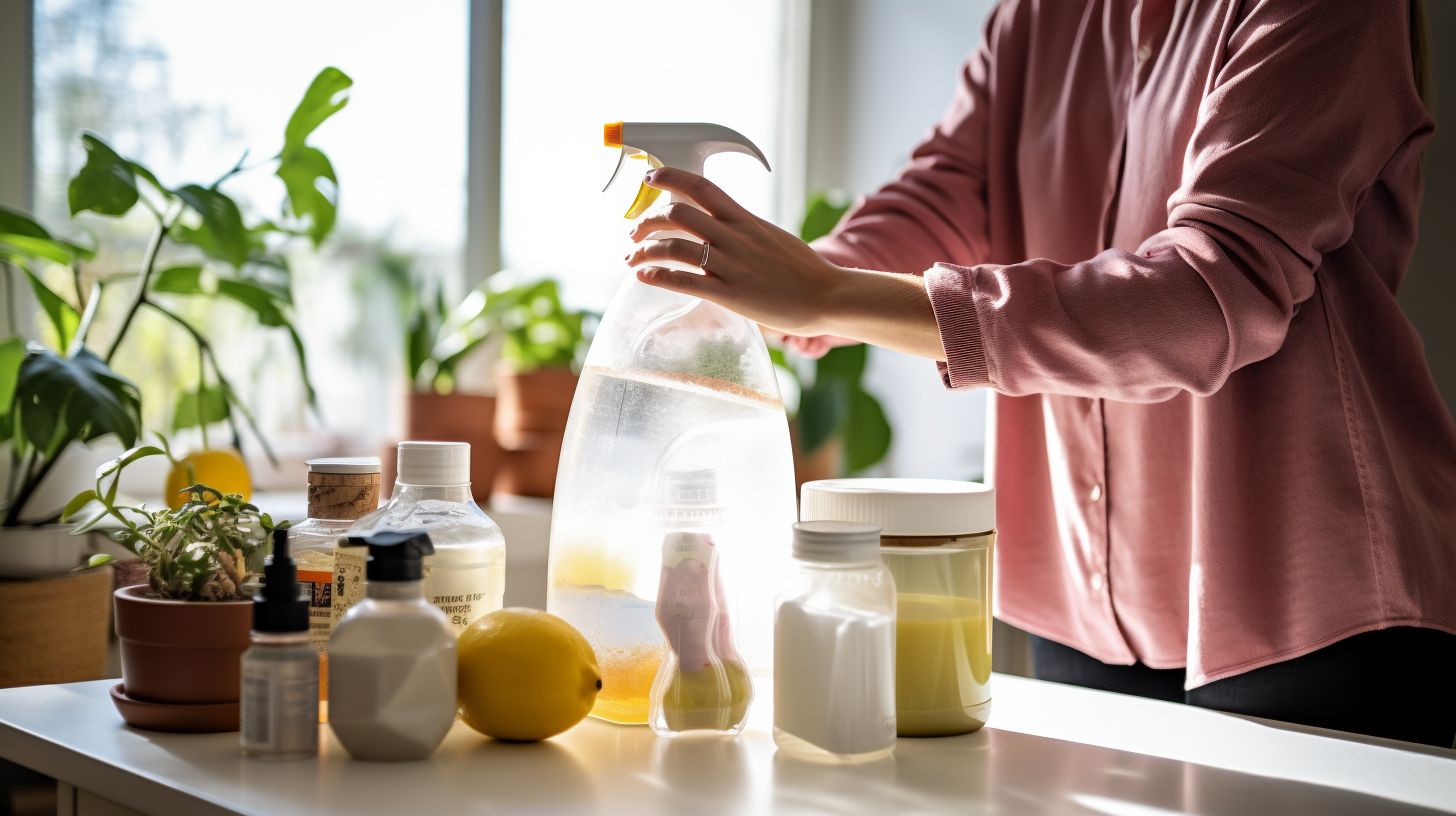
Safer for Your Family

Homemade laundry soap provides a chemical-free alternative to traditional detergents. By making your own, you eliminate the potential risks associated with exposing your family to harsh chemicals.

These store-bought products often contain ingredients that can cause skin irritation or allergic reactions in sensitive individuals. With DIY laundry soap, you decide what goes into the mix, creating a nontoxic laundry detergent that’s gentle on everyone’s skin.

Protecting your loved ones becomes simpler with natural cleaning products. Not only do they keep harmful substances out of your home, but they also contribute to an environmentally friendly lifestyle.

Embrace the peace of mind that comes from knowing exactly what is cleansing your family’s clothes—pure, safe ingredients mixed by you for ultimate protection and health benefits.

Customizable Ingredients

Making your laundry soap doesn’t just mean it’s safer for your family; it also puts you in control of what goes into each batch. You can tailor the scent, strength, and eco-friendliness to suit your personal needs.

Choose from a variety of natural scents like lavender or lemon by adding essential oils, or leave it unscented for a fragrance-free clean.

Adjustable ingredients are ideal for those with sensitive skin or allergies. By selecting specific components, you create an individualized laundry solution that minimizes risks of irritation.

Experiment with different amounts of borax, washing soda, and bar soaps such as Fels Naptha until you find the perfect mix for your household’s laundry needs.

Ingredients to Use in Homemade Laundry Soap

When making your own laundry soap, it’s important to use safe and natural ingredients that are effective at cleaning clothes. From essential oils for fragrance to washing soda for stain-fighting power, there are plenty of options to choose from when customizing your homemade detergent.

List of Safe Ingredients

When making homemade laundry soap, it is important to use safe and gentle ingredients that are effective in cleaning clothes. Here are the recommended safe ingredients for creating your own eco-friendly and non-toxic laundry soap:

  1. Borax: A natural mineral compound that boosts the cleaning power of soap and helps remove stains and odors from clothes.
  2. Washing soda: Also known as soda ash or sodium carbonate, it is a key ingredient for removing tough stains and boosting the effectiveness of laundry soap.
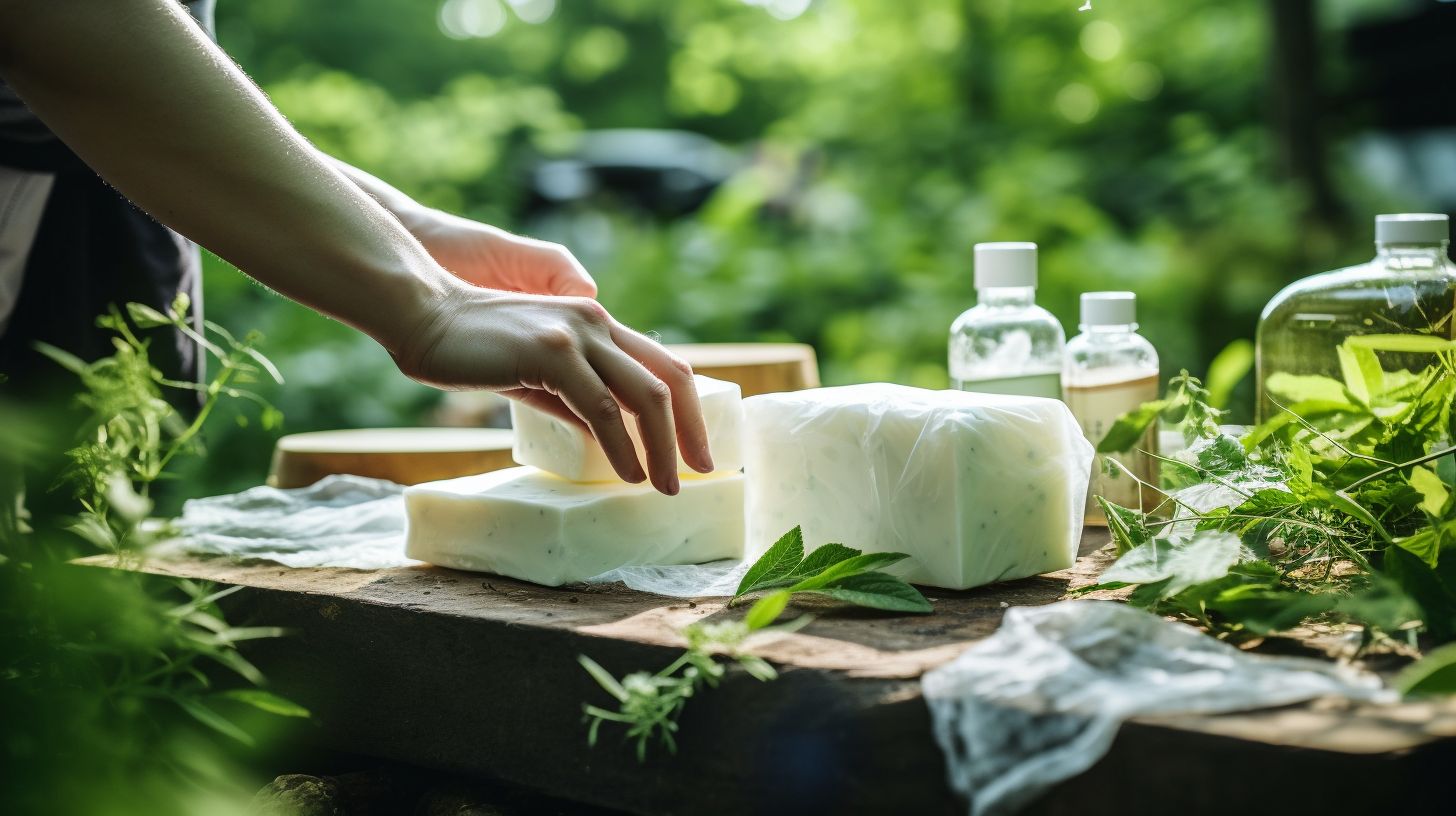
  3. Soap flakes: These natural, biodegradable flakes can be made from pure vegetable oil or plant-based ingredients and serve as a gentle cleansing agent for clothes.
  4. Liquid Castile soap: A versatile, all-natural soap made from plant oils like olive oil, it’s environmentally friendly and suitable for sensitive skin.
  5. Laundry bar soap (e.g., Zote, Fels Naptha): Traditional bar soaps specifically designed for efficient stain removal and fabric care in homemade laundry detergent recipes.
  6. Dawn dish soap: Often used in small amounts for its powerful grease-cutting abilities in DIY laundry soaps.

Ingredients to Avoid in Store-Bought Detergents

Harmful chemicals found in store-bought detergents can have a negative impact on both your health and the environment. Choosing to make your own laundry soap allows you to avoid these harmful ingredients and create a safer, more eco-friendly alternative.

Harmful Chemicals

Many store-bought laundry detergents contain harmful chemicals like diethanolamine, sodium lauryl sulfate (SLS), sodium laureth sulfate (SLES), phosphates, and formaldehyde. These toxic substances have been linked to liver, kidney, and reproductive issues in animal studies.

Moreover, these hazardous ingredients pose environmental risks and can be harmful to human health over time due to their toxicological effects. It’s important to be aware of these unsafe additives and opt for safer homemade laundry soap options with natural ingredients.

The inclusion of diethanolamine and SLS/SLES in commercial detergents warrants caution as they are proven toxicants according to toxicological studies. Additionally, the presence of phosphates contributes to water pollution while formaldehyde is a known carcinogen.

Negative Impact on the Environment

Switching from store-bought detergents to homemade laundry soap can reduce the negative impact of harmful chemicals on the environment. Common laundry detergents contain volatile organic compounds (VOCs) that contribute to air and water pollution, harming ecosystems and human health.

By opting for Earth-friendly alternatives, you can help minimize the release of these hazardous substances into the environment while still achieving clean and fresh-smelling clothes.

Making this small change can lead to a positive environmental impact by reducing the amount of toxic chemicals being released into our surroundings.

How to Make Homemade Laundry Soap

Gathering equipment and ingredients is the first step in making homemade laundry soap. Followed by step-by-step instructions and tips for success to ensure a successful batch of DIY detergent.

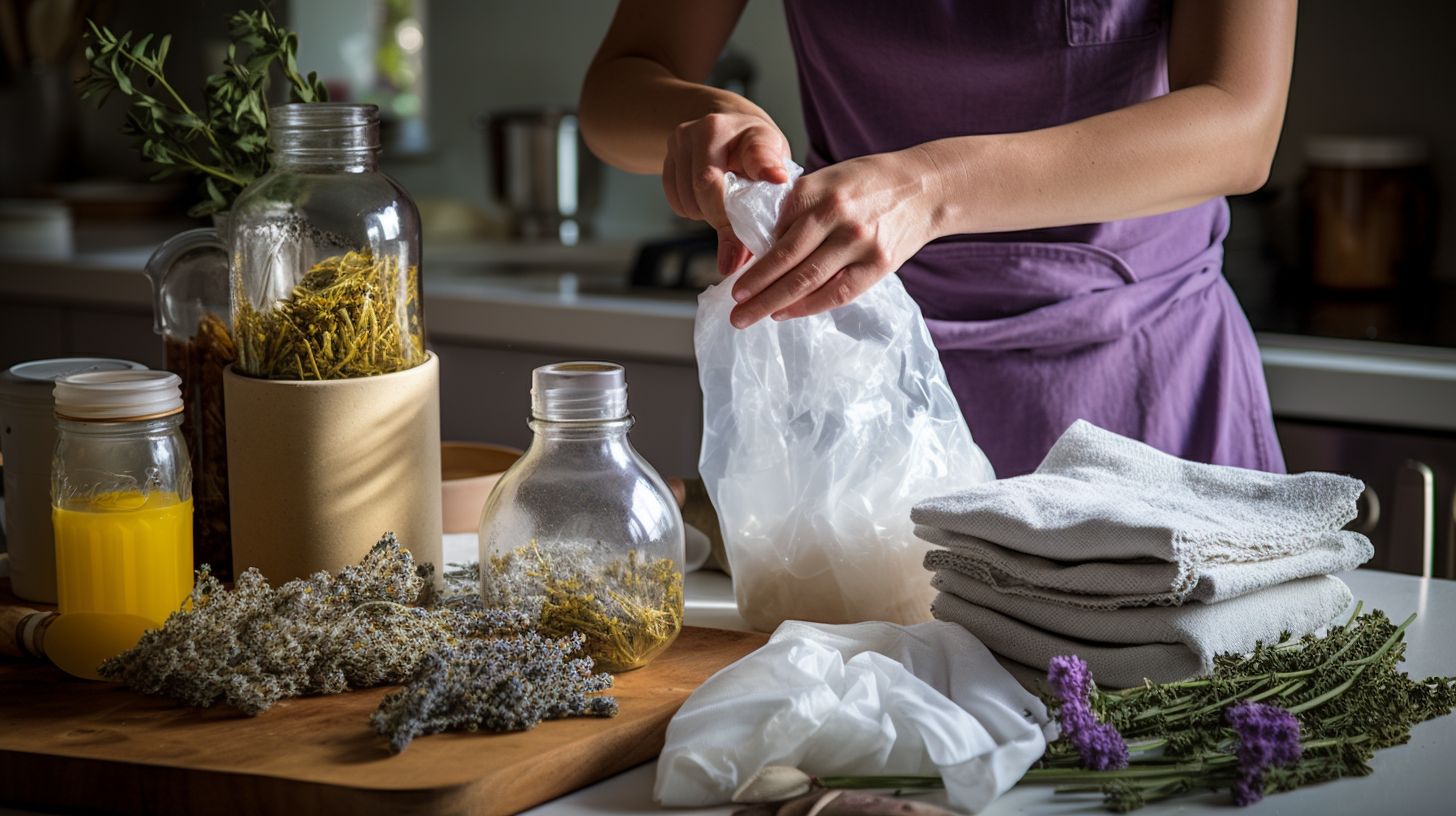
Gathering Equipment and Ingredients

To make homemade laundry soap, gather the necessary ingredients and equipment. You will need Fels Napthia, washing soda, borax, and pure bar soap or castile soap for the detergent.

Additionally, have a 5-gallon bucket and hot tap water ready. You’ll also need a grater or shredder to prepare the soap. A one-gallon jug and a pot are recommended for dissolving the grated soap.

These items are essential for creating your own effective and economical laundry detergent.

Step-by-Step Instructions

After gathering the necessary equipment and ingredients, follow these step-by-step instructions to make your own homemade laundry soap:

  1. Grate or chop the soap bar until finely ground using a food processor.
  2. Boil 8 cups of water in a large pot.
  3. Add the grated soap to the boiling water and stir until dissolved.
  4. In a separate bowl, mix 2 cups of borax and 2 cups of washing soda.
  5. Once the soap is dissolved in the water, pour in the borax and washing soda mixture, stirring well.
  6. Let the mixture sit overnight to thicken.
  7. Use about 1 cup per load when adding your homemade laundry soap liquid to your washer.

Tips for Success

For successful homemade laundry soap, store it in an airtight container to prevent clumping and preserve its effectiveness. Carefully measure the ingredients to maintain the right balance and avoid chunkiness in your detergent.

If using a high-efficiency washer, ensure that your DIY laundry soap is compatible with such machines for optimal cleaning results. Proper storage, precise measuring, and appliance compatibility are essential factors for successfully making and using homemade laundry detergent.

To keep your natural laundry soap effective, understand its shelf life; typically around six months to one year if stored properly. Also, consider experimenting with different bar soaps or adding essential oils for customization while keeping in mind potential allergies or sensitivities.

Tips for Making and Using Homemade Laundry Detergent

Proper storage is key to maintaining the effectiveness of your homemade laundry detergent. Measuring carefully, avoiding chunkiness, using it in HE washers, and understanding its shelf life are also important tips for success.
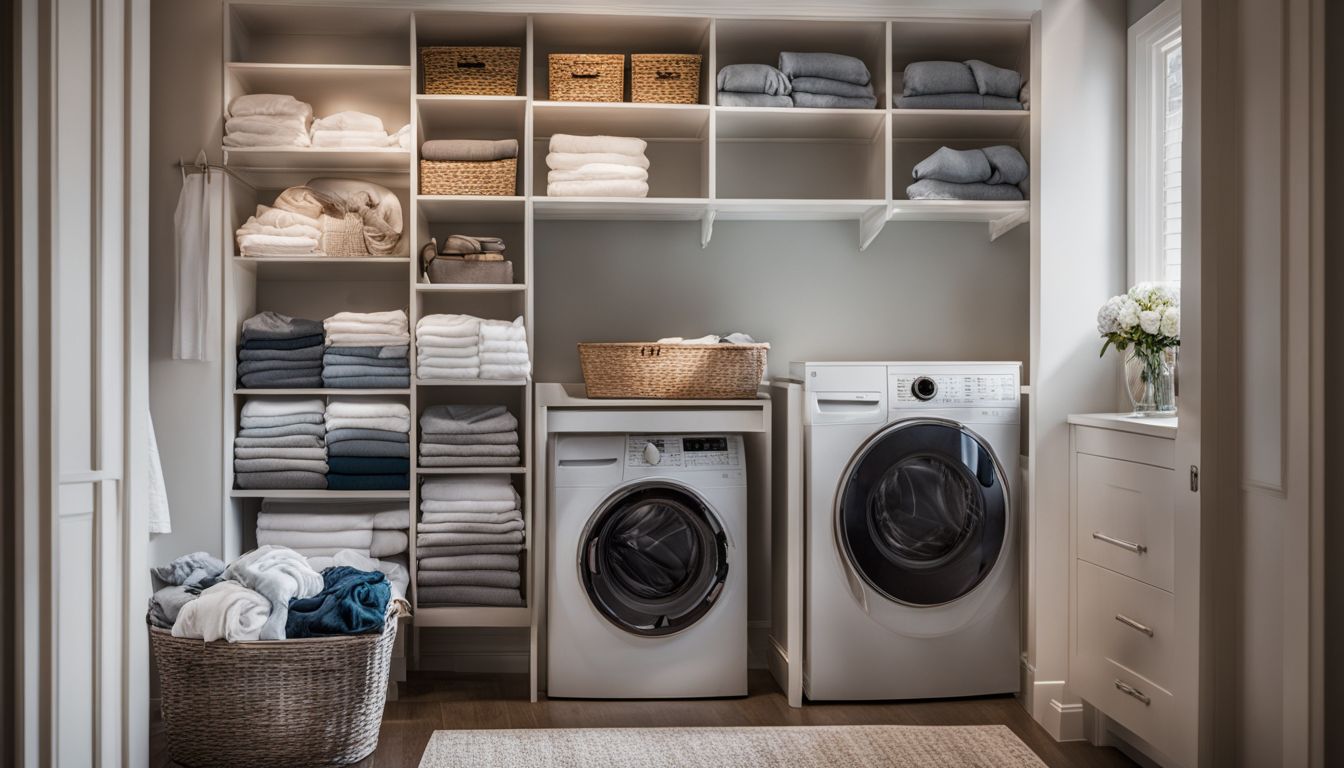
Proper Storage

Store homemade laundry detergent in an airtight container, whether it’s glass or plastic. Ensure the container has a tightly fitting lid to maintain the detergent’s effectiveness. For liquid detergent, use a 2-liter capacity container and add 6 cups of room temperature water and 1 cup of washing soda for proper storage.

Maintain the quality and shelf life of your DIY laundry soap by storing it in an airtight container with a secure lid. Whether you choose glass or plastic, make sure the vessel is capable of sealing tightly to preserve your homemade cleaning solution effectively.

Measuring Carefully

Grate the bar soap with caution, ensuring precise measurements for your homemade laundry detergent. Accurate amounts of Borax and washing soda are crucial to the effectiveness of your DIY laundry soap.

Avoiding Chunkiness

To prevent chunkiness in homemade laundry detergent, it is crucial to ensure that the ingredients are fully dissolved. This can be achieved by using hot water and thoroughly stirring the mixture until all components are completely integrated.

By following specific steps in recipes and allowing for proper dilution of ingredients, chunkiness can be minimized or eliminated altogether. It’s essential to pay attention to guidance provided in different homemade laundry detergent recipes, as some may offer troubleshooting advice specifically aimed at addressing concerns related to chunkiness.

Additionally, ensuring that grated Fels-Naptha soap is fully dissolved before adding it to the rest of the ingredients can help prevent chunkiness from occurring during the detergent-making process.
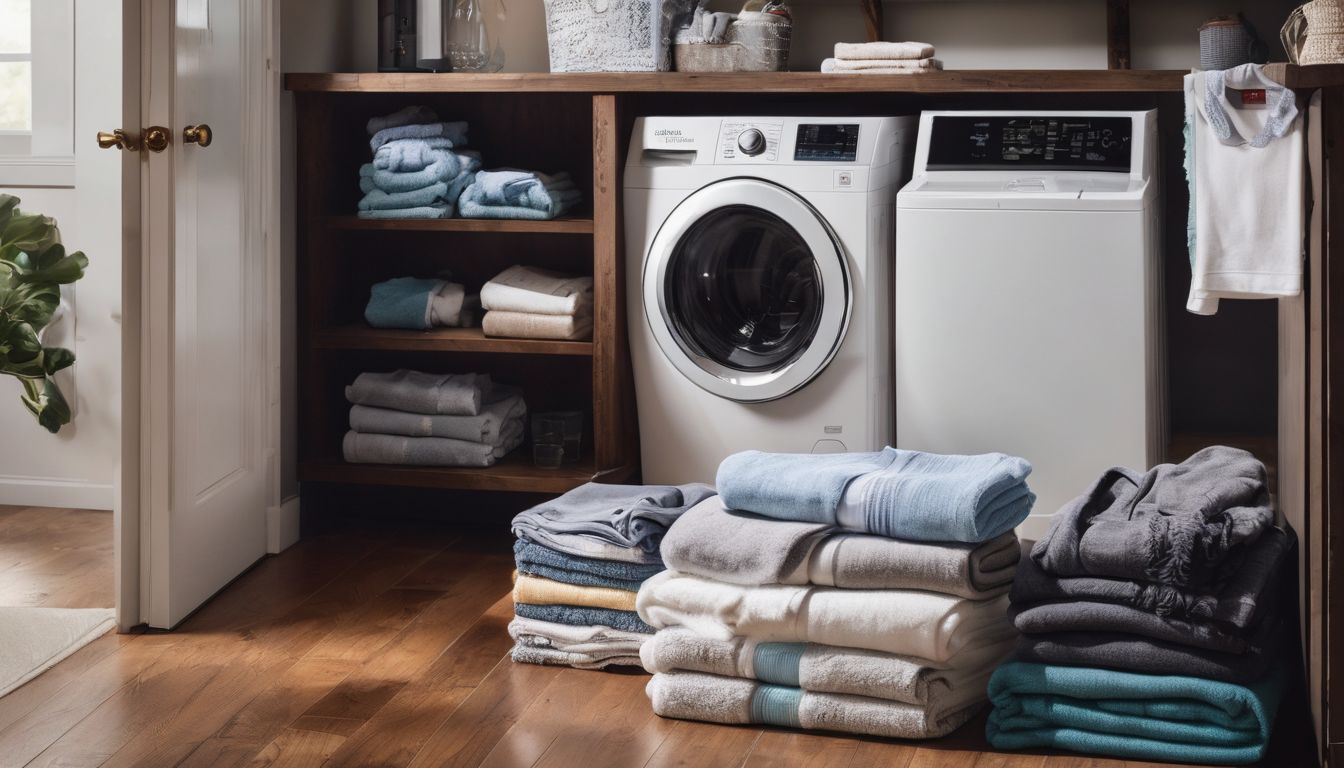
Using in HE Washers

Homemade laundry detergent can be used in high-efficiency (HE) washers, as long as it is a low-sudsing formula. It’s important to follow the recommended usage amount to prevent oversuding and ensure effective cleaning.

Whether in liquid or powder form, homemade laundry soap can be a great eco-friendly alternative for HE washer users.

When using homemade detergent in an HE washer, measure carefully and avoid overpouring. This will help maintain the effectiveness of the detergent while preventing excess suds that could potentially cause issues with your machine.

Shelf Life and Effectiveness

Homemade laundry detergent can maintain its effectiveness for up to six months when stored properly. It is important to keep it in a dry and cool place, away from direct sunlight and moisture, to prevent clumping and ensure its longevity.

When using homemade soap for laundry, be sure to measure the amount carefully as excess soap can lead to residue build-up on clothes. Additionally, thoroughly rinsing the laundry after washing helps remove any lingering soap particles that may cause irritation or reduce fabric softness.

To maximize the shelf life and effectiveness of your natural laundry detergent, consider making smaller batches more frequently rather than large quantities that may not be used within the recommended timeframe.

Conclusion

In conclusion, making your own laundry soap offers numerous benefits such as cost savings and the ability to tailor ingredients to suit your family’s needs. By using safe and natural ingredients, you can create a detergent that is gentle on clothes and the environment.

With simple steps and basic equipment, anyone can craft their homemade laundry soap, ensuring effective cleaning without harmful chemicals or additives. Try out different recipes to find the one that works best for you, whether it’s in liquid or powder form, providing a sustainable and eco-friendly option for your household cleaning needs.

FAQs

1. What ingredients do I need to make homemade laundry soap?

To make homemade laundry soap, you will need ingredients such as washing soda, borax, and a bar of soap.

2. Can I use homemade laundry soap for all types of washing machines?

Yes, homemade laundry soap can be used in both top-loading and front-loading washing machines.

3. How much homemade laundry soap should I use per load of laundry?

For a standard load of laundry, 2-4 tablespoons of homemade laundry soap is typically sufficient.

4. Is it cost-effective to make homemade laundry soap compared to buying commercial detergent?

Making your own laundry soap can be more cost-effective over time, especially if you regularly do large amounts of laundry.

5. Are there any special storage considerations for homemade laundry soap?

Homemade laundry soap should be stored in an airtight container away from moisture and direct sunlight to maintain its effectiveness.

What Should Be Dry Cleaned? A Guide To Cleaning Different Fabrics

What Should Be Dry Cleaned? A Guide To Cleaning Different Fabrics

Dry Cleaning , Fabricare Center Blog

Have you ever shrunk your favorite sweater by accident? Wool fabric is tough but needs special care to keep it in top shape. Our guide will clear up the confusion on which fabrics need a trip to the dry cleaners and which don’t.

Keep reading for all the best tips!

Key Takeaways

  • Professional dry cleaning is a must for fabrics like silk, velvet, wool, leather, linen, and suede to keep their quality and appearance intact.
  • Home washing is suitable for cotton, knits, polyester and denim; each fabric comes with specific guidelines to prevent damage during the cleaning process.
  • Special materials such as cashmere and furs require particular attention – opt for professional care or follow precise hand-washing instructions.
  • Embellished items should be handled by professionals to protect intricate beadwork or sequins from being damaged in a standard wash.
  • Always read the care labels on clothing thoroughly before attempting any cleaning; they provide vital information on maintaining fabric quality.

Fabrics That Need Professional Cleaning

Fabrics That Need Professional Cleaning

Silk, velvet, wool, leather, linen and suede are all fabrics that require professional dry cleaning to maintain their quality and appearance. Keep reading to learn more about how to properly care for these delicate materials.

Silk

Caring for silk takes a gentle touch, as this luxurious fabric is known for its delicacy. It’s best to entrust your silk garments to professional dry cleaners who have experience with these sensitive materials and use eco-friendly solvents.

Such specialized care ensures the preservation of silk’s smooth texture and vibrant color without exposing it to harsh chemicals.

If you’re dealing with raw silk or high-end pieces like Douppioni and Crepe, professional garment care becomes even more important. These types of silk respond poorly to machine washing because of the intense agitation and heat they would face.

Handwashing is an option but requires meticulous attention so as not to shrink or damage the delicate fibers. Stick with a reliable cleaner for your delicate fabrics. Proper maintenance can dramatically extend the life span of your cherished silk items.

Velvet

Dry cleaning is essential for pure velvet garments to maintain their lush texture and rich color without causing damage. Different velvets demand specific care. It’s crucial to distinguish between them to ensure proper maintenance.

If you own a piece made from polyester or crushed velvet, gently place it inside a mesh washing bag before machine washing with cold water on the gentle cycle. This precaution helps prevent snags and tears during the wash.

For spills on velvet upholstery, act fast with just a damp cloth to wipe away messes easily. Thanks mainly to its durable and stain-resistant properties. Use cool water when hand washing delicate pieces and opt for detergents formulated specifically for delicates.

Following these procedures keeps your velvet items looking impeccable without risking harm to the fabric’s unique qualities.

Wool

Wool requires extra attention during the cleaning process. This natural, thick material can easily warp or shrink if not treated properly. For delicate garments like vintage coats or handmade blankets, hand-washing in cold or lukewarm water with a mild detergent is best.

Soak these items for just the right amount of time as per fabric care instructions to avoid any damage.

Always check labels before tossing woolens into the wash. They often provide crucial information on proper care. If your wool item says it’s machine washable, set your washer to a gentle cycle using a wool-specific detergent and choose a low spin option.

Be careful with drying – some woollen clothes can handle tumble drying while others must air dry flat to maintain their shape and texture. Moving onto fabrics that also demand caution – leather stands out as one needing specialist treatment.

Leather

Moving from the delicate care of wool to another professional cleaning necessity, leather requires specialized attention. Professional leather cleaning involves using specialized equipment and chemicals to remove dirt and stains effectively.

It is essential to allow leather items to air-dry naturally after cleaning, avoiding direct sunlight or heat sources as they could cause fading or damage. Regular upkeep includes wiping a leather jacket with a soft, dry cloth to remove surface dirt and keep it looking clean.

Periodic thorough cleaning not only ensures hygienic and safe-to-use apparel but can also be cost-efficient in the long run.

Linen

Linen can be safely dry cleaned or machine washed, unless the item is marked as “hand wash only.” It’s recommended to take linen garments to a professional dry cleaner who can use appropriate methods and chemicals for cleaning.

Dry cleaning doesn’t use water, which can ruin the texture of the fabric.

Linen that has been correctly manufactured and treated can be machine or hand washed, even tumble dried on low temperatures if needed. Depending on how it is applied, linen can be machine washed, hand washed, or dry cleaned; following care instructions ensures proper maintenance.

Suede

Suede, with its velvety texture, requires professional dry cleaning due to its porous material. It is recommended that suede be professionally cleaned at least once a year to maintain its appearance and durability.

Machine washing suede can damage the fabric, so it’s essential to seek out dry cleaning services that specialize in caring for this delicate material. For surface stains on suede shoes, a gentle cleaning solution such as suede shampoo and a nylon brush can be used for effective removal.

Additionally, regular light brushing of suede fabric every one or two weeks helps remove surface dirt and debris while maintaining its appearance.

Fabrics That Can Be Washed at Home

Cotton, knits, polyester, and denim are all fabrics that can typically be safely washed at home. However, it’s always important to check the care label on your clothing to ensure proper cleaning instructions are followed.

Cotton

Cotton can be easily washed at home using cold or lukewarm water in the washing machine. To maintain its durability, avoid over-drying cotton and ensure that it is not subjected to hot water, as this can cause shrinking.

By following these simple fabric maintenance tips, you can keep your cotton clothing looking fresh and vibrant for longer periods.

Maintaining cotton fabric involves using appropriate washing machine settings and choosing colder water temperatures to prevent shrinkage. It’s important to be mindful of fabric care by avoiding over-drying during the laundry process. Ultimately extending the life of your favorite cotton garments.

Knits

Knits, including wool and cotton blends, are washable at home using the gentle cycle on your washing machine or by hand. When caring for knits at home, always use a mild detergent and cold water to avoid shrinking or damaging the fabric.

Knit garments labeled as “dry clean only” can still be safely washed at home following the proper care instructions. For special materials like wool, it’s best to hand wash or take them to a professional dry cleaner to maintain their quality.

Remember that knits require delicate handling during cleaning due to their stretchy nature and sensitivity, so always refer to the care label for specific instructions on how to best maintain these fabrics.

Polyester and Other Synthetics

Polyester and other synthetic fabrics, such as nylon and acrylic, are generally safe for machine washing. Always check the care label for specific instructions on water temperature and other washing guidelines.

Most polyester blends can be laundered with warm or cold water, but it’s important to avoid hot water as it can cause the fabric to shrink or lose its shape. When it comes to drying, polyester should be air dried or tumble dried on low heat to prevent damage.

When polyester garments are dirty but don’t require a full wash, spot cleaning with mild detergent and water is an effective way to keep them fresh between washes. Avoid using bleach or harsh chemicals that could cause discoloration or damage to the fabric.

Denim

When it comes to caring for denim, it’s important to note that true denim should be washed sparingly to avoid fading. If your denim clothing says “dry clean only,” it should not be washed in the washer.

Instead, dry cleaners have experience cleaning sensitive fabrics like denim, ensuring they are handled with care and expertise. However, if your denim is ready for a wash, it is recommended to do so on the delicate cycle with cold water.

Remember that denim doesn\’t need washing after every wear – only when it gets dirty from stains, dirt, or odors.

Caring for Special Items

Ensure your cashmere sweaters and furs are properly taken care of. Additionally, learn how to handle embellished items and delicate or synthetic materials.

Cashmere

Cashmere is a luxurious and delicate fabric with its own antibacterial properties, which means it does not need frequent washing like synthetics. Most cashmere items can be dry cleaned according to the care label instructions, ensuring the fine fiber remains in top condition.

It’s best to avoid washing or dry cleaning wool and cashmere sweaters after every use as this can damage the yarns. When storing cashmere, folding rather than hanging is recommended to maintain its quality.

As for caring at home, hand washing or professional dry cleaning are preferred methods for maintaining cashmere garments due to their delicate nature. To prevent stretching or damage, it’s important not to wring or twist the fabric during drying but instead lay the sweater flat on a clean surface.

Furs

As we transition from caring for delicate cashmere to the special maintenance required for furs, it’s crucial to recognize that fur garments demand unique handling. When it comes to cleaning and storing furs, professional care is paramount.

Furs should not be exposed to heat and should be stored in cool temperatures with ample breathing space to maintain their pristine condition. Furthermore, avoiding friction and chemicals on fur pieces is essential in preserving their quality over time.

Professionals who specialize in fur care are equipped with the expertise needed to inspect each garment thoroughly before cleaning. They meticulously examine for stains, rips, tears, and other nuances before devising a tailored approach.

Embellished Items

Embellished items, such as beaded or sequined garments and hand-stitched accessories, often require special care due to their delicate nature. These ornate pieces should be sent to the dry cleaners for professional cleaning to ensure that the embellishments remain intact and undamaged.

Hand-stitched details can easily unravel in a standard washing machine, and the intricate beadwork or sequins may not withstand the agitation. By trusting these items to professional cleaners, you can maintain their beauty without risking damage.

When it comes to caring for bedazzled fashion or jeweled accessories, it’s vital to consider the fragility of these embellishments. Professional dry cleaning ensures that your adorned clothing and studded apparel receive gentle yet effective treatment while preserving their decorative elements.

Fragile or Synthetic Materials

Fabrics like chiffon, tulle, and rayon are delicate and should be handled with special care. Dry cleaning is recommended to preserve the quality of these sensitive materials. Similarly, certain synthetic fabrics such as PVC and polyurethane cannot withstand dry cleaning and may become damaged during the process.

It’s important to check the fabric label or consult a professional cleaner for the best care instructions for fragile or synthetic materials.

For natural fibers such as linen, wool, rayon, silk, viscose, lyocell, modal, and cupro that react poorly with water. Dry cleaning helps maintain their shape and texture. Using gentle cleaning methods will ensure that these fabrics retain their integrity over time.

Caring for Special Items

Handle furs, suits, pleated items, and more with care by following specific care instructions and always checking the labels before cleaning. For more tips on caring for special fabrics and garments, keep reading!

Tips for handling furs, suits, pleated items, and more

When handling furs, suits, or pleated items. Check the care label for specific dry cleaning instructions. Use a soft-bristled brush to gently remove surface dirt from fur. Then store it in a cool and dark place.

Suits should be brushed after each wear and professionally cleaned occasionally to maintain their appearance. Avoid hanging pleated garments for long periods to prevent permanent creases.

For fragile or synthetic materials, such as sequined or embellished items, spot clean stains with mild detergent before consulting a professional cleaner. When dealing with delicate pieces like silk or velvet, avoid direct heat and sunlight exposure during storage to preserve their texture and color integrity.

The importance of reading labels and following care instructions

Understanding and adhering to clothing care symbols and garment care instructions is crucial for maintaining the quality of special items and fabrics. The care labels on clothing provide essential guidance on how to properly care for different fabrics, ensuring their longevity.

By following proper fabric care instructions and washing guidelines, individuals can prevent damage to delicate materials and extend the lifespan of their garments. Therefore, it is imperative to pay close attention to laundry care labels and follow textile care recommendations to ensure proper fabric maintenance.

Proper fabric care involves reading clothing care symbols and garment care instructions carefully before washing or cleaning any item. This attention to detail not only preserves the integrity of the fabric but also prevents unnecessary wear or damage that could occur from improper handling.

Conclusion

In conclusion, caring for different fabrics is essential to maintain their quality and longevity. Knowing which fabrics should be dry cleaned and which can be washed at home can help you preserve your clothing items.

By following the care instructions on labels and understanding the specific requirements of each fabric, you can ensure that your clothes remain looking great for a long time. Taking the necessary steps to clean delicate materials properly will help you keep your wardrobe in top condition.

It’s important to handle each fabric with care according to its specific cleaning needs without compromising its integrity.

FAQs

1. How do I know if a fabric should be dry cleaned?

Check the care label on the garment for “dry clean only” or “dry clean recommended” instructions.

2. Can I hand wash fabrics that are labeled as dry clean only?

It’s best to follow the care instructions provided on the label and have items labeled as “dry clean only” professionally cleaned to avoid damaging the fabric.

3. Are there any fabrics that should always be dry cleaned?

Yes, delicate fabrics like silk, wool, velvet, and structured garments with linings often require professional dry cleaning to maintain their quality.

4. What are some common items that need to be dry cleaned?

Common items that often require dry cleaning include suits, formal wear, coats, curtains made of delicate materials, and silk or wool garments.

5. How do I store clothes after they have been dry cleaned?

Once collected from the cleaners, it’s best to remove plastic bags from clothing to allow them to breathe and hang them in a cool, well-ventilated space away from direct sunlight.

Top 10 Laundry Tips And Tricks For Cleaner And Fresher Clothes

Top 10 Laundry Tips And Tricks For Cleaner And Fresher Clothes

Laundry

Are you struggling to keep your clothes looking and smelling their best? Washing clothes inside out can significantly extend their lifespan, ensuring they stay vibrant and fresh. This article is packed with ten practical laundry tips and tricks that will transform your routine for cleaner, fresher garments.

Dive in for the secrets to spotless outfits!

Key Takeaways

  • Sort your laundry by color, fabric type, and weight before washing to keep clothes vibrant and prevent damage.
  • Use mesh laundry bags for delicate items like lingerie and fine knits to protect them in the wash cycle.
  • Turn dark – colored clothes inside out before washing to reduce fading, extend their life, and keep colors rich.
  • Add baking soda or scent boosters to your wash for extra freshness and odor elimination from clothes.
  • Tackle wrinkles without an iron by using ice cubes or a damp towel in the dryer for easy crease removal.

Laundry Tips for Efficient and Effective Washing

Maximize your laundry routine with smart strategies that enhance cleaning power and maintain the quality of your clothes. Dive into key adjustments for washing practices that can make a significant difference in tackling your laundry pile effectively.

Using Smaller Loads for Efficiency

Smaller laundry loads can really boost your machine’s performance. They give clothes more room to tumble and mix, ensuring that detergent and water reach every inch of fabric for a thorough clean.

This method not only improves the washing process but also leads to less wear on both your garments and the washing machine. Think about how crowded an elevator can get; just like people need space to move, so do your shirts and pants during a wash cycle.

Efficient laundry starts with managing load size correctly. Fill the drum to just the right level – typically no more than three-quarters full – allowing clothes movement necessary for effective washing.

This is crucial in avoiding additional strain on your washing machine’s motor and agitator, leading to reduced maintenance issues over time. So next time you’re sorting through your dirty clothes, consider dividing them into smaller batches for an efficient laundry day experience.

Sorting Clothes Properly

After considering the efficiency of smaller loads, let’s dive into the importance of sorting clothes correctly. This process is not just about keeping colors vibrant; it also protects your clothes’ texture and longevity.

  • Kick off your laundry routine by dividing your clothes based on color. Keep whites with whites to prevent them from getting dingy and separate colors to avoid bleeding.
  • Consider fabric type as you sort. Place delicate garments together and wash them on a gentle cycle to prevent damage.
  • Pay attention to weight as well. Heavy items like towels can cause lighter fabrics to wear out when mixed in the same load.
  • Be mindful of different washing requirements. Some items may need a cold wash or special care, so grouping these together streamlines the process.
  • Utilize mesh laundry bags for extra protection. Delicate items like lingerie or fine knits stay safe when contained in these bags during a cycle.
  • Check clothing labels for washing instructions. This ensures each item receives the right treatment, maintaining fabric care and color fastness.

Utilizing Mesh Laundry Bags

Mesh laundry bags serve as a shield for your most delicate clothes during the wash cycle. Slip your fine knits, lingerie, and undergarments into these bags to avoid snags and damage.

They’re crafted to withstand heat while allowing soap and water to flow freely, ensuring a thorough clean without risking the integrity of fragile fabrics.

Secure your delicates in mesh laundry wash bags before choosing the delicate cycle on your washing machine. This practice extends the life of items like bras and tights by preventing them from getting tangled or stretched out.

Think of them as an extra layer of protection that keeps everything from unravelly stockings to lace-trimmed panties looking their best wash after wash.

Preventing Fading by Turning Dark-Colored Items Inside Out

Just as mesh laundry bags can shield your delicates, turning dark-colored items inside out serves as a guard against fading. This simple yet effective technique is key for maintaining the rich colors of your favorite garments.

By reversing your clothes before tossing them in the wash, you minimize the exposure of delicate dyes to harsh detergents and agitation. This practice not only preserves colorfastness but also extends clothing longevity by reducing friction that causes wear and tear during washing cycles.

Securing drawstrings on pants and hoodies is another savvy move to prevent tangling or snagging other items in the load. While focusing on fabric preservation, don’t overlook these details that add up to a well-cared-for wardrobe.

Keeping all your clothes in top shape means less need for replacements, saving money and time in the long run.

Securing Drawstrings

Drawstrings can be a real hassle in the laundry, often getting knotted or wrapped around other items. To avoid this nuisance, always tie drawstrings into loose knots before tossing garments into the washing machine.

This simple step keeps them from tangling and also prevents the frustration of missing strings post-wash.

Make sure to double-check that these knots are secure right before you start your wash cycle. Properly fastened drawstrings will go through the entire spin without coming undone, keeping your laundry neat and saving you time on post-laundry fixes.

With everything in place, move on to exploring more tricks that keep clothes fresh and enduringly clean.

Tricks to Keep Clothes Fresh and Clean

Tricks to Keep Clothes Fresh and Clean

Unlock the secrets to clothing that smells as delightful as it looks with our innovative tricks. Dive into a world where baking soda becomes your odor-busting ally and ice cubes are not just for drinks but a nifty weapon against wrinkles, ensuring every garment emerges from the dryer ready to wear and exceptionally fresh.

Using Baking Soda or Scent Boosters for Odor Removal

Baking soda and scent boosters are your secret weapons for keeping clothes smelling fresh. They tackle unpleasant odors and enhance the overall cleanliness of your laundry with ease. Here’s how you can use them:

  • Add half a cup of baking soda to your laundry load along with your regular detergent. This helps to brighten colors, whiten whites, and eliminate tough odors.
  • For a natural freshness boost, sprinkle baking soda directly into your washing machine drum before adding clothes. The soda’s antiseptic properties help combat dinginess.
  • Place an open box or bowl of baking soda inside your wardrobe to absorb unwanted smells. This keeps your stored clothing fresh between wears.
  • Mix baking soda with water to create a paste for pretreating stains on clothes. Apply it gently on the spot, let it sit for a few minutes, then wash as usual.
  • Pour scent boosters directly into the washing machine drum before loading clothes. These small beads will dissolve during the wash cycle, leaving behind a lasting fragrance.
  • Opt for scent boosters if you’re dealing with particularly stubborn wardrobe odors that detergent alone won’t remove.
  • Consider using unscented or mildly scented baking soda if strong fragrances irritate your skin or senses, as it still provides powerful cleaning without added perfume.
  • Refresh gym clothes by soaking them in a solution of one part baking soda and four parts water before washing. This pre-treatment helps remove sweat odors effectively.

Utilizing Ice Cubes or a Damp Towel to Unwrinkle Clothes in the Dryer

Getting rid of wrinkles in your clothes doesn’t have to involve an ironing board and a lot of time. The dryer can be your secret weapon for smooth, wrinkle-free garments with the help of ice cubes or a damp towel.

  • Start by placing a handful of ice cubes into the dryer with your wrinkled clothes. The heat will melt the ice, creating steam that eases out creases.
  • Alternatively, throw in a damp towel with the clothing items needing wrinkle removal. As the towel dries, it releases steam, which helps flatten out wrinkles.
  • Choose only a few pieces of clothing to treat at one time so that there’s enough room for them to move and allow the steam to do its job effectively.
  • Select the regular drying setting on your machine; this provides sufficient heat for the ice or damp towel method to work properly.
  • Run the dryer for about 15 minutes. Check if the wrinkles are gone; if not, repeat for another few minutes as needed.

Using a Laundry Booster for Heavily Soiled Items and Hard Water

Heavily soiled clothes and hard water conditions can pose a real challenge when striving for that impeccably clean laundry. To tackle these tough situations, adding a laundry booster to your washing process is key.

Unlike regular detergents, boosters like stain removers and fabric softeners have special ingredients designed to enhance cleaning power and manage the minerals in hard water effectively.

Not only do they assist in soil removal, but they also act as freshness enhancers by ensuring fabrics stay soft and pleasant-smelling after each wash. Since about 85% of households deal with hard water, using a laundry additive such as a hard water treatment can be essential for maintaining the life-span of your clothing while keeping them spotless.

So next time you’re faced with stubborn dirt or dingy clothes due to mineral deposits, remember that a robust laundry booster is your best ally. Keep this in mind especially before tackling your next load of towels or jeans since proper care will keep these items looking their best over time.

Mastering the Art of Folding Clothes

Mastering the Art of Folding Clothes

Master the art of folding clothes with simple yet transformative techniques that streamline your wardrobe management. Discover the secrets to crisp drawers and clutter-free closets, enhancing both garment longevity and your daily routine.

Tips for Efficient Folding

Folding clothes properly can save you time and space in your drawers and closets. Jim’s Laundry Services suggests several techniques that lead to neatly folded, organized garments.

  • Start with laying the item flat on a surface. Smooth out wrinkles with your hands for a crisp, clean fold.
  • Fold sleeves inward for shirts or tops, then fold the body of the garment until it is a compact rectangle.
  • For pants, align the legs and fold them in half; from there, you can fold upwards to fit your storage space.
  • Utilize the filing method where clothes stand on end instead of being stacked. This makes identifying and accessing clothes easier.
  • Match socks by their pairs but avoid stretching the cuffs by balling them up; simply fold one sock over its mate.
  • Implement a consistent folding pattern for all like items, ensuring efficient clothing storage and retrieval.
  • Prompt laundry removal from the dryer while warm minimizes wrinkles and makes folding more manageable.

Utilizing Laundry Baskets or Hampers

Once your clothes are neatly folded, having the right laundry baskets or hampers can take your organization to the next level. Place them around your home for easy sorting and storage of dirty clothes.

Make sure each family member knows these aren’t just for tossing in their garments—pockets must be empty, and all zippers should be closed to prevent snags during washing.

Incorporate different types of baskets into your laundry routine: tall hampers for collecting dirty items and flat, compact versions for holding clean, folded clothes before they make their way to closets and drawers.

This system not only keeps things sorted but also simplifies putting away laundry once it’s fresh from the dryer. By strategically using multiple baskets, you’ll find that keeping up with the endless cycle of dirty and clean clothes becomes a much smoother process.

Organizing Drawers and Closets

Declutter your drawers and closets first to make space for the clothes you actually wear. Get rid of any items that no longer fit, are out of style, or you haven’t worn in a year. This will simplify finding what you need and keeping everything tidy.

Invest in some smart storage solutions like dividers for drawers to keep socks and underwear separate. Shelving units can help maximize closet space, perfect for stacking jeans or sweaters neatly.

Fold your shirts vertically using effective folding techniques; this allows you to see every item at once and saves precious drawer real estate. Hang dresses, suits, and coats on sturdy hangers to maintain their shape and prevent wrinkles.

Use vertical storage wisely by installing hooks or shelves behind the closet door to store accessories like belts, hats, or bags within reach yet out of sight.

Frequency of Laundry Tasks

Discover the perfect balance for your laundry routine, ensuring your clothes maintain their quality without overwashing – stay tuned to unveil how often various items need a spin in the wash.

How Often to do Laundry

Keeping a laundry schedule helps maintain cleanliness throughout your home. Washing linens and clothes at the right frequency ensures they stay fresh and last longer. Here’s how to determine when to toss items into the wash:

  • Bedding needs a weekly wash to remove sweat, oils, and skin cells that accumulate over time.
  • Towels should hit the laundry basket after three to four uses unless they’ve become heavily soiled sooner.
  • Jeans can go several wears without washing, but it’s best to clean them every four to five wears to maintain their shape and color.
  • Bras deserve attention after three to four wears; more often if you’ve been sweating or it’s exceptionally hot out.
  • Wash pillows every six months; pillowcases, however, should join the bedding in a weekly wash.
  • Regular maintenance of your washing machine is essential for these items’ longevity and freshness.

Specific Guidelines for Washing Towels, Bras, Jeans, Sheets, and Pillows

Transitioning from laundry frequency to specific guidelines, let’s focus on the best practices for washing various items in your household. Adhering to these tips not only keeps your fabrics in top condition but also ensures a thorough clean.

  • Wash towels separately from clothes to avoid transferring lint.
  • Opt for hot water to eliminate bacteria and provide a deep clean, as towels are typically more absorbent and can hold onto grime.
  • Use a gentle cycle or hand wash bras to maintain their shape and elasticity.
  • Cold water is preferred to prevent the fabric from stretching and hooks from snagging other garments.
  • Turn jeans inside out before tossing them into the machine; this helps preserve color and prevents fading.
  • Stick with warm water for robust fibers like denim, ensuring they get thoroughly cleaned without causing shrinkage.
  • Regularly wash sheets in hot water once a week to remove dust mites and allergens for a fresher sleeping environment.
  • Smooth out sheets before drying to minimize wrinkles and save time on ironing.
  • Check care labels and follow the recommended washing instructions for different pillow types.
  • Use warm water for most pillows, providing a balance between effective cleaning and fabric care.

Conclusion

Embrace these laundry tips and tricks to elevate your routine. Make each wash count by selecting the right water temperature for your clothes. Keep fabrics looking sharp and colors vibrant with our savvy advice.

Discover the joy of pulling out fresher, cleaner garments every time you unload your washer or dryer. Turn laundry day into a breeze and give your wardrobe the care it deserves!

FAQs

1. What’s the best way to keep my white clothes bright?

To keep your white clothes bright, wash them with a bit of bleach or baking soda, and make sure you separate them from colored clothes.

2. How can I make my towels stay soft and fluffy after washing?

For soft and fluffy towels, use less detergent, add vinegar during the rinse cycle, and shake them out before drying.

3. Can I remove stains using home products?

Yes, many stains can be removed by treating them with home products like vinegar, baking soda, or lemon juice before washing.

4. Should I wash all my clothes in cold water to save energy?

Wash most of your clothes in cold water to save energy but use hot water for heavily soiled garments or to kill germs.

5. How often should I clean my washing machine?

It’s a good idea to clean your washing machine once a month to keep it running efficiently and ensure your clothes get clean.

How To Disinfect A Washing Machine: A Step-by-Step Guide

How To Disinfect A Washing Machine: A Step-by-Step Guide

Fabricare Center Blog , Laundry

Does your laundry still smell a bit funky, even after a wash? You might not realize it, but your washing machine can harbor bacteria and mold. In this guide, we’ll show you how to disinfect your washer step by step so clothes come out truly clean and fresh.

Don’t worry; it’s easier than you think!

Key Takeaways

  • Disinfecting your washing machine regularly is crucial for maintaining cleanliness, preventing mold and bacteria growth, and ensuring optimal appliance longevity.
  • Use bleach diluted in water to disinfect a top-loading or front-loading washing machine, or use natural alternatives such as vinegar and baking soda to achieve the same results without harsh chemicals.
  • Regular cleaning not only removes bacteria and mold but also leads to cleaner clothes with each wash while extending your appliance’s lifespan.
  • Choosing suitable equipment/tools including rubber gloves, cleaning brush, disinfectant/sanitizing wipes, all-purpose cleaner towels/scrubbing pad/detergent will ensure effective regular cleaning maintenance that prevents mold growth and ensures your washing machine maintains optimal performance.

Why Regular Cleaning Is Important

Why Regular Cleaning Is Important

Regular cleaning is important for sanitization and disinfection benefits, prolonging the lifespan of appliances, preventing mold and bacteria growth, and removing build-up of dirt and detergent.

Sanitization and disinfection benefits

Keeping your washing machine in top-notch condition isn’t just about making it last longer; it’s a serious matter of household cleanliness. Sanitization and disinfection go hand in hand to ensure that common bacteria don’t stand a chance, especially where you clean your clothes.

High temperatures and specific sanitize cycles are designed to tackle these microscopic invaders, ensuring your laundry comes out not just looking clean but actually being sterile.

Clean machines lead to cleaner clothes. Debris, dirt, and leftover detergent can turn the inside of your washer into a playground for germs—ones that hitch a ride on your t-shirts and jeans right back into the world.

By regularly removing these unwanted guests with proper cleaning agents or even simple items like bleach or vinegar, you control contamination effectively, giving peace of mind every time fresh laundry is folded.

Prolonged lifespan of appliances

Just as sanitizing your washing machine keeps it hygienic, regular maintenance ensures that every load spins smoothly for years. Cleaning isn’t only about freshness; it also promotes equipment longevity, an essential factor in home appliance upkeep.

Descale your washer every nine months to combat hard water minerals that could lead to clogs and hinder appliance performance. This preventative maintenance not only enhances durability but also secures efficient operation, allowing you to delay expensive replacements.

Keeping on top of your cleaning regimen prevents the accumulation of grime and detergent leftovers that can strain your machine’s components. By sticking to a consistent maintenance schedule, you safeguard the intricate parts of your washer against premature wear.

As a result, routine care lays the foundation for household appliances to surpass their expected lifespans while delivering optimal results with each use.

Preventing mold and bacteria growth

Let mold and bacteria know they’re not welcome in your washing machine by cracking the door open after each cycle. This simple act airs out the machine, helping to keep it dry and less hospitable to unwanted microbial guests.

Also, tackle soap scum and debris head-on with regular scrubs; these unwelcome particles are like a buffet for germs, setting the stage for them to grow and multiply.

To maintain tip-top washing machine hygiene, make cleaning more than an occasional chore. Set a schedule that keeps mold and bacteria at bay before they settle in. Consider this part of your routine appliance maintenance, safeguarding both your health and your washer’s performance.

Now that you know how to prevent these unwelcome invaders from taking over, let’s gear up with what you’ll need for the cleaning mission ahead.

Removing build-up of dirt and detergent

To prevent mold and bacteria growth, it’s essential to regularly remove the build-up of dirt and detergent from your washing machine. By doing so, you can ensure that residue accumulation is minimized, allowing for a clean and efficient appliance.

Regular cleaning – about once a month or every 30 wash cycles – helps maintain the cleanliness of your washing machine, preventing soil and grime build-up while extending its lifespan.

White vinegar is an effective alternative to detergents for regular cleaning, helping to remove build-up and reduce residue.

Materials You’ll Need

Equipment/tools: a cleaning cloth, scrub brush, and gloves. Cleaning solutions: bleach or vinegar and baking soda. Want to know how to disinfect your washing machine? Keep reading for step-by-step instructions!

Equipment/tools

Protective gloves are necessary to protect your hands from harsh cleaning chemicals and grime when disinfecting a washing machine. A cleaning brush is essential for scrubbing away stubborn dirt, grime, and mold in hard-to-reach areas of the washing machine.

For thorough sanitation, ensure you have disinfectant or sanitizing wipes to clean and kill germs on all surfaces of the machine. In addition, using an all-purpose cleaner can help remove any remaining residue and leave the machine smelling fresh.

Towels are useful for drying off the interior after cleaning, while a scrubbing pad can aid in tackling tough stains and build-up inside the drum. Lastly, having a reliable detergent on hand is crucial for regular maintenance washes to keep your washing machine clean and odor-free.

Cleaning solutions

To complement your equipment and tools, there are various cleaning solutions you can use to disinfect your washing machine. Apart from the commonly known chlorine bleach, alternative cleaning solutions such as pine oil, phenolic disinfectants, or quaternary disinfectants can effectively sanitize and remove bacteria from your machine.

These options provide a range of choices for individuals who prefer alternatives to traditional bleach-based cleaners. Additionally, laundry sanitizing products or using a sanitary cycle on your washing machine can also contribute to keeping it clean and free from harmful bacteria.

In conjunction with maintaining regular upkeep of your washing machine, utilizing these different cleaning agents ensures that you have multiple options for keeping the interior of your appliance sanitary and disinfected.

How to Disinfect a Washing Machine With Bleach

The use of bleach in cleaning your washing machine can effectively kill bacteria and remove stubborn mold and mildew. Learn the step-by-step process to disinfecting your washer with bleach and keep it clean and sanitized.

Read on for more tips on how to maintain a germ-free laundry machine.

Using bleach

To disinfect a washing machine with bleach, dilute 1/2 cup of bleach in the standard detergent dispenser or mix it into a quart of water before adding it directly to the wash drum.

Run an extra rinse cycle after the main wash to ensure all traces of bleach are rinsed away, and leave the door open to air dry. Opting for laundry bleach instead of regular cleaning bleach is crucial to prevent damaging clothes’ fibers.

It’s important to manually select an extra rinse if necessary and repeat the steps as needed when deep cleaning.

How to Disinfect a Washing Machine Without Bleach

To disinfect a washing machine without bleach, you can use vinegar and baking soda. These natural cleaning agents are effective in removing germs and odors from the machine. Alternatively, there are also other alternative methods such as using hydrogen peroxide or citric acid for disinfection.

Using vinegar and baking soda

Vinegar and baking soda are effective natural cleansers for disinfecting a washing machine. They work well in combating odors and removing residue. Here’s how to use them:

  1. Mix equal parts of white vinegar and water in a spray bottle.
  2. Spray the inside of the washing machine, including the drum and door seal.
  3. Wipe down all surfaces with a clean cloth or sponge.
  4. In a separate bowl, create a paste using baking soda and water.
  5. Apply the paste to any stubborn stains or areas with built – up grime inside the machine.
  6. Let it sit for 15 – 30 minutes before scrubbing with a brush or sponge.
  7. Run a hot water cycle without any clothes in the machine to rinse out the mixture.

Alternative methods

Pine oil, phenolic disinfectants, and quaternary disinfectants serve as nontoxic alternatives to chlorine bleach for cleaning a washing machine. These natural disinfectants are effective in removing mold, mildew, and everyday grime without harsh chemicals.

Similarly, using white vinegar and baking soda as an eco-friendly option can effectively sanitize the washing machine’s interior, providing a sustainable and non-toxic approach to maintaining cleanliness.

For those seeking chemical-free cleaning options, homemade solutions like pine oil or other organic cleaning alternatives prove to be environmentally safe choices. By utilizing these green cleaning methods, individuals can achieve sanitization while contributing positively to the environment through the use of sustainable cleaning products.

How to Clean a Top-Loading Washing Machine

How to Clean a Top-Loading Washing Machine

First, start by running a hot water cycle with bleach to disinfect the interior of the machine. Then, wipe down the agitator and drum with a cleaning solution and scrub any stubborn stains with a brush.

Finally, clean the dispensers and lid with a mixture of water and detergent to ensure all areas are thoroughly sanitized.

Step-by-step instructions for a Top-Loading Washing Machine

To clean a top-loading washing machine, follow these steps:

  1. Mix 1/4 cup of bleach with 1 quart of water.
  2. Pour the bleach solution into the empty tub and run a complete cycle on hot water.
  3. After the cycle is complete, wipe down the interior with a damp cloth and leave the lid open to air dry.
  4. To deep clean, remove the agitator cap and wash it in warm, soapy water.
  5. Wipe down the exterior with a damp cloth and a vinegar or diluted bleach solution to sanitize.

Recommended products: Top Loading

For top-loading washing machines, an effective all-purpose cleaner is a must-have product to keep the interior fresh and clean. Look for a cleaner that is suitable for use in washing machines and can easily remove dirt, grime, and detergent buildup.

Additionally, having white vinegar on hand is essential for natural cleaning solutions. It’s an eco-friendly option that can help eliminate odor-causing bacteria and mineral deposits from the machine.

To maintain your top-loading washer, it’s important to choose products that align with the manufacturer’s recommendations. Using an all-purpose cleaner combined with occasional vinegar treatments will help keep your machine running smoothly while maintaining its cleanliness and freshness without causing damage or wear.

How to Clean a Front-Loading Washing Machine

How to Clean a Front-Loading Washing Machine

For a front-loading washing machine, start by wiping down the rubber seal and door with a mixture of vinegar and water to remove any mold or mildew. Then, run a hot cycle with baking soda, followed by another hot cycle with distilled white vinegar to disinfect the drum and remove any lingering odors.

Be sure to also clean the detergent dispenser and filter to ensure your machine stays in top condition.

Step-by-step instructions for a Front-Loading Washing Machine

To clean a front-loading washing machine, follow these steps:

  1. Clean the rubber seal and door glass with a mixture of liquid bleach and water to remove any mold or mildew buildup. Use a small brush to scrub the crevices thoroughly.
  2. Use washing machine cleaner or affresh tablets to clean the washer drum. Follow the manufacturer’s instructions for the appropriate use of these cleaning products.
  3. Wipe down the exterior of the machine using cleaning wipes and a mild detergent solution to eliminate dirt and grime. Pay attention to control panels, knobs, and handles.
  4. Run a cleaning cycle with liquid chlorine bleach or distilled white vinegar to sanitize the interior of the washer. Ensure there are no clothes inside before starting this process.

Recommended products: Front Loading

After cleaning your front-loading washing machine, it’s essential to use the right products to maintain its cleanliness. To prevent mold and mildew, consider using specialized washer cleaner tablets designed for front-loading machines on a monthly basis.

Wiping down the door gasket regularly and running the Clean Washer cycle can also help in preventing odor and mold growth. Additionally, using liquid chlorine bleach or distilled white vinegar is effective in disinfecting and eliminating any lingering odors from your front load washer.

When it comes to maintaining a clean and odor-free front load washer, there are several key products that can make a significant difference. Incorporating these recommended products into your routine maintenance schedule will help keep your washing machine smelling fresh while ensuring optimal performance and longevity.

Cleaning The Exterior of The Machine and Dryer

To clean the exterior of the machine, use a mixture of warm water and mild detergent to wipe down the surface. For the dryer, use a damp cloth to remove any lint or debris from the exterior and sanitize with a disinfectant spray.

Cleaning the exterior of the machine

To clean the exterior of the machine, mix equal parts white vinegar and warm water to create a homemade cleaning solution. Use a microfiber cloth to wipe down the outside of the washer and dryer with the vinegar and water mixture. Scrub any stubborn stains or dirt as needed using the cloth. If preferred, a mild dish detergent mixed with water can also be used to wipe down the exterior surfaces of the washing machine and dryer. Make sure to rinse thoroughly with clean water after using any cleaning solution.

How to sanitize a dryer

  • To ensure proper sanitation of the dryer, start by turning off and unplugging the appliance to prevent any accidents.
  • Begin by cleaning the lint trap thoroughly to remove any trapped lint and debris that could pose a fire hazard.
  • Wipe down the interior of the dryer drum using a damp cloth and mild soap to remove any stains or stuck-on items that could harbor bacteria or mold.
  • Check for clogs in the vent and clear them using a vent brush or vacuum to ensure proper airflow and prevent potential fire hazards.
  • Vacuum debris from the lint using a vacuum attachment to remove any lingering particles that could affect the efficiency of the dryer.

Routine Maintenance and Tips

– Clean your washing machine at least once a month to prevent mold and bacteria growth.

– Use less detergent to avoid build-up in the machine and reduce the need for frequent cleaning.

– Wipe down the exterior of the machine regularly to keep it looking clean and sanitary.

How often to clean your washing machine

Experts recommend cleaning your washing machine about once a month or every 30 cycles to prevent buildup and soils. It is ideal to maintain the proper functioning of your machine by cleaning it monthly.

For those in areas with hard water, more frequent cleaning, approximately every 1-3 months, is recommended. If you are a heavy user, consider cleaning your washing machine once a month to ensure its longevity; however, lighter users can suffice with maintenance a couple of times a year.

Deep cleaning should be completed once a month to remove contaminants like mold spores and bacteria while also eliminating residue and mold buildup. Regardless of the type of washing machine you have, running an empty hot water cycle with one cup of oxygen bleach once every three months helps keep it clean.

Tips for maintaining a clean machine

To maintain a clean washing machine, follow these tips:

  1. Clean the detergent dispenser regularly to prevent buildup of residue and mold.
  2. Leave the door or lid open after each use to allow air circulation and prevent odor and mold growth inside the machine.
  3. Wipe down the rubber seal around the door to remove any trapped dirt, lint, or moisture.
  4. Run a hot water cycle with white vinegar once a month to dissolve mineral deposits and disinfect the interior of the machine.
  5. Use a washing machine cleaner product every few months to remove residue and odors from hidden parts of the washer.

Professional repair services for washing machines

To maintain a well-functioning washing machine, it is important to consider professional repair services. By addressing minor issues promptly, appliance repair services can help prevent breakdowns and costly water damage, ultimately extending the lifespan of your washer and saving you money in the long run.

Professional maintenance not only ensures that your washing machine remains in good working condition but also helps prevent potential issues such as water damage.

Preventative maintenance can go a long way in keeping your washing machine running efficiently. Timely repairs can help extend the appliance’s life and minimize the risk of expensive breakdowns and water damage.

Conclusion

To maintain a clean and hygienic washing machine, regular cleaning and disinfection are essential. Incorporate the outlined step-by-step guide using bleach, vinegar, or alternative methods for effective sanitization.

Keep your washing machine in top condition by following the routine maintenance tips and recommended products to ensure long-lasting performance. Regular cleaning not only removes bacteria and mold but also extends the lifespan of your appliance, providing you with cleaner and fresher laundry every time.

FAQs

1. How often should I disinfect my washing machine?

It is recommended to disinfect your washing machine every 2-3 months to prevent buildup of bacteria and mold.

2. Can I use regular household cleaning products to disinfect my washing machine?

Yes, you can use common household items such as white vinegar, baking soda, or bleach along with hot water for effective disinfection.

3. What are the signs that indicate a need to disinfect my washing machine?

Signs that your washing machine needs disinfection include unpleasant odors inside the drum, visible mold or mildew, or clothes not smelling fresh after a wash cycle.

4. How long does it take to disinfect a washing machine?

The time required to disinfect a washing machine varies based on the method used but typically takes around 1-2 hours for a thorough cleaning cycle.

5. Is it necessary to run an empty load after disinfecting the washing machine?

Yes, running one empty wash cycle with hot water and detergent following the disinfection process helps remove any residual cleaning solution and ensures thoroughly cleaned internal components of the washer.

How Much Does A Load Of Laundry Cost At Home: Home vs Laundromat Costs

How Much Does A Load Of Laundry Cost At Home: Home vs Laundromat Costs

Fabricare Center Blog , Household , Laundry

Ever wonder if it’s cheaper to do laundry at home or hit the laundromat? On average, a single load of laundry at home can cost around $1.50 to $2.00. This article breaks down the expenses so you can decide what’s best for your budget.

Don’t miss out on savvy savings tips ahead!

Key Takeaways

  • The average cost of doing laundry at home, considering electricity, water usage, and laundry supplies, amounts to approximately $1.37 per load.
  • By adopting energy-saving techniques like using cold water for washing and air-drying clothes when possible, homeowners can effectively reduce the cost of doing laundry at home while also contributing to sustainable practices.
  • When comparing costs between doing laundry at home and a laundromat, taking care of laundering needs in-house presents an economical choice compared to visiting a laundromat regularly due to reduced energy consumption and water usage when using modern, energy-efficient washing machines.
  • Consideration should be given not only to the cost per load but also factors like convenience, availability of laundromats in your area, size and type of laundry load you typically have, overall cost-effectiveness including any additional expenses such as transportation or maintenance of your own washer and dryer.

Factors Affecting the Cost of Doing Laundry

Factors Affecting the Cost of Doing Laundry

Electricity consumption and water usage are the main factors affecting the cost of doing laundry at home, along with the cost of laundry supplies.

Electricity consumption

Washing machines and dryers are major players in your home’s energy usage, particularly when it comes to laundry day. Operating these appliances can cost around $10 monthly on your electricity bill, adding up to about $120 each year.

Your washer and dryer’s power consumption depends a lot on the settings you choose; for instance, selecting hot water for washing and warm rinsing consumes an average of 4.5 kWh per load.

At a standard rate of $0.15 per kWh, that adds up to 68 cents every time you run the machine.

Choosing an energy-efficient laundry routine isn’t just good for the environment—it also makes sense for your wallet. If budget-friendly alternatives intrigue you, consider using natural gas instead of electricity for heating water in your washing cycles or invest in an efficient washerdryer combo that slashes those energy bills significantly while still keeping your clothes clean and fresh.

Water usage

Water usage can be one of the most significant costs when doing laundry at home. The average washing machine guzzles about 41 gallons per load, making water rates a crucial factor in your overall laundry expenses.

If you wash clothes four times a week, this translates to thousands of gallons annually, and based on local water rates, it could add up to over two hundred dollars each year just for water.

Cutting down on water consumption is both eco-friendly and cost-effective. By opting for high-efficiency machines that use less water or tweaking your laundry habits, like using appropriate load settings and only washing full loads, you reduce domestic water usage considerably.

This not only lowers home laundry costs but also supports broader efforts towards water conservation without sacrificing clean clothes.

Cost of laundry supplies

The price of washing detergent plays a significant role in the expenses for doing laundry. With costs for a single load ranging between $0.15 to $0.40, choosing the right detergent can make a difference in your wallet over time.

Liquid, powder, or pod detergents each come with different price points and efficiency levels.

Other supplies such as fabric softener, bleach, and stain removers add to the cost of laundry per load but offer benefits like longer-lasting clothes and better cleaning power. Buying these items in bulk or opting for store brands can save money without compromising on quality.

It’s not just about how much you use, but also finding the best deals that work for your budget and laundry habits.

Comparing Laundry Costs at Home and at a Laundromat

Comparing Laundry Costs at Home and at a Laundromat

The cost per load at home includes electricity, water, and laundry supplies. The cost per load at a laundromat may vary based on location and size of the machine. Factors to consider when choosing between home laundry and a laundromat include convenience, time saved, and overall expenses.

Cost per load at home

At home, the cost per load of laundry is approximately $1.37, making it a budget-friendly option compared to using a laundromat. Factors contributing to this lower cost include reduced energy consumption and water usage when using modern, energy-efficient washing machines.

Choosing cost-effective laundry supplies can further minimize expenses for each load.

When budgeting for laundry expenses, considering the average annual cost of doing laundry at home – about $264.16 for four loads per week – it becomes evident that taking care of laundering needs in-house presents an economical choice compared to visiting a laundromat regularly.

Cost per load at a laundromat

The cost per load at a laundromat typically ranges between $2 and $4, depending on the location and amenities offered. In addition to this base rate, there are additional charges for using the dryer.

On average, when factoring in both washing machine and dryer fees, the total cost per load at a laundromat is approximately $3.12, making it crucial to consider these expenses when planning your laundry budget.

It’s important to note that recent data indicates an increase in the average cost of doing laundry at a laundromat from around $2 to now approximately $3. This rise should be taken into account when comparing home laundry costs with those incurred at a coin-operated facility.

Factors to consider when choosing between home laundry and a laundromat

  1. Convenience: Consider how convenient it is for you to do laundry at home versus going to a laundromat. Do you have the time and space to do laundry at home, or is it easier for you to drop off your clothes at a laundromat?
  2. Availability of laundromats: Take into account the availability of laundromats in your area. Are there several options nearby, or will you have to travel a significant distance to find one?
  3. Size and type of laundry load: Think about the size and type of laundry load you typically have. If you have large or bulky items to wash, a laundromat’s larger machines may be more suitable.
  4. Cost-effectiveness: Evaluate the overall cost of doing laundry at home versus at a laundromat, taking into consideration the cost per load as well as any additional expenses such as transportation or maintenance of your own washer and dryer.
  5. Energy and water usage: Consider the environmental impact and cost implications of using energy and water when doing laundry at home versus at a laundromat.
  6. Laundry service options: If available in your area, consider the convenience and potential cost savings of using a laundry service instead of doing it yourself at home or using a laundromat.

Cost Effective Strategies for Doing Laundry at Home

Save on energy and water by washing full loads, using cold water, and air drying clothes. Choose cost-effective supplies and invest in an energy-efficient washing machine for long-term savings.

Read more to learn how to lower your laundry costs at home!

Energy and water saving techniques

To save on energy and water when doing laundry at home, consider the following cost-effective strategies:

  1. Use cold water for washing: Washing with cold water can significantly reduce energy consumption as it eliminates the need to heat the water for each load.
  2. Opt for energy-efficient washing machines: Investing in an energy-efficient washing machine can lower overall energy usage and contribute to long-term savings on electricity bills.
  3. Air-dry laundry when possible: Utilize outdoor or indoor drying racks to reduce reliance on a clothes dryer, saving both energy and money.
  4. Adjust water levels based on load size: Ensure that the washing machine is set to the appropriate water level for each load size, minimizing unnecessary water usage.

Choosing cost-effective laundry supplies

Select economical laundry supplies to maximize your savings. Look for budget-friendly detergent, fabric softener, and stain removers. Check out value-based laundry essentials that offer quality at an affordable price.

Invest in cost-efficient products like energy-efficient washing machines and dryers to minimize long-term expenses. Seek out low-cost alternatives for items such as dryer sheets and bleach, ensuring you maintain high cleanliness standards while keeping within your budget.

Purchasing an energy-efficient washing machine

Invest in an energy-efficient washing machine to reduce utility bills and minimize environmental impact. Look for ENERGY STAR certified models, as they are designed to use less water and electricity, resulting in long-term cost savings.

These eco-friendly washers not only conserve resources but also contribute to sustainable laundry practices by adopting green laundry technology.

Consider purchasing a waterefficient and energysaving washer, which aligns with sustainable living and reduces the overall carbon footprint of household chores.

Conclusion

When comparing costs, consider electricity usage and water consumption. Use energy-efficient washers and dryers to save money at home. Choose the most cost-effective laundry supplies for a budget-friendly approach.

FAQs

1. How much does it cost to do a load of laundry at home?

The cost of doing a load of laundry at home depends on factors such as the energy and water usage of your machine, detergent, and any additional expenses like fabric softener or dryer sheets.

2. Is it cheaper to do laundry at home or at a laundromat?

In general, doing laundry at home can be more cost-effective over time compared to using a laundromat, especially when factoring in the initial investment in a washer and dryer.

3. What are the advantages of doing laundry at home instead of using a laundromat?

Doing laundry at home offers convenience, flexibility in wash cycles, privacy, and the ability to handle different fabrics and sizes without travel time or machine availability concerns.

4. Can I reduce my electricity bill by adjusting my washing machine settings?

Yes, you can save on electricity costs by using cold water for washing clothes when possible and selecting shorter wash cycles with full loads rather than multiple small loads throughout the week.

5. Are there any additional costs associated with doing laundry at home?

Additional costs may include maintenance for your washer and dryer units if they require repairs or replacement parts over time, although these vary based on usage levels and model reliability.

How To Clean A Band Uniform: A Step-by-Step Guide

How To Clean A Band Uniform: A Step-by-Step Guide

Fabricare Center Blog

Have you ever wondered how to keep your marching band uniform looking sharp and clean? Band uniforms can become dirty and smelly after performances, making proper care essential. This guide will provide a step-by-step process on how to clean a band uniform. Ensuring your uniform stays in pristine condition for every parade and halftime show.

Keep reading — it’s easier than you think!

Key Takeaways

  • Separate the jacket and bib pants before washing in cold water on a gentle cycle with non – chlorine detergent, treating any stains as needed and hang drying to maintain the integrity of the fabric.
  • Use non – chlorine detergent and avoid bleach or liquid fabric softener to prevent damage to the uniform’s material and colors during washing.
  • Hang dry band uniforms instead of using a dryer to preserve their shape, prevent shrinkage, and extend their lifespan.

Why Proper Cleaning of Marching Band Uniforms is Important

Why Proper Cleaning of Marching Band Uniforms is Important

Properly cleaning marching band uniforms is important because it maintains a professional appearance, prevents odors and stains, and prolongs the life of the uniform.

Maintains Professionalism and Appearance

Marching band uniforms speak volumes about the group’s discipline and pride. Clean, crisp attire not only looks sharp but also reflects the professionalism of your team. It shows judges, spectators, and fellow musicians that you take your role seriously.

This commitment to appearance extends beyond the uniform itself; it encompasses how members carry themselves in public.

Regular garment cleaning is more than just a routine—it’s part of preserving the distinct identity of a marching band. Uniform cleanliness ensures every member stands out during performances with a professional image that commands respect.

A well-maintained uniform is key to creating an impactful visual presentation that resonates with each note played and step taken on field or stage.

Prevents Odors and Stains

Proper cleaning of band uniforms is vital for tackling odors and stains, especially after long performances filled with sweat and activity. Since these uniforms often have wool or synthetic blends, they can easily trap perspiration, which leads to unpleasant smells if not properly washed.

One effective way to combat odor is by adding some white vinegar to the wash; this natural ingredient works wonders in breaking down the sweat molecules and keeping the fabric fresh.

Stains from outdoor shows or accidental spills are another concern for any marching band member. To ensure that these unsightly marks don’t become permanent fixtures on your uniform, act quickly.

Use a good non-chlorinated stain remover to pre-treat the affected areas before washing. It’s essential to choose a gentle, non-chlorine detergent because harsh chemicals can damage delicate fabrics over time.

Washing with care extends the life of your uniform and keeps it looking sharp for every performance without those distracting stains or off-putting odors dominating your presence on the field.

Prolongs the Life of the Uniform

Caring for a band uniform correctly goes beyond keeping it looking sharp; it actually extends the garment’s wearability. Following the recommended cleaning instructions, such as using a non-chlorine detergent and cold water wash on gentle cycle, prevents the fabric from breaking down prematurely.

This careful approach to garment maintenance keeps colors vibrant and ensures that uniforms fit consistently performance after performance.

Handling these pieces with attention to detail impacts their longevity significantly. Regular cleaning routine tailored specifically for marching band uniforms – checking labels, separating bibbers, avoiding harsh chemicals – protects against wear and tear.

It maximizes textile preservation so that each piece can withstand numerous marches under different weather conditions without losing its professional appearance or comfort.

Steps for Cleaning a Band Uniform:

Separate the jacket and bib pants before washing in cold water on a gentle cycle with non-chlorine detergent, treating any stains as needed and hang drying to maintain the integrity of the fabric.

Separating Jacket and Bib Pants

To clean a band uniform, it is essential to start by separating the jacket and bib pants. When washing the uniform, these two items should be treated separately due to their different fabric compositions and potential for color bleeding. Here are the detailed steps for separating and cleaning the jacket and bib pants:

  1. Inspect both the jacket and bib pants after each use to determine if they require cleaning.
  2. Unbutton or unzip any closures on the jacket before removing it from the bib pants.
  3. Gently remove any detachable accessories such as shoulder cords or sashes from the jacket.
  4. Turn both the jacket and bib pants inside out before laundering them, ensuring thorough cleaning of all surfaces.
  5. Prior to washing, check for any specific stains or spots that may require pre – treatment using appropriate stain removers or detergents specifically designed for each type of fabric.

Washing in Cold Water on Gentle Cycle

Washing a band uniform in cold water on a gentle cycle is essential for preventing shrinkage and preserving the fabric. This method helps maintain the shape and quality of the uniform, especially if made of 100% polyester gabardine. Here’s how to wash a band uniform effectively:

  1. Separate the jacket and bib pants before washing.
  2. Use non – chlorine detergent to avoid damaging the fabric.
  3. Treat any stains before washing to ensure they don’t set in.
  4. Avoid using liquid fabric softener and bleach as they can harm the fabric.
  5. Hang dry the uniform instead of using a dryer to prevent damage or shrinkage.

Using Non-Chlorine Detergent

To clean a band uniform, using non-chlorine detergent is crucial for maintaining the fabric and colors. It helps to preserve the integrity of the uniform and keep it looking vibrant. When washing your band uniform, consider the following points:

  1. Environmentally friendly detergent: Opt for nontoxic laundry detergent that is gentle on both the fabric and the environment.
  2. Cold water washing: Clean the uniform in cold water to prevent any potential damage from hot temperatures.
  3. Gentle cycle: Use a gentle cycle setting on your washing machine to ensure that the uniform is handled delicately during the cleaning process.
  4. Hang dry: After washing, always hang dry the band uniform to avoid any shrinking or damage that may occur in a dryer.
  5. Nonbleach detergent: Avoid using bleach or liquid fabric softener, as these can cause discoloration and damage to the fabric.

Treating Stains

To treat stains on band uniforms, follow these steps:

  1. Pre – treat stains with cold water and stain treatment before washing.
  2. Avoid rubbing stains and instead blot them with water, solvents, and cleaning agents.
  3. Soak jackets with mixed colors in white vinegar or salt water before washing to prevent color bleeding.
  4. Wash common uniform stains with vinegar and water, then apply a mixture of baking soda, salt, and hydrogen peroxide before washing.
  5. Use non – chlorine detergent and refrain from using liquid fabric softener on band uniforms.
  6. For difficult stains, apply stain remover, lightly scrub, rinse in the sink, reapply treatment, and then wash the uniform.
  7. This care guide is for band directors, parents, and uniform managers to provide valuable information on treating and removing stains from band uniforms.

Drying

Hang the uniform up to air-dry on a clothesline after gently squeezing out any excess water from the washing machine. Machine wash jackets and bib pants separately in cold water on the gentle cycle and hang dry to ensure proper cleaning and care. Hang drying the uniform is crucial after washing to avoid any potential harm or damage that could occur from using a dryer.

Tips for Maintaining and Storing Band Uniforms

Tips for Maintaining and Storing Band Uniforms

– Wash bibs and jackets separately to prevent damage and color bleeding.

– Always use cold water and non-chlorine detergent for cleaning band uniforms.

– Avoid using bleach or liquid fabric softener, as it can cause discoloration and damage to the fabric.

– Hang dry your uniform to maintain its shape and prevent shrinkage.

Avoid Washing Bibs and Jackets Together

  1. Wash bibs and jackets separately to prevent colors from bleeding and ensure thorough cleaning.
  2. Machine wash the jacket and bib pants in cold water on the gentle cycle to avoid shrinking or damaging the fabric.
  3. Use a non – chlorine detergent to effectively clean and maintain the color of both pieces without causing any harm to the materials.
  4. Hang dry the jackets and bib pants instead of using a dryer to prevent any potential shrinking or damage from heat.
  5. By following these steps, you can ensure that your band uniforms remain in top condition for a longer period, ready for every performance.

Use Cold Water and Non-Chlorine Detergent

To maintain the quality of band uniforms, it is crucial to use cold water and non-chlorine detergent. By doing so, you protect the fabric from damage and discoloration.

  1. Cold water washing: Cold water helps prevent shrinking and color fading, preserving the integrity of the uniform.
  2. Non-chlorine detergent: Using a mild, non-chlorine detergent protects the fabric’s fibers and maintains its vibrant appearance without causing any harm.
  3. Garment preservation: The combination of cold water and non-chlorine detergent ensures that the band uniform remains in top condition, extending its lifespan.
  4. Stain removal: The gentle yet effective nature of non-chlorine detergent makes it suitable for stain removal without compromising the fabric’s texture or color.
  5. Fabric protection: This washing method safeguards the fabric against wear and tear, ensuring that the uniform looks impeccable throughout its usage.

No Bleach or Liquid Fabric Softener

Using bleach on band uniforms can lead to color migration and damage the fabric. Liquid fabric softener is not recommended as it can cause harm to the material. Here are some tips for maintaining and storing band uniforms:

  • Avoid using bleach or liquid fabric softener as they can cause color migration and damage the material.
  • Use colorsafe detergent and cold water washing to preserve the uniform’s appearance and integrity.
  • Choose nonchlorine bleach and fabric care tips to ensure the longevity of the uniform.
  • Follow laundry best practices by using a gentle detergent without bleach to prevent white residue on the uniforms.
  • Ensure that powders are fully dissolved before washing to avoid leaving white dots on the uniforms, and do not use liquid fabric softener.

Hang Dry

Hang drying band uniforms is essential to prevent damage from the heat of a dryer and to ensure the longevity of the garments. Properly hanging clothes to dry is important for maintaining the quality of your band uniform. Here are some tips and methods for hang drying your uniform:

  1. Use padded hangers or wide plastic hangers to maintain the shape of the jacket and pants.
  2. Hang the uniform in a well – ventilated area away from direct sunlight to prevent fading.
  3. Air dry the uniform completely before storing it in a garment bag to prevent mold and mildew.
  4. Ensure that there is enough space between garments to allow air circulation while they are drying.
  5. Avoid hanging wet uniforms on metal hangers as they can leave rust stains on the fabric.

Special Considerations for Removing Odors and Stains

Using cleaning vinegar diluted with water, non-chlorinated stain remover, and hand washing in cold water can help remove tough odors and stains from band uniforms. Additionally, make sure to dry the uniforms after each performance and consider professional cleaning for more stubborn stains.

Using Cleaning Vinegar Diluted With Water

To effectively remove odors and stains from band uniforms, consider using cleaning vinegar diluted with water. This natural cleaning solution is gentle on fabrics and can help maintain the integrity of the uniform. Here are specific steps for using cleaning vinegar diluted with water:

  1. Prepare a mixture of 1 cup of white vinegar and 1 gallon of warm water.
  2. Soak the affected areas of the band uniform in the vinegar – water solution for at least 30 minutes to help remove odors.
  3. For tougher stains, apply undiluted vinegar directly onto the stained areas before soaking.
  4. After soaking, launder the uniform as usual, following care label instructions and using non – chlorine detergent.

Non-Chlorinated Stain Remover

Using a non-chlorinated stain remover is important for safely and effectively removing stains from band uniforms. Non-chlorinated stain removers are gentle on fabric and help maintain the color and quality of the uniform. When treating stains on band uniforms, consider using “Spray and Wash” or any other environmentally friendly, nontoxic, or eco-friendly non-chlorine stain remover. This type of stain remover is safe for use on white collars and ensures that the uniform remains in top condition.

Hand Washing in Cold Water

To maintain band uniforms, hand washing in cold water is essential. This method helps to preserve delicate fabrics and remove odors and sweat effectively. If using a washing machine, set it to a gentle cycle with cold water. Do not mix the bib pants and jacket during the wash. Use a non-chlorine detergent for cleaning, as it is gentler on the fabric and help preserves colors. In case of stains, gently treat them by soaking the affected area in a non-chlorinated stain remover before washing. Always air-dry the uniform to prevent damage from high heat and use professional cleaning when necessary.

Drying Uniforms After Each Performance

Drying band uniforms after each performance is crucial to prevent odors and stains from setting in. It is essential to keep the following tips in mind for drying band uniforms effectively:

  1. Hang the uniform pieces separately to air dry.
  2. Ensure that the uniform is completely dry before storing it to prevent mold and mildew growth.
  3. Avoid using a dryer as the heat can damage the fabric and cause shrinkage.
  4. If possible, hang the uniform outside in fresh air and sunlight to help eliminate any lingering odors.
  5. Consider using odor – eliminating sprays or pouches when storing the uniform between performances.

Professional Cleaning

Professional cleaning services offer specialized care for band uniforms, ensuring that tough stains and lingering odors are effectively removed. These services use advanced stain removal techniques and odor elimination methods to maintain the pristine appearance of the uniform.

Special attention is given to the white collars of band uniforms during the cleaning process to ensure they remain crisp and spotless. Professional laundry services provide an essential solution for maintaining the professional appearance and longevity of marching band uniforms, giving them a fresh and polished look after each performance.

Frequently Asked Questions and Other Tips

Frequently Asked Questions and Other Tips

How often should uniforms be cleaned? Can I use a washing machine and dryer to clean my uniform? Can I use vinegar to clean my uniform? How can I handle tougher stains? Tips for maintaining uniforms during the marching season.

Can I take my band uniform to a professional cleaner?.

How Often Should Uniforms be Cleaned?

Band uniforms should be cleaned promptly after each use, ideally between performances or games. This helps prevent stains from setting and eliminates any potential odors that may develop during wear.

It’s important to check the uniforms after each wearing and address any cleaning needs as they arise to maintain the professional appearance and hygiene of the uniform. By staying proactive with cleaning, band members can ensure that their uniforms remain in top condition throughout the marching season.

Can I Use a Washing Machine and Dryer to Clean My Uniform?

Using a washing machine to clean your band uniform is generally acceptable. The recommended approach is to use cold water on a gentle cycle, especially for uniforms made of 100% polyester gabardine.

Avoid using the dryer to preserve the fabric quality and longevity of the uniform – instead opt for air-drying on a clothesline or flat surface.

You can also consider using non-chlorine detergent during the washing process to ensure that your band uniform remains in top condition.

How Can I Handle Tougher Stains?

To handle tougher stains on your band uniform, pre-treat the affected areas with a non-chlorine stain remover such as “Spray and Wash.” Gently scrub the stained area, then rinse it thoroughly in the sink.

Reapply the treatment before washing to ensure thorough stain removal. For stubborn grease, oil, or other difficult stains, consider taking your uniform to a professional dry cleaner for specialized care.

For ink, food, and grass stains, it’s crucial to clean them as soon as possible after each use to prevent them from setting in. Avoid using water or other remedies that may push the stain deeper into the fabric weave or cause further damage.

Tips for Maintaining Uniforms During the Marching Season

During the marching season, it’s essential to take extra care of band uniforms. To maintain their appearance and longevity, separate pants from jackets for washing. Use cool water and a gentle cycle to avoid damaging the delicate fabric, and consider professional dry cleaning for the pants to keep them in top condition.

Additionally, avoid using bleach as it can cause discoloration and damage the material. Lastly, make sure to remove uniforms from the dryer before they are completely dry to prevent any potential damage during performances.

Can I Take My Band Uniform to a Professional Cleaner?

Professional garment cleaners are equipped with the expertise and equipment to provide high-quality uniform maintenance. It is generally recommended to take band uniforms to professional cleaners due to their expense and the need for specialized clothing care.

When selecting a professional cleaning establishment, it’s important to ensure that they are familiar with cold water washing techniques and can follow specific care instructions for band apparel cleaning.

Conclusion

Proper care and cleaning of band uniforms are crucial for maintaining their appearance and longevity. Following the step-by-step guide provided will help prevent odors and stains, ensuring that your uniform looks professional at all times.

By using the right washing techniques and storing them properly, you can prolong the life of your marching band attire. Keep in mind that regular maintenance is key to preserving the quality and hygiene of your band uniform.

FAQs

1. What is the best way to wash a band uniform?

Wash the band uniform following the care instructions on the label, typically using a gentle cycle with cold water and mild detergent.

2. Can I use bleach to remove stains from a band uniform?

Avoid using bleach as it can damage the fabric and colors of the uniform. Instead, try using a stain remover designed for delicate fabrics.

3. How should I dry a band uniform after washing?

After washing, air-dry the band uniform on a flat surface to help preserve its shape and prevent shrinkage or stretching.

4. Can I iron a band uniform if it gets wrinkled?

It’s best to avoid ironing directly on certain parts like embroidered logos or synthetic fabrics. Instead, use a garment steamer or iron inside-out with low heat.

5. Are there any specific care tips for keeping my band uniform in good condition?

To maintain your band uniform, always check and follow individual garment care labels for washing and drying instructions, and avoid exposing it to direct sunlight for extended periods to prevent color fading.

How To Remove Laundry Detergent Stains From Clothes: 5 Effective Methods

How To Remove Laundry Detergent Stains From Clothes: 5 Effective Methods

Fabricare Center Blog , Laundry

Laundry detergent stains on clothes can be a frustrating problem to deal with. Believe it or not, these stains are common and often result from using too much detergent or poorly dissolving washing powders.

This article will guide you through five effective methods to remove those pesky splotches for good! Are you ready to say goodbye to stubborn laundry stains? Let’s dive in!

Key Takeaways

  • Detergent stains on clothes can result from using too much detergent or poorly dissolving washing powders, causing blotchy or discolored patches.
  • Detergent stains appear as blue or white streaks, standing out on darker clothes and casting a dull tone on whites.
  • Powdered detergents and concentrated liquid detergents are more prone to causing stains, especially when the washing machine is overloaded.
  • Effective methods for removing detergent stains include using rubbing alcohol, vinegar, baking soda, dish soap, and agitation.
  • Rubbing alcohol acts as a solvent to break down oils in stains, while vinegar’s acidity helps break down detergent residue.
  • Baking soda neutralizes and lifts stains, also acting as a natural deodorizer.
  • Dish soap’s grease-fighting properties make it effective against oily or greasy detergent stains.

Understanding Detergent Stains on Clothes

Detergent stains on clothes can appear as blotchy or discolored patches that are often blue in color.

What do detergent stains look like?

Detergent stains can often appear as blue or white streaks on fabrics. They stand out prominently on darker clothes, making your outfit look unkempt. The soapy residues left behind by the detergent cause these marks that can sometimes give off a faded appearance to colored clothing due to uneven dye absorption during washing.

On white garments, such spots may not be too noticeable but they still cast a dull and greyish tone over the fabric, taking away its crisp and fresh appeal. In certain cases, you might even spot yellowish patches caused by reaction between the cleaning agents in the detergent and elements in hard water.

Why do clothes get detergent stains?

Detergent stains occur on clothes when laundry detergent doesn’t dissolve properly or isn’t evenly distributed in the washing machine. The excess detergent gets trapped in the fabric during the wash cycle and appears as bluish, grayish, or white residues after drying.

It is more common with powdered detergents and highly concentrated liquid detergents because they require extra effort to dissolve completely. Also, overloading your washing machine can lead to insufficient water for the detergent to dissolve adequately, resulting in stains on your clean clothes.

Effective Methods for Removing Detergent Stains

Rubbing alcohol, vinegar, baking soda, dish soap, and agitation are all effective methods for removing detergent stains from clothes.

Effective Methods for Removing Detergent Stains

Rubbing alcohol

Rubbing alcohol stands as an effective tool to banish laundry detergent stains from your clothes. As a powerful solvent, it breaks down the oils that bond these tricky stains to the fabric surface.

To use this method, dampen a cloth or sponge with some rubbing alcohol and gently rub the stain in question until you witness progress. Be sure to test on a small, hidden area first because while it’s typically safe for most fabrics, rubbing alcohol can discolor certain materials.

Once done working on the stain, wash your garment normally and watch those pesky spots disappear!

Vinegar

Vinegar is a versatile and effective solution for removing detergent stains from clothes. Its acidic properties help break down the residue left behind by detergents, leaving your clothes clean and stain-free.

To use vinegar, simply mix equal parts of white vinegar and water in a spray bottle. Spray the mixture directly onto the stained area, then gently rub it in with a clean cloth or sponge.

Let it sit for a few minutes before rinsing thoroughly with cold water. Vinegar can be used on both colored and white clothing without causing any damage or discoloration. So next time you discover detergent stains on your clothes, reach for some vinegar to get them out quickly and easily!

Baking soda

Baking soda is another effective method for removing detergent stains from clothes. Sprinkling baking soda directly onto the stained area can help to neutralize and lift the stain.

The alkaline properties of baking soda work to break down the detergent residue, making it easier to wash away. To use this method, simply dampen the stained area with water, sprinkle a generous amount of baking soda over the stain, and gently rub it in using a soft cloth or sponge.

Let it sit for a few minutes before rinsing thoroughly and laundering as usual.

In addition to its stain-removing properties, baking soda also helps eliminate odors that may be left behind by detergent stains. It acts as a natural deodorizer by absorbing unpleasant smells from fabrics.

Dish soap

Dish soap can be a powerful ally when it comes to removing detergent stains from clothes. Its grease-fighting properties help break down the residue left behind by laundry detergents, making it easier to lift the stains from your garments.

Simply apply a small amount of dish soap directly onto the stain, rub gently, and let it sit for a few minutes before rinsing with cold water. Then, wash the garment as usual to remove any remaining traces of soap.

Dish soap is particularly effective on oily or greasy stains caused by laundry detergents, leaving your clothes clean and fresh once again.

Agitation

Agitation is another effective method for removing detergent stains from clothes. By agitating the stained area, you are helping to loosen and break up the stain particles, making it easier for them to be removed during laundering.

This can be done by gently rubbing or scrubbing the stain with a soft brush or cloth before throwing the garment into the washing machine. Agitation combined with other stain removal methods can significantly improve your chances of getting rid of those pesky detergent stains and restoring your clothes to their clean and fresh state.

Preventing and Avoiding Detergent Stains

Preventing and Avoiding Detergent Stains

To prevent and avoid detergent stains, it is important to use the correct amount of detergent for each load and ensure that the load size is appropriate for your machine. Additionally, getting things moving by agitating the clothes during the wash cycle can help distribute the detergent evenly and reduce the chances of stains.

Be cautious when using powdered detergents as they can sometimes leave residue on clothes. If you encounter tough stains that won’t come out with DIY methods, don’t hesitate to seek professional help.

Use the correct amount of detergent

Using the correct amount of detergent is crucial for preventing and removing stains from clothes. Here are some tips to ensure you’re using the right amount:

  • Measure the detergent according to the product instructions.
  • Use a measuring cup or the cap provided with the detergent bottle for accuracy.
  • Avoid using more than the recommended amount, as excess detergent can leave residue on clothes.
  • If you have hard water, you may need to use slightly more detergent.
  • Adjust the detergent amount depending on the size of your load.

Watch the size of the load

To prevent detergent stains on your clothes, it’s important to watch the size of the load.

  • Divide larger loads into smaller ones
  • Ensure that there is enough space for proper agitation
  • Avoid overfilling the washing machine
  • Follow the manufacturer’s instructions for load size
  • Keep an eye on the water level in the machine

Get things moving

To effectively remove detergent stains from your clothes, it’s important to get things moving. This means agitating the stained area by gently rubbing or scrubbing it with a soft brush or cloth.

The motion helps to loosen and lift the stain from the fabric, making it easier to remove. Remember not to be too rough as this may damage the clothing fibers. So, roll up your sleeves and give those detergent stains a good scrubbing!

Be cautious with powdered detergent

Powdered detergent can leave stubborn stains on clothes if not used properly. Take care to avoid these issues by following these tips:

  1. Measure correctly: Use the recommended amount of powdered detergent for each load to prevent residue and staining.
  2. Dissolve thoroughly: Before adding clothes to the washer, ensure that the powdered detergent is fully dissolved in the water.
  3. Pre-treat stains: For heavily soiled items or tough stains, pre-treat with a stain remover or laundry soap before washing with powdered detergent.
  4. Avoid direct contact: If using a top-loading machine, add the powdered detergent first and let it dissolve completely before adding clothes to minimize direct contact and potential staining.
  5. Rinse thoroughly: After washing, make sure to rinse the clothes thoroughly to remove any remaining detergent residue that could cause staining.

Seek professional help for tough stains

If you’ve tried all the DIY methods and still can’t get rid of those stubborn detergent stains on your clothes, it’s time to seek professional help. Professionals have access to specialized stain removal techniques and products that are specifically designed to tackle tough stains.

Whether it’s a blue detergent stain or scrud marks on your clothes, they have the expertise to handle any type of laundry dilemma. Don’t waste any more time struggling with difficult stains – let the professionals take care of it for you and enjoy clean, fresh clothes once again.

Remember, some stains can become permanent if not treated properly, so don’t hesitate to reach out for assistance when needed. Professional cleaners have the knowledge and resources to effectively remove even the most challenging detergent stains from both white and dark-colored clothing.

Conclusion

In conclusion, these five effective methods can help you remove laundry detergent stains from your clothes. By using rubbing alcohol, vinegar, baking soda, dish soap, and agitation techniques, you can tackle even the toughest stains.

Remember to follow the prevention tips to avoid future detergent stains on your clothes. Say goodbye to those pesky marks and enjoy clean laundry once again!

Laundry Tips: What Does Fabric Softener Do And How Does It Work?

Laundry Tips: What Does Fabric Softener Do And How Does It Work?

Fabricare Center Blog , Household , Laundry

Doing laundry seems simple, but have you ever wondered what fabric softener really does? It’s more than just a product that makes your clothes smell fresh. This blog post will decode the mystery behind fabric softeners, unveiling how they work their magic on our clothes.

Time to dive into the secrets of this laundry superstar!

Key Takeaways

  • Fabric softener works by using electrically charged compounds to smooth and coat fibers, reducing friction, minimizing static cling, and leaving clothes feeling softer.
  • Types of fabric softeners include liquid, dryer sheets, beads/crystals, fabric softening balls, and spray-on softeners, each offering unique benefits.
  • Benefits of fabric softener include softer fabric, reduced static, easier ironing, enhanced freshness, color preservation, and reduced harshness.
  • Drawbacks of fabric softener include potential fabric damage, skin irritation, environmental impact, residue buildup, cost, incompatibility with certain detergents, allergen concerns, and flammability risks.
  • Natural alternatives to fabric softener include white vinegar, baking soda, wool dryer balls, aluminum foil, and air drying.
  • Tips for using fabric softener include measuring carefully, avoiding staining, and recognizing that it can be skipped for certain fabrics or personal preferences.

What is Fabric Softener?

Fabric softener is a laundry product that comes in various forms, such as liquid, powder, or sheets, and is used to make fabrics softer and reduce wrinkles.

Types of fabric softener (liquid, powder, sheets, etc.)

There are several types of fabric softeners available in the market, each boasting its unique benefits.

  1. Liquid Softeners: These are added to the final rinse cycle and infuse your clothes with a fresh scent while making them softer.
  2. Dryer Sheets: Just throw one of these in the dryer with your clothes. They stop static cling and impart a light fragrance.
  3. Beads or Crystals: Sprinkle these directly into the washing machine before adding clothes. They dissolve slowly and release their scent during the wash cycle.
  4. Fabric Softening Balls: These reusable balls go in the dryer, softening and fluffening your laundry by gently massaging fabrics as they tumble.
  5. Spray-on Softeners: Spray these directly onto clothes after washing for quick freshen-up before ironing.

How Does Fabric Softener Work?

How Does Fabric Softener Work?

Fabric softener works by using electrically charged compounds to smooth and coat the fibers of your clothes, resulting in softer fabric and reducing static cling. Curious to learn more about how this process works? Keep reading!

Electrically charged compounds

Fabric softeners work magic on our clothes using electrically charged compounds. These smart molecules carry a positive charge, which neutralizes the negative charge in fabrics that often leads to static.

The compound clings to fibers in clothing during the rinse cycle, creating a protective layer around them. This process reduces friction and leaves your clothes feeling softer. With less electrical charge, there’s reduced static cling – no more socks mysteriously sticking together! The compounds also help impart a fresh scent, providing you with laundry that not only feels great but smells fantastic too.

Smoothing and coating fibers

Fabric softener performs a crucial task in the laundry process by smoothing and coating fibers. As you run your washer, it releases these agents into the water. They attach themselves to fabrics, providing a protective layer over each strand of material.

This activity reduces friction between fibers that can lead to wear and tear during washing or drying. It also creates a smoother feel on your clothes by flattening out rough patches on the fiber surface.

Ultimately, this lends an appealing softness to your garments while enhancing their durability over time.

The Pros and Cons of Using Fabric Softener

Using fabric softener has its benefits, such as softer fabrics and reducing static, but there are also drawbacks like potential damage to certain fabrics and skin irritation. Curious to know more? Keep reading!

Benefits (softer fabric, reducing static, etc.)

Fabric softener offers several benefits for your laundry:

  1. Softer fabric: Fabric softeners help to break down the stiffness in clothes, leaving them feeling soft and comfortable against your skin.
  2. Reducing static: Static cling can be a nuisance, but fabric softeners neutralize the electric charge in fabrics, reducing static and preventing clothes from sticking together.
  3. Easier ironing: Using fabric softener can make ironing easier by reducing wrinkles and making fabrics more pliable.
  4. Enhanced freshness: Fabric softeners leave behind a pleasant scent that keeps your laundry smelling fresh and clean.
  5. Color preservation: By coating the fibers of your clothes, fabric softeners help to preserve the vibrancy of colors, preventing fading over time.
  6. Reduced harshness: Some types of fabric softeners can help reduce the harshness of certain fabrics, making them feel smoother against your skin.

Drawbacks (damage to certain fabrics, skin irritation, etc.)

Fabric softener may not be suitable for every fabric or individual. It is important to be aware of the potential drawbacks that come with its use. Some of these drawbacks include:

  1. Fabric damage: Certain fabrics, such as towels and athletic wear, can be negatively affected by fabric softener. The chemicals in the softener can reduce their absorbency or affect their moisture-wicking properties.
  2. Skin irritation: Fabric softeners often contain fragrances and other chemicals that can irritate sensitive skin. People with allergies or sensitivities may experience itching, redness, or rashes when using fabric softener.
  3. Environmental impact: Many fabric softeners contain ingredients that are harmful to the environment. When washed down the drain, these chemicals can pollute water sources and harm aquatic life.
  4. Residue buildup: Over time, fabric softener can leave a residue on clothing and washing machines. This buildup can make clothes feel stiff or greasy and cause colors to fade faster.
  5. Cost: Fabric softeners can add an extra expense to laundry care routines. Depending on the type of softener used and frequency of usage, it may contribute to higher laundry costs over time.
  6. Incompatibility with certain detergents: Some types of fabric softeners may not work effectively when used with certain laundry detergents or in certain washing machine settings.
  7. Allergen concerns: The fragrances used in many fabric softeners can trigger allergies or asthma symptoms in some individuals.
  8. Flammability risks: Certain types of liquid fabric softeners are flammable and should be handled with caution.

Alternatives to Fabric Softener

Alternatives to Fabric Softener

Instead of using fabric softener, there are natural alternatives like vinegar and baking soda that can help reduce static and achieve softer clothes. Want to know more? Keep reading!

Natural alternatives

If you prefer to avoid using fabric softener, there are several natural alternatives you can try. These alternatives are effective in reducing static and achieving softer clothes without the use of traditional fabric softener. Here are some options:

  1. White vinegar: Add 1/2 cup of white vinegar to your rinse cycle to help soften fabrics and prevent static.
  2. Baking soda: Add 1/4 cup of baking soda to your wash cycle to naturally soften and freshen your clothes.
  3. Wool dryer balls: These reusable balls help reduce static and wrinkles while also softening your laundry. Simply throw them in the dryer with your clothes.
  4. Aluminum foil: Crumple a sheet of aluminum foil and place it in the dryer with your clothes to reduce static cling.
  5. Air drying: Hang your clothes outside or on a drying rack instead of using the dryer. This method can result in naturally softer fabrics.

Tips for reducing static and achieving softer clothes without fabric softener

Reduce static and achieve softer clothes without fabric softener with these simple tips:

  • Use vinegar: Add half a cup of white vinegar to your rinse cycle to help reduce static and soften fabric.
  • Dryer balls: Toss a few dryer balls into the dryer with your clothes. They help to break up static and fluff up fabrics.
  • Line dry: Hang your clothes outside or on a drying rack to air dry. This can help prevent static buildup and give your clothes a natural softness.
  • Shake it out: Give your clothes a good shake before putting them on. This can help loosen any static cling and make them feel softer.
  • Natural fabric softeners: Try using natural alternatives like baking soda or essential oils for added scent and softness.

Tips for Using Fabric Softener

Measure fabric softener carefully to avoid staining and skip it in some wash loads for specific fabrics. Discover more tips on how to achieve softer clothes without fabric softener in our blog.

Proper measurement

To ensure the best results when using fabric softener, proper measurement is key. Follow the instructions on the product label to determine the correct amount of fabric softener needed for your laundry load.

Using too much can leave a residue on your clothes, while using too little may not provide enough softness and static reduction. By measuring carefully, you can achieve perfectly softened and fresh-smelling clothes without any hassle or guesswork.

Avoiding staining

To avoid staining your clothes when using fabric softener, it’s important to follow a few simple guidelines. First, make sure you measure the fabric softener accurately according to the instructions on the packaging.

Using too much can result in excess residue that may leave stains on your clothes. Second, pour the fabric softener directly into the designated dispenser or at the start of the rinse cycle, avoiding contact with fabrics before they are thoroughly rinsed.

Lastly, if you notice any stains after washing and drying your garments, try rewashing them without using fabric softener or spot-treating the stains before laundering again. By taking these precautions, you can enjoy softer clothes without worrying about unwanted stains.

Can be skipped in some wash loads

Fabric softener can be a helpful addition to your laundry routine, but it’s important to know that it isn’t always necessary. In fact, fabric softener can be skipped in some wash loads without compromising the cleanliness or quality of your clothes.

This is especially true for certain fabrics that may not benefit from the use of fabric softener, such as towels or athletic wear. By skipping fabric softener for these items, you can help preserve their absorbency and performance over time.

Additionally, if you prefer a fragrance-free laundry experience or have sensitive skin, opting out of using fabric softener altogether might be a good choice for you.

Conclusion

Fabric softener is a game-changer when it comes to laundry. It works by using electrically charged compounds to smooth and coat the fibers, resulting in softer fabric and reduced static cling.

While there are some drawbacks and alternatives to consider, using fabric softener can make your clothes feel better than ever before. So go ahead, give it a try and enjoy the benefits of this secret weapon for your laundry!

How To Hand Wash Clothes: A Comprehensive Guide For Effective Cleaning

How To Hand Wash Clothes: A Comprehensive Guide For Effective Cleaning

Fabricare Center Blog , Household , Laundry

Are you tired of your delicate clothes getting damaged in the washing machine? Fact is, some fabrics just can’t withstand the rough and tumble. This comprehensive guide reveals how to hand wash clothes effectively, preserving their quality while saving energy.

Let’s dive into a world where cleaning meets care; every garment deserves it!

Key Takeaways

  • Hand washing clothes preserves delicate fabrics and extends the life of your garments.
  • It significantly reduces energy and water consumption compared to using a washing machine.
  • The step-by-step process includes reading the care label, pre-treating stains, creating a washing solution, soaking and swishing, rinsing and repeating, squeezing out excess water, laying flat on a towel, and letting air dry.

Why Hand Washing Clothes is Important

Hand washing clothes is important to preserve delicate fabrics, reduce energy and water consumption, and avoid damaging certain items.

Why Hand Washing Clothes is Important

Preserve delicate fabrics

Hand washing clothes is essential to preserve delicate fabrics. This gentle cleaning method minimizes the risk of fabric damage, preserving the quality and longevity of your garments.

Delicate items such as lingerie or reusable grocery bags that can harbor pathogens benefit especially from hand washing. Even clothing labelled “dry clean only” is often safe for a careful hand wash at home.

Using this eco-friendly cleaning method not only protects your delicate belongings, but it also aids in reducing water and energy consumption, making it an excellent choice for both fabric care and environmental conservation.

To ensure optimal results with minimal strain on the fabric, garments should soak in a proper detergent solution for between 15 to 60 minutes before gently handling them further in the process.

Reduce energy and water consumption

Washing clothes by hand significantly saves water and electricity. Traditional washing machines consume ample amounts of water in each cycle, leading to excessive consumption over time.

Hand washing uses just a fraction of the amount, proving it as a resourceful method of laundry.

Choosing to wash clothes by hand also reduces energy waste, making it an eco-friendly option for any household. Traditional washing machines require high amounts of electricity – every cycle contributes to substantial power usage throughout the year.

In comparison, hand washing consumes zero electrical units as it primarily relies on personal effort rather than machine operation. This combination makes handwashing a responsible choice both financially and environmentally while adhering to sustainable living practices.

Avoid damaging certain items

Hand washing clothes involves a delicate process of fabric care that helps to preserve the life and form of your garments. The gentle swishing action in a basin filled with water and accessible detergent can prevent damage to items that are too fine or watersensitive for machine washes.

Harsh agitation from these machines often results in stretch, tear, or disfigurement of fabrics such as lace, silk, wool and others marked “Dry Clean Only”. Using handwashing techniques not only preserves clothing but also its vibrant colors making it look newer for longer periods.

Materials and Tools You’ll Need

To effectively hand wash your clothes, gather the necessary materials and tools including proper detergent, a sink or tub, and a drying rack or towel.

Materials and Tools You'll Need

Proper detergent

Using the right detergent is a crucial step in hand washing clothes. It is recommended to use a laundry detergent specifically formulated for hand-washing, such as The Laundress Delicate Wash.

This detergent is designed to be gentle on delicate fabrics while still providing effective cleaning. If you don’t have a specialized hand-washing detergent, Tide can also work well for other delicate items and can be used for hand washing in the sink.

By using the proper detergent, you can ensure that your clothes are thoroughly cleaned without causing any damage or fading to the fabric.

A sink or tub

A sink or tub is an essential tool for hand-washing clothes effectively. It provides a designated space where you can carefully clean and rinse your garments without any difficulty.

Before starting the washing process, make sure to clean the sink or tub thoroughly to remove any potential residue that could bleach or damage your fabrics. Fill the sink or small tub with water at the recommended temperature, ensuring it is neither too hot nor too cold for your clothes.

This will help maintain the quality of your fabrics while allowing them to get properly cleaned during the hand-washing process. Remember, if there is no care label available, opt for cool to lukewarm water as a general rule when hand-washing clothes.

A drying rack or towel

A drying rack or towel is essential for properly air drying hand-washed clothes. Instead of placing damp garments on a hanger or over the back of a chair, which can cause them to lose their shape, using a drying rack or towel provides gentle support and allows for even air circulation.

Delicate fabrics like silk and wool should be laid flat on a clean towel, while other clothes can be hung up on a rack with clothespins. This method helps to prevent wrinkles and ensures that your hand-washed items dry thoroughly without any damage.

The Step-by-Step Process

Read the tag, pre-treat stains, create a washing solution, soak and swish, rinse and repeat, squeeze out excess water, lay flat on a towel, let air dry. Learn how to effectively hand wash clothes for optimal cleanliness.

Read the tag

Before you start hand washing your clothes, it’s important to read the tag. The care label provides valuable information about how to clean the garment properly. Some items may require special attention or specific detergent.

By checking the tag, you can ensure that you’re following the correct instructions for effective cleaning. Additionally, certain fabrics may require extra care or caution when hand washing.

So take a moment to read the tag before you begin, and you’ll be on your way to gentle and effective cleaning for your delicate items.

Pre-treating stains

Pre-treating stains is a crucial step in the hand-washing process for clothes. By addressing stains before washing, you increase the chances of effectively removing them during the cleaning process.

The American Cleaning Institute (ACI) offers a helpful stain removal guide for different types of stains. It is recommended to use a color-safe stain remover to pre-treat visible stains and heavily-soiled areas before hand-washing your clothes.

This helps break down the stain and loosen its grip on the fabric, making it easier to remove during the washing process with laundry detergent or an enzyme-based cleaner. So, don’t skip this important step and ensure your clothes come out looking fresh and clean after hand-washing!

Creating a washing solution

To create a washing solution for hand washing clothes, start by filling a sink or bowl with water. Add liquid laundry soap to the water and mix it well until it becomes sudsy. Make sure to use the recommended amount of detergent specified on the packaging.

The soapy solution will help break down dirt and remove stains from your garments effectively. This step is crucial in ensuring that your clothes come out clean and fresh after hand washing them.

Soaking and swishing

Soaking and swishing is a crucial step in the hand-washing process to ensure effective cleaning of your clothes. To start, gently immerse the item in lukewarm water mixed with a mild detergent.

Use delicate movements to swish the garment through the sudsy water, avoiding any scrubbing or twisting that could potentially damage the fabric. This motion helps activate the detergent and allows it to penetrate deep into the fibers for a thorough and efficient clean.

It is recommended to soak your clothing for up to 30 minutes to achieve optimal cleaning results. Remember not to wring or scrub the garment during this process as it can cause unnecessary wear and tear.

Rinse and repeat

The step-by-step process of hand washing clothes involves rinsing and repeating. After soaking and swishing your garments in the washing solution, it is important to thoroughly rinse them with clean water.

This helps to remove all traces of detergent and leftover dirt, ensuring that your clothes are clean and fresh. If you choose to use fabric softener during the rinsing process, make sure to repeat the rinsing cycle until the water runs clear without any suds or residue.

Rinsing well ensures that your clothes are properly cleaned and ready for drying.

Squeeze out excess water

Squeezing out excess water is a crucial step in the hand-washing process. After rinsing your clothes thoroughly, gently squeeze them to remove as much water as possible. This helps to speed up the drying time and prevents dripping when you lay them flat to dry.

Remember not to twist or wring the clothes, especially delicate fabrics, as it can stretch or damage them. By squeezing out excess water instead of wringing, you’ll preserve the shape and quality of your garments while ensuring they dry faster.

To avoid any water buildup or residue on your freshly washed clothes, pressing down firmly with both hands along the length of each garment can help extract surplus moisture effectively.

Lay flat on a towel

Laying hand-washed clothes flat on a clean, dry white bath towel is an effective way to dry them. After gently squeezing out excess water, placing the garments on the towel allows moisture to be absorbed while keeping their shape intact.

To further expedite drying, you can roll the clothing into the towel to help remove even more moisture. This method works well for most fabrics, including delicate ones like wool and silk, as it helps to prevent stretching or misshaping while promoting thorough air drying.

Just remember not to place clothes near heat sources during this process!

Let air dry

After hand washing your clothes, it is important to let them air dry. This natural drying method helps to preserve the fabric and prevent any damage that could occur in a machine dryer.

When air drying, make sure to carefully read the garment’s label instructions for specific guidance on how to best dry the item. You can lay flat your hand-washed clothes on a towel or use a drying rack to allow proper airflow and even drying.

By letting your clothes air dry, you are ensuring that they maintain their shape and quality while also reducing energy consumption.

Tips and Tricks for Hand Washing Different Fabrics

From hand washing bras and delicate lingerie to caring for wool and silk, discover the best techniques for cleaning various fabrics. Don’t miss out on these essential tips!

Hand washing bras and lingerie

To hand wash bras and lingerie effectively, follow these tips and tricks:

  • Use a mild detergent specifically designed for delicate fabrics.
  • Fill a sink or basin with lukewarm water.
  • Immerse the bras and lingerie in the water, gently swishing them around to ensure even cleaning.
  • For extra protection, place the bras in a mesh lingerie bag before submerging them in water.
  • Allow the garments to soak for about 15 minutes, ensuring that all areas are submerged.
  • Gently agitate the items by squeezing them lightly to help remove dirt and stains.
  • Rinse the bras and lingerie thoroughly with cold water until no soap residue remains.
  • Avoid wringing or twisting the items to prevent stretching or damaging the fabric.
  • Squeeze out excess water by pressing gently against the side of the sink or tub.
  • Lay each garment flat on a towel, roll up the towel tightly to absorb moisture, then unroll and reshape them if necessary.
  • Finally, lay the bras and lingerie flat on a drying rack or clean towel to air dry completely.

Hand washing sweaters and delicate garments

  • Gently swish sweaters and delicate garments in sudsy water
  • Avoid scrubbing or twisting actions to prevent stretching or damage
  • Submerge the garments in water mixed with detergent for hand washing
  • Hand wash and soak the garments for up to 30 minutes
  • Swish detergent in the water before placing the garment and gently pressing it down
  • Rinse by pressing the garments against the sink or bowl instead of scrubbing or twisting
  • Consider using alternative options like gentle shampoo for hand washing clothes

Hand washing jeans and gym clothes

Properly hand washing jeans and gym clothes is essential for gentle cleaning and maintaining the quality and longevity of these garments. To effectively hand wash jeans and gym clothes, you will need a few supplies: laundry detergent, a clean towel, and a space large enough to fully submerge the garments. By following the detailed washing instructions provided in this article, you can ensure that your jeans and gym clothes are properly cleaned while preserving their fabric integrity.

Special considerations for wool and silk

To properly hand wash wool and silk garments, there are a few special considerations to keep in mind. First, it’s important to note that washing poor-quality silk can damage the fabric, but most silk garments can be safely washed.

However, both wool and silk can shrink or be ruined by heat, perspiration, and oils. So when hand washing delicate items made from these fabrics, it’s crucial to use gentle movements and avoid scrubbing or twisting actions.

By following these guidelines, you can ensure the longevity of your wool and silk clothing while keeping them clean and fresh.

Conclusion

In conclusion, hand washing clothes is an effective method for preserving delicate fabrics and reducing energy and water consumption. By following the step-by-step process outlined in this comprehensive guide, you can ensure that your clothes are cleaned thoroughly without any damage.

With a little time and effort, hand washing can extend the life of your garments and keep them looking fresh.

FAQs

1. What materials do I need to hand wash clothes effectively?

To hand wash clothes effectively, you will need a basin or sink, mild laundry detergent, water at the right temperature, and a drying rack or clean towels for drying.

2. How long should I soak my clothes before washing them by hand?

It is recommended to soak your clothes in soapy water for about 10-15 minutes before washing them by hand.

3. Can I use regular bar soap to wash my clothes by hand?

Yes, you can use regular bar soap as an alternative to laundry detergent when washing your clothes by hand.

4. Should I scrub or agitate the clothes while washing them by hand?

Gently agitate the clothes with your hands to remove dirt and stains without causing damage to the fabric.

5. How long does it take for hand-washed clothes to dry completely?

The drying time for hand-washed clothes varies depending on factors such as humidity and fabric thickness, but it usually takes around 24-48 hours for them to dry completely indoors.

How To Wash A Baseball Jersey

How To Wash A Baseball Jersey To Keep It Clean And Fresh

Fabricare Center Blog , Laundry

Washing a baseball jersey can seem daunting, especially when trying to maintain its vibrant colors and fresh look. Many are unaware that washing these jerseys requires specific care to prevent damaging the fabric or fading the print. This blog post equips you with easy-to-follow steps on how to effectively clean your baseball jerseys without causing any harm. Be prepared; your jersey is about to be spotless!

Key Takeaways

  • Check the care instructions provided by the manufacturer to ensure you wash your baseball jersey properly.
  • Remove stains by hand using a gentle stain remover and follow the steps provided in the article for effective stain removal.
  • Presoak your jersey before washing to lift dirt and loosen stains.
  • Use cold water when washing your baseball jersey to prevent fading and shrinking.

Preparation Before Washing Your Jersey

Washing and Drying Your Baseball Jersey

Before washing your baseball jersey, make sure to carefully check the care instructions provided by the manufacturer. Remove any stains by hand using a gentle stain remover, and consider presoaking the jersey in a mixture of water and laundry detergent to help lift dirt and grime.

Check the care instructions

A baseball jersey often comes with specific care instructions from the manufacturer. These directions give crucial information on how best to maintain the garment, offering insights into advisable washing temperatures and ideal drying methods for protecting both the fabric and any graphics or embellishments.

It is vital to follow these guidelines for preserving your jersey’s pristine condition over time. Avoid deviating from these instructions even if common practices suggest otherwise; manufacturers have tested their products extensively and understand what suits them best.

For instance, some jerseys may require cold water washes despite popular belief that hot water cleans better, just as others might recommend air-drying instead of using a dryer. By respecting these directives, you uphold your baseball uniform’s quality while ensuring it remains fresh and vibrant game after game.

Remove stains by hand

Start by inspecting your baseball jersey thoroughly to identify any stains. Here are the steps to remove stains by hand:

  1. Isolate the stained area: Spread the jersey out and circle the stain with a washable marker.
  2. Apply gentle detergent: Use a soft cloth or an old toothbrush dipped in liquid laundry soap for this process.
  3. Scrub lightly: Gently work on the stain, ensuring that you don’t damage the fabric.
  4. Rinse: Rinse off the soap under cold running water.
  5. Repeat as needed: Some stubborn stains may require several rounds of this process.

Presoak to lift dirt

Presoaking your baseball jersey plays a vital role in a successful cleansing process.

  • Fill your sink or tub with cold water.
  • Add 1 tablespoon of HEX Performance Laundry Detergent for every gallon of water.
  • Submerge the jersey in the water and detergent mixture.
  • Soak for at least an hour to lift dirt and loosen stains.
  • Wash immediately after presoaking to prevent stains from setting in further.

Washing and Drying Your Baseball Jersey

Preparation Before Washing

To wash your baseball jersey, start by using cold water in the washing machine.

Use cold water

Using cold water is crucial when washing and drying your baseball jersey. Cold water helps to prevent fading and shrinking, preserving the vibrant colors of the shirt. Additionally, it helps to protect the decals on the jersey from damage.

Since most baseball jerseys are made from polyester fabric for its durability and flexibility, washing them in cold or warm water ensures that they maintain their quality over time.

By using cold water, you can successfully clean your baseball jersey while keeping it looking fresh and new.

Avoid using hot water

Using hot water to wash and dry your baseball jersey should be avoided. Hot water can cause fading, shrinking, and damage to the letters on the jersey. Instead, opt for washing with cold water to preserve the colors and prevent any unwanted changes in size or texture.

Remember, cold water is gentler on delicate fabrics and helps maintain colorfastness of your jersey’s fabric. By avoiding hot water, you can ensure that your baseball jersey stays clean and fresh without compromising its quality and appearance.

Using white vinegar for odor removal

White vinegar is a great natural deodorizer that can be used to eliminate odors from your baseball jersey. When washing your jersey, add half a cup of white vinegar to the wash cycle along with your regular detergent.

The acidic properties of white vinegar help neutralize and remove stubborn smells, leaving your jersey smelling fresh and clean. For an extra boost, you can also combine white vinegar with baking soda before adding it to the wash.

This powerful combination helps break down stains and leaves your jersey odor-free. So say goodbye to unpleasant smells and hello to a fresh baseball uniform!

How to soak and pretreat stains

To remove stains from your baseball jersey, follow these steps:

  1. Fill a sink or bucket with warm water.
  2. Add 2 tablespoons of heavy – duty laundry detergent to the water.
  3. Place the stained area of the jersey into the soapy water.
  4. Allow the jersey to soak for at least 30 minutes.
  5. Gently rub the fabric together to help lift the stain.
  6. If the stain persists, dampen the area with cold water.
  7. Apply a prewash stain removing agent, such as vinegar or soap, directly onto the stain.
  8. Let the pretreatment sit for a few minutes before washing.
  9. After pretreating, wash your baseball jersey using cold water and mild detergent.
  10. Air – dry your jersey to avoid any potential damage from using a dryer.

Avoid using the dryer

Putting your baseball jersey in the dryer is a big no-no. The high heat can cause shrinking, set stains, and fade colors. Even using the low-heat setting isn’t recommended as it can still lead to shrinkage and potentially make any remaining stains worse.

To keep your jersey looking its best, opt for air drying instead. It’s a safer option that helps maintain the integrity of the fabric and ensures your uniform stays in top shape.

Air-drying tips

To properly air-dry your baseball jersey and maintain its quality, follow these helpful tips:

  • Hang up the jersey on a plastic or wooden hanger to prevent wrinkles and maintain its shape.
  • Turn the jersey right side out before air drying to ensure proper airflow and thorough drying.
  • Avoid direct sunlight while drying the jersey to prevent fading of colors.
  • If you need to use a dryer, use low temperatures and be cautious with older or less advanced machines.
  • Never put the jersey in the dryer as high heat can cause it to shrink.

Maintaining and Storing Your Jersey

Learn how to properly care for your baseball jersey, from treating stains to storing it correctly, to ensure it stays clean and fresh for every game.

How often to wash

To keep your baseball jersey clean and fresh, it’s important to wash it regularly. A good rule of thumb is to wash your jersey after every practice or game to prevent dirt and sweat from setting in.

Washing it promptly will help maintain its quality and prevent any lingering odors. By washing your jersey frequently, you’ll ensure that it stays in great condition for many games to come.

Treating stains

When dealing with stains on your baseball jersey, it’s important to take the right steps to ensure proper cleaning. Here are some effective ways of treating stains:

  1. Pre-treat stains: Before washing, make sure to pre-treat any visible stains on your jersey. You can use an enzyme-based stain remover or a heavy-duty laundry detergent specifically designed for stain removal.
  2. Soak in cold water: Fill a sink or basin with cold water and add a stain removal solution like OxiClean. Let the jersey soak for about 15-30 minutes to help lift the stain.
  3. Gently rub the stain: After soaking, gently rub the stained area with your fingers or a soft brush. Be careful not to scrub too vigorously, as this may damage the fabric.
  4. Rinse thoroughly: Once you’ve treated the stain, rinse the jersey thoroughly under cold running water to remove any remaining residue from the cleaning solution.
  5. Check for lingering stains: If there are still visible stains after treating and rinsing, repeat the process or consider using a specialized fabric stain remover for tough stains.

Care and repair tips

To keep your baseball jersey in top shape, follow these care and repair tips:

  • Remove any stains as soon as possible to prevent them from setting in.
  • Use a stain remover or gently rub the stained area with a mild detergent before washing.
  • Avoid using bleach or harsh chemicals that can damage the fabric.
  • Mend any small tears or loose threads to prevent further damage.
  • Wash your jersey separately from other clothing to prevent color bleeding.
  • Turn the jersey inside out before washing to protect any printed logos or numbers.
  • Use a gentle cycle and cool or warm water when washing your jersey.
  • Avoid using high heat when ironing or drying to prevent shrinking or warping.
  • Store your clean, dry jersey in a cool and dry place to prevent musty odors and mold growth.

Proper storage

To properly store your baseball jersey, follow these steps:

  1. Use stainless steel or wooden hangers: These materials are gentle on the fabric and help maintain the shape of your jersey.
  2. Avoid overcrowding in the closet: Give your jersey enough space to hang freely and prevent wrinkles or creases.
  3. Turn jerseys inside out before washing: This helps protect any logos, numbers, or other printed details from fading or peeling.
  4. Undo buttons before washing: Leaving buttons fastened can cause stress on the fabric and lead to tearing or misshaping.
  5. Wash jerseys with zips and velcro in a laundry bag: This protects delicate fabrics from getting caught or damaged during the wash cycle.
  6. Air dry jerseys after washing: Avoid using the dryer as high heat can shrink, fade, or damage the fabric. Instead, lay your jersey flat or hang it up to air dry naturally.

Taking Your Baseball Jersey To Be Cleaned By A Professional

Many misconceptions circulate online regarding the best way to clean a baseball jersey. One common misconception suggests avoiding dry cleaners, fearing potential damage. With over 50 years in the industry, our master cleaners can assure you that this is not the case. After all, if the most delicate garments can be safely dry cleaned, why would it harm durable jerseys?

The truth is, the majority of baseball jerseys can be effectively cleaned by following these steps: wash on a delicate cycle and then hang dry. This is precisely the process we employ for most of the baseball jerseys we clean. However, for more delicate and high-end “authentic” jerseys, we opt for dry cleaning, followed by a gentle hang dry. We provide the same high-quality service we offer for garments that cost thousands of dollars.

At Fabricare Center Cleaners, we prioritize the utmost care when cleaning all types of clothing. If you have any questions or need advice on how to wash your baseball jersey, please don’t hesitate to contact our master cleaners here.

Conclusion

Keeping your baseball jersey clean and fresh is essential for maintaining its quality and longevity. By following the proper washing techniques, such as using cold water, pretreating stains, and air-drying the jersey, you can ensure that it remains in optimal condition.

Remember to wash it after every game or event, and always check the care instructions on the label for best results. With these tips, your baseball jersey will stay clean and fresh for many seasons to come!

FAQs

1. Can I wash a baseball jersey in the washing machine?

Yes, you can wash a baseball jersey in the washing machine using a gentle cycle and cold water.

2. Should I use bleach to remove stains from my baseball jersey?

No, it is not recommended to use bleach on a baseball jersey as it can damage the fabric. Instead, pre-treat stains with a stain remover before washing.

3. How should I dry my baseball jersey after washing?

It is best to air-dry your baseball jersey by laying it flat or hanging it up. Avoid using the dryer as high heat can shrink or damage the fabric.

4. Can I iron my baseball jersey to remove wrinkles?

You should avoid ironing your baseball jersey as high heat can melt or distort any printed designs or logos on the fabric. Hang the jersey up after washing to allow wrinkles to naturally release.

5. How often should I wash my baseball jersey?

The frequency of washing depends on how often you wear your baseball jersey and how dirty it gets. As a general guideline, wash your jersey after every few uses or whenever it becomes visibly soiled for optimal cleanliness and freshness.

1 3 4 5 6 7 12