September 2023 - Fabricare Center

Monthly Archives: September 2023

Do Dry Cleaners Clean Hats? A Complete Guide To Hat Cleaning

Do Dry Cleaners Clean Hats? A Complete Guide To Hat Cleaning

Fabricare Center Blog

Maintaining your style game means keeping even the smallest details sharp, and a grimy hat can easily derail your look. Whether it’s a cherished baseball cap or a sophisticated wool fedora, ensuring the cleanliness of your headwear is crucial for both its endurance and aesthetic appeal. In this blog post we’ll answer the question, do dry cleaners clean hats? As well as deep diving into the world of hat care, addressing common concerns such as whether dry cleaners are equipped to handle your headgear, offering step-by-step guidance on the delicate art of hand-washing caps without distorting their shape, and even sharing expert insights on conquering tenacious stains. So, don’t click away just yet – this informative guide could be the savior your beloved headpieces have been waiting for!

Key Takeaways

  • Dry cleaners may not always be the best option for cleaning hats due to potential risks and alternative methods available.
  • Hand washing in cold water with mild detergent is a safe and effective method for cleaning hats.
  • Alternative methods such as spot cleaning, talcum powder application, and machine washing can also be used depending on the type of hat.
  • Proper drying techniques include air drying, laying flat to dry, or hanging to dry without using heat sources.

Can Hats be Taken to Dry Cleaners?

Dry cleaning may not always be the best choice for cleaning hats due to potential risks and the availability of alternative methods.

Recommendations for Hat Care

Properly caring for your hats extends their lifespan and keeps them looking fresh. Always check the hat’s label for specific cleaning instructions before attempting any cleaning routines.

When no guidance is provided, hand washing in cold water with mild detergent proves to be a safe and effective method. Avoid using hot water, as it can cause colors to fade or bleed. For stubborn stains, use a soft bristle brush to gently scrub the affected area.

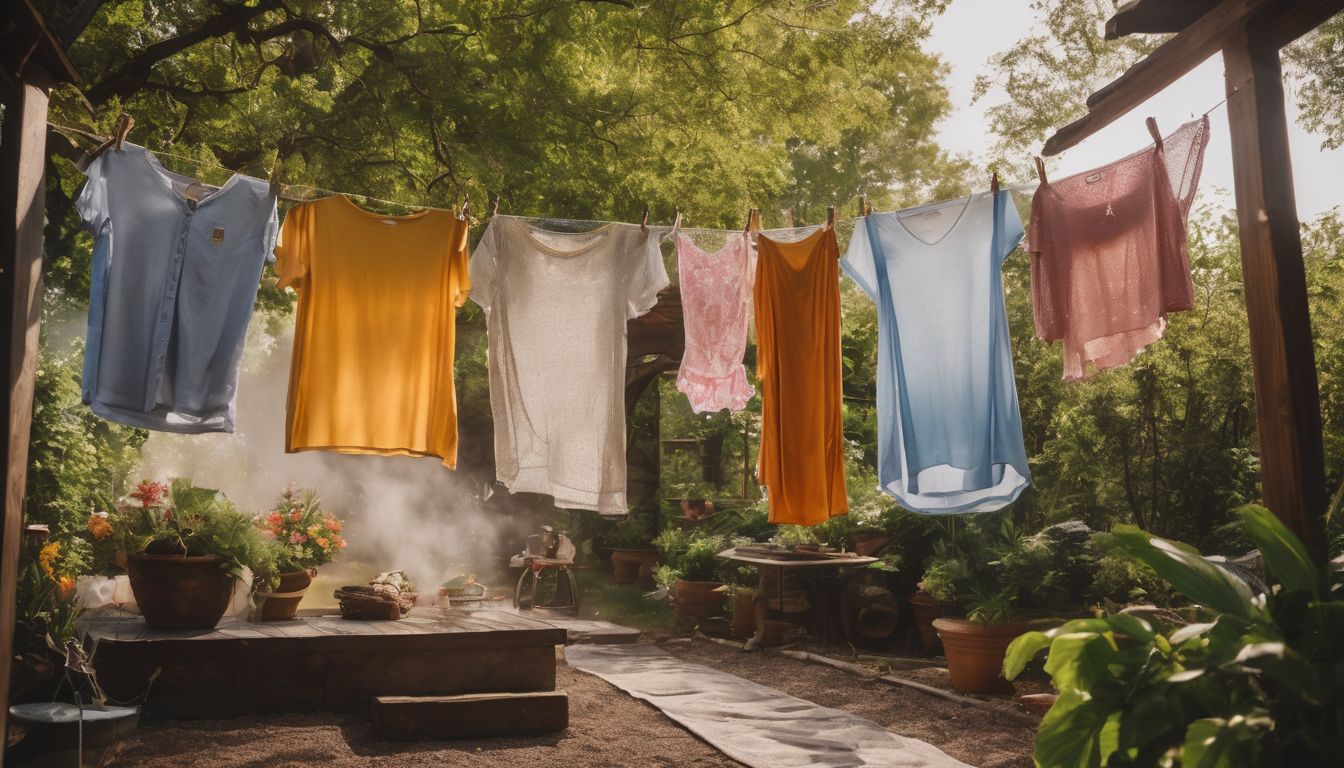
Air drying is highly recommended after cleaning. To ensure the hat retains its shape while drying naturally, place it over an upside-down bowl. Keep hats away from heat sources like radiators or direct sunlight during this process, as they can potentially warp or shrink.

Lastly, regular light cleaning goes a long way. Wipe down your hats after wearing them to prevent dirt buildup and discoloration.

Alternative Cleaning Methods

Many hat owners prefer alternative cleaning methods, as dry cleaning may not always be suitable. One popular option is hand washing, which involves soaking the hat in a mixture of warm water and mild detergent and gently scrubbing off dirt and grime. After washing, airing the hat in the sun can effectively remove odors and stains.

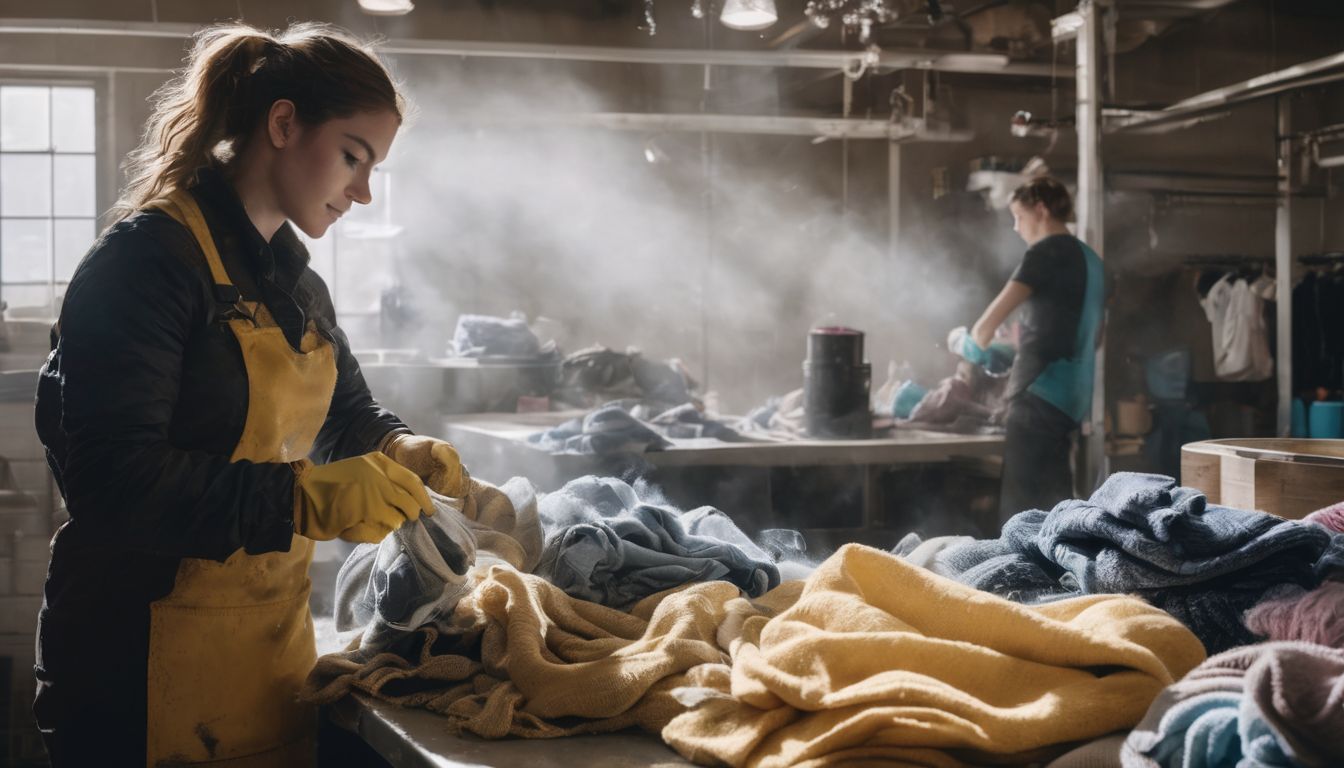
Potential Risks of Dry Cleaning

Dry cleaning, although effective at removing stains and odors, comes with its own set of risks. The process involves the use of chemicals such as perchloroethylene (perc), a solvent that can cause health issues with prolonged exposure. These health hazards can affect both the workers who handle it regularly and the customers using dry-cleaned items.

Another significant risk is the potential fire hazard associated with this cleaning method. Solvents used in dry cleaning are often highly flammable, posing a risk of ignition if not properly managed.

Additionally, there are ergonomic risks for employees who work long hours in awkward positions or engage in repetitive motions, which can lead to strain injuries.

Moreover, there may be difficulties with colorfastness in hats during the dry-cleaning process, potentially leading to color fading or running, reducing the overall appeal of your favorite hat.

Lastly, improper disposal or management of these solvents could contribute to environmental pollution, increasing contamination risks associated with dry cleaning processes.

How to Clean a Baseball Cap Without Ruining It

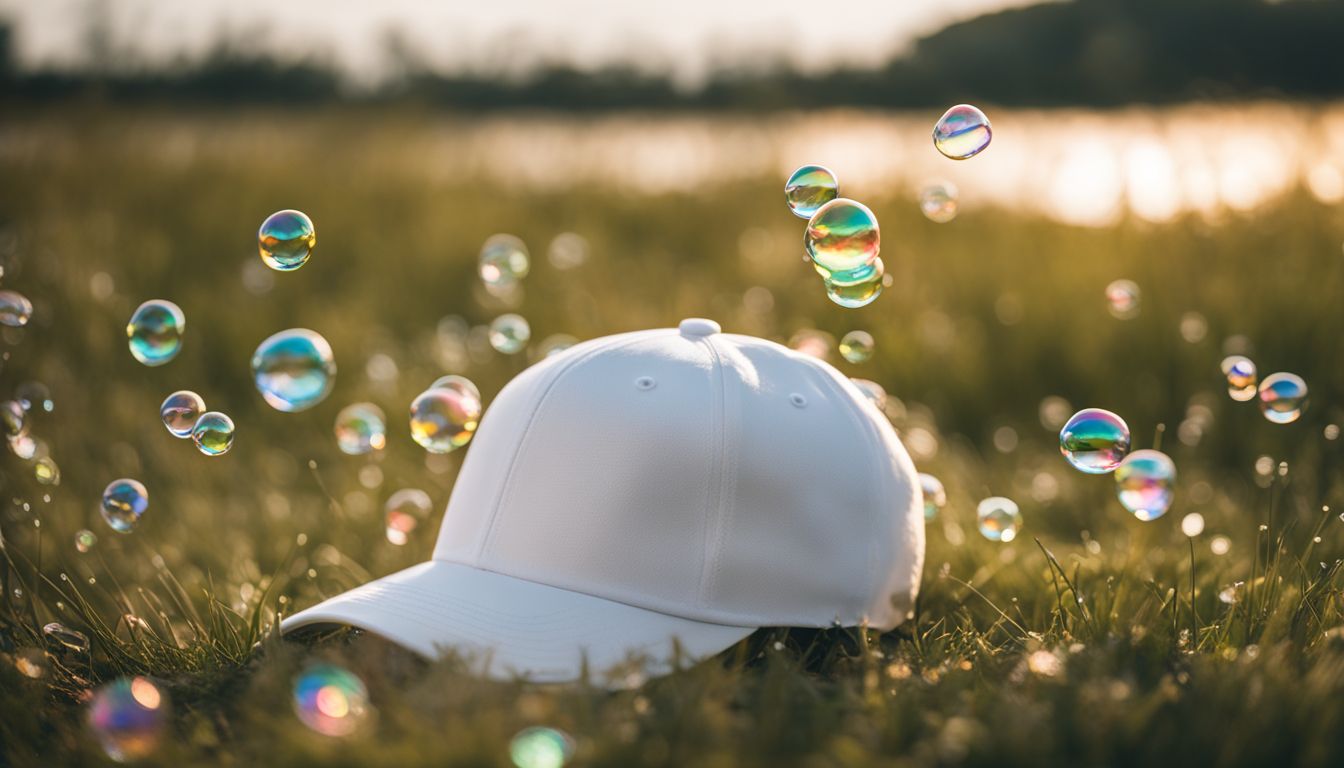
Cleaning a baseball cap without ruining it can be achieved through spot cleaning with mild detergent or by using gentle hand washing techniques.
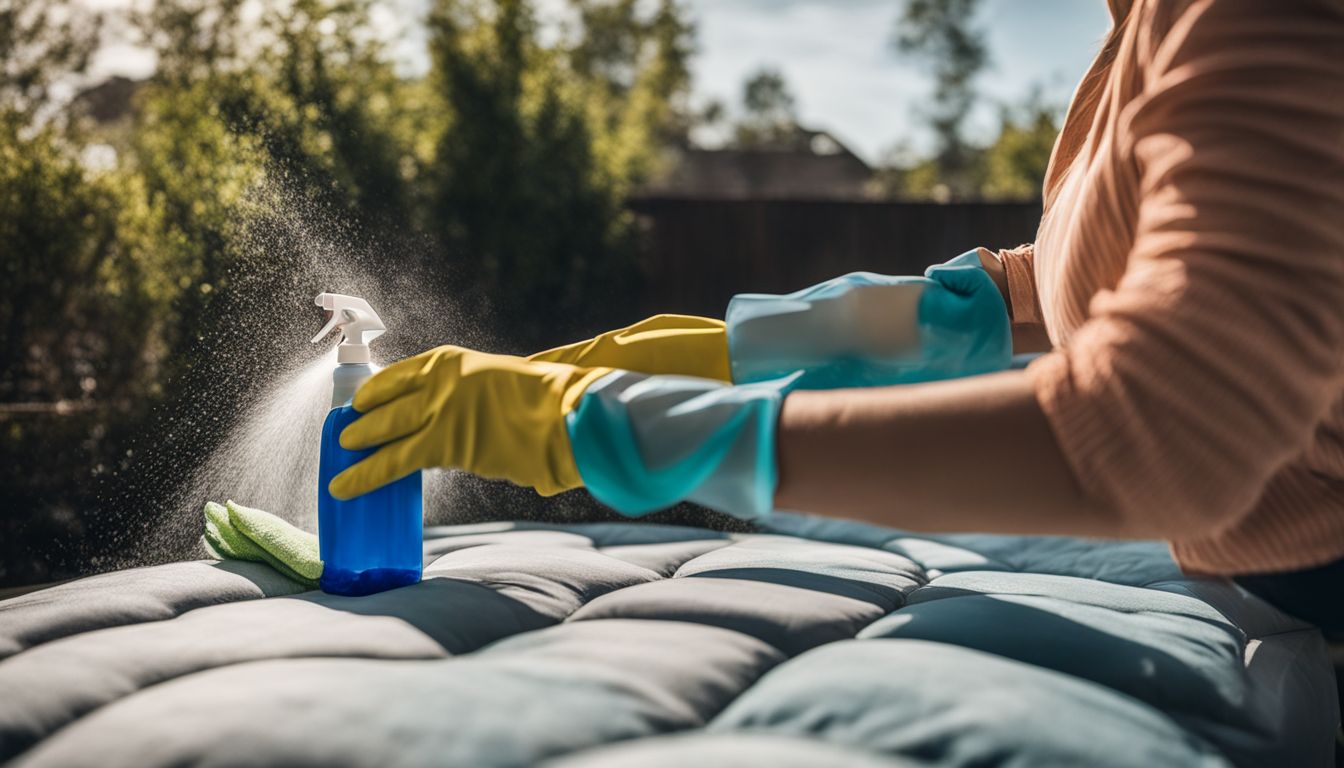
Spot Cleaning

Spot cleaning is an excellent method for cleaning baseball caps without causing any harm. By applying a small amount of cleaning solution or stain remover to specific dirty areas, you can effectively remove stains and grime without subjecting the entire hat to a full wash.

Before applying the solution, it’s crucial to test it on a small, inconspicuous area of the cap to ensure it won’t cause fabric discoloration or damage. To spot clean a baseball cap, dip it into a water mixture and gently scrub the soiled areas using a solvent-based product or shampoo with a toothbrush.

This targeted approach allows you to address problem areas while preserving the overall quality and shape of your hat.

Hand Washing

Hand washing is the recommended method for cleaning a baseball cap without causing any damage. Compared to other cleaning methods, hand washing yields cleaner results, which is especially important for vintage caps or those made from delicate materials.

By carefully washing the hat by hand, you can prevent damage and ensure that your hat remains in good condition for an extended period. It’s crucial to exercise caution when washing baseball caps to avoid any unintended consequences or the risk of ruining the hat altogether.

Drying Techniques

To properly dry a baseball cap after cleaning, there are several effective techniques to consider:

  1. Air Drying: The best way to achieve optimal results is to let the cap air dry naturally. Place it on a clean surface, such as a countertop or towel, allowing the air to circulate around it. This method helps maintain the shape and fabric of the hat.
  2. Laying Flat to Dry: Another option is to lay the cap flat on a clean towel or drying rack. Gently reshape it if necessary and leave it undisturbed until it is completely dry. This technique works well for hats with brims or structured designs.
  3. Hanging to Dry: Alternatively, you can hang the cap to dry using a clothespin or clip attached to the brim or strap. Ensure that it is hung in an area with good ventilation and away from direct sunlight.

Tips and Techniques for Hat Cleaning

Let’s review the essential materials needed for hat cleaning, proper rinsing and drying techniques, and how to effectively tackle specific stains in this comprehensive guide.

Materials Needed

To successfully clean your hats, gather the following materials:

  • Hat
  • Laundry detergent
  • Cleaning gloves
  • OxiClean alternative (or a similar product)
  • Toothbrush
  • Towel
  • Stain remover
  • Hat care products

Proper Rinsing and Drying

Achieving a thorough hat cleaning requires following the correct rinsing and drying procedures:

  1. Gently rinse the hat under cool running water to remove any dirt or debris.
  2. Employ a mild detergent or specialized hat cleaning solution to spot clean any stains on the hat.
  3. Rinse the hat thoroughly with cool water to eliminate any residue from the cleaning solution.
  4. Pat the hat gently with a towel to remove excess moisture.
  5. If necessary, reshape the hat and place it on a clean towel or drying rack in a well-ventilated area.
  6. Allow the hat to air dry completely before wearing or storing it.

Handling Specific Stains

Effectively managing specific stains on hats requires the right techniques and tips in your cleaning repertoire. One proven method is to apply a small amount of powder directly onto the stain and allow it to absorb for a few minutes before gently brushing it off. This approach helps lift and remove the stain without causing damage to the hat material.

For more persistent stains that resist spot cleaning, consider creating a potent cleaning mixture using OxiClean or another suitable detergent.

Remember, when dealing with wool hats, avoid vigorous rubbing as it may potentially damage their delicate texture. Instead, opt for gentle brushing motions when removing stains from wool hats.

Dos and Don’ts of Hat Cleaning

To keep your hats in pristine condition, it’s essential to follow these dos and don’ts when cleaning and preserving them:

Avoiding Certain Cleaning Methods

Do’s:

  • Do consult professional hat cleaning services for delicate or expensive hats, especially if you’re unsure about cleaning them yourself.

Don’ts:

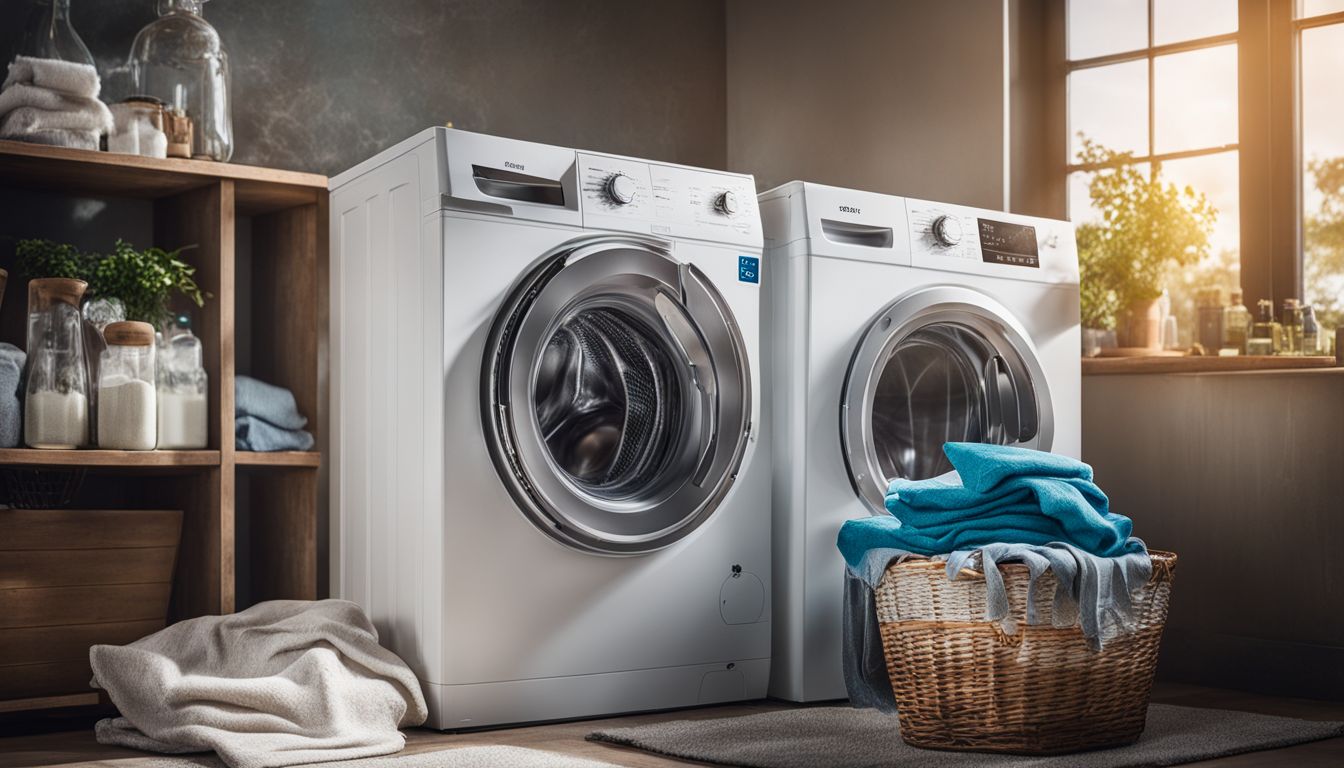
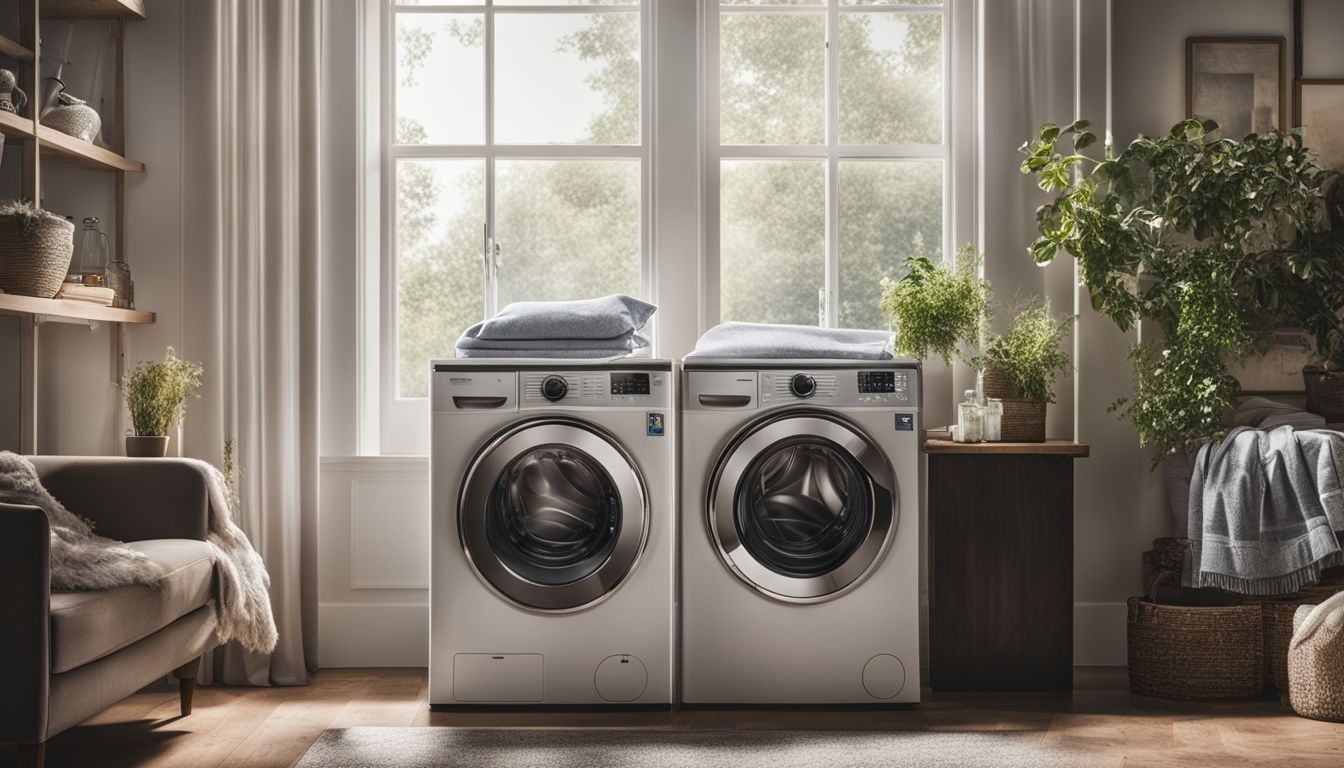
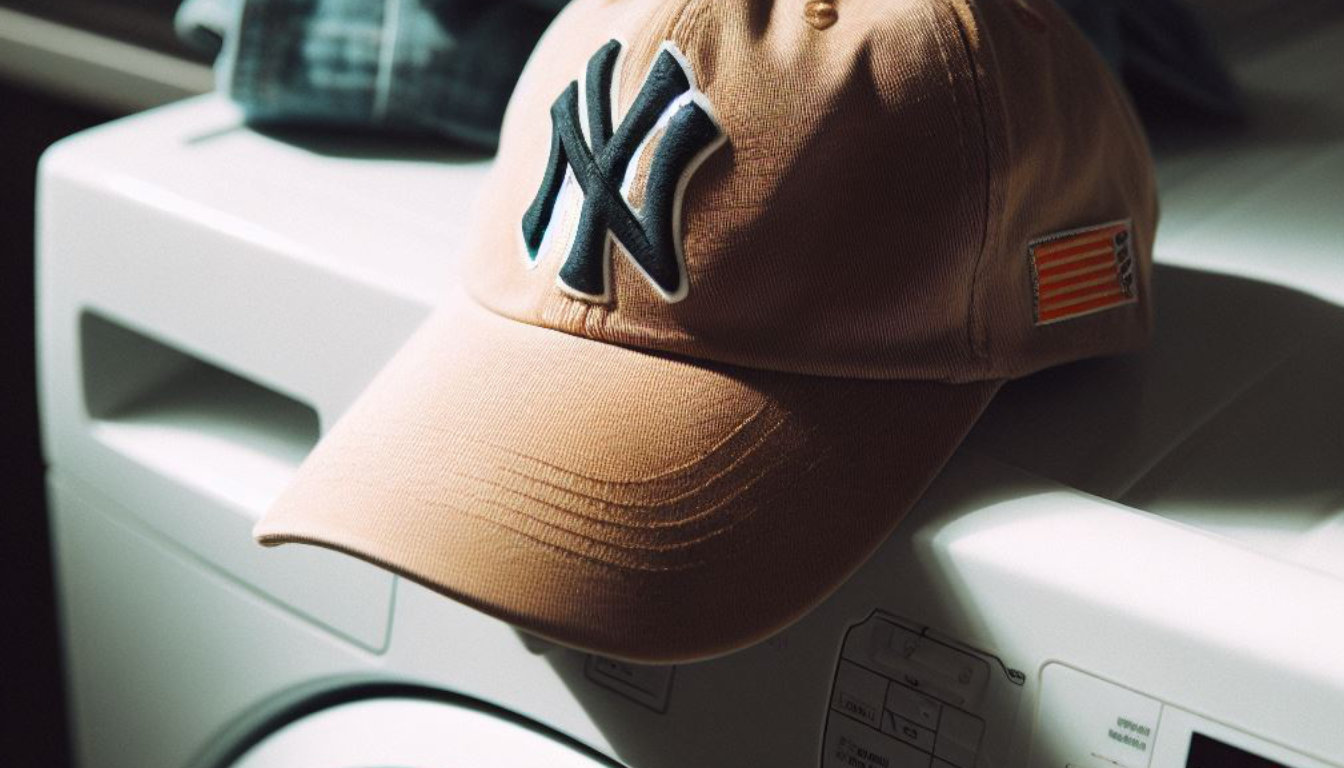
  • Don’t machine wash your hats, as it can cause damage and distort their shape.
  • Don’t use harsh chemicals or bleach when cleaning your hats, as they can cause discoloration or weaken the fabric.
  • Don’t scrub aggressively when spot cleaning your hats; instead, gently blot any stains.
  • Don’t put your hats in the dishwasher for cleaning, as the hot water and agitation can ruin their shape.
  • Don’t use a dryer to dry your hats, as heat and tumbling can alter their shape and size.

Tips for Preserving Hat Shape

Preserving the shape of your hat is crucial for maintaining its appearance:

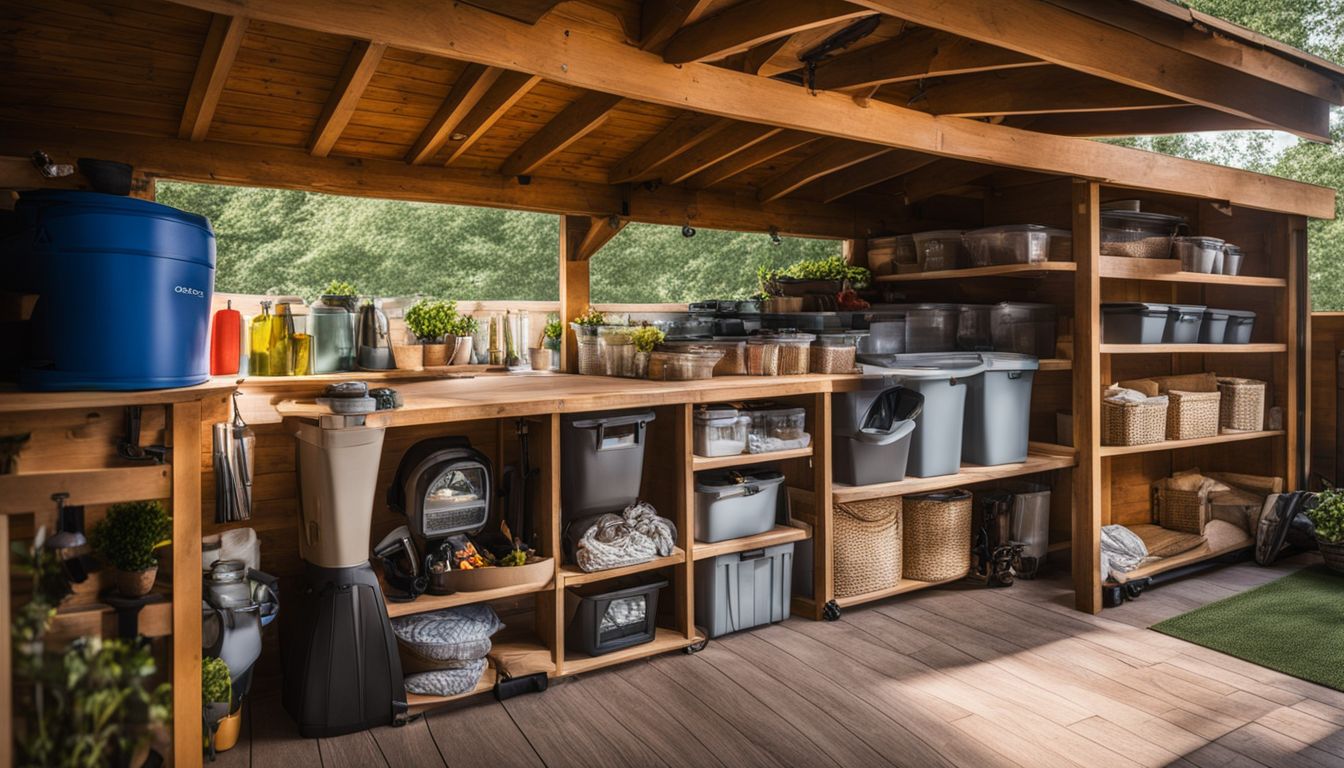
  • Store your hats in a cool, dry place to prevent them from losing their shape.
  • Use hat boxes or shelves specifically designed for hats to avoid crushing or squashing them.
  • Avoid hanging your hats on hooks or pegs, as this can cause them to stretch and lose their form.
  • If your hat becomes misshapen, use a steam iron on a low setting to gently reshape it.
  • For straw hats, use a hat stand or stuff the crown with tissue paper to maintain its shape when not in use.
  • Avoid excessive handling of your hats, as this can lead to deformation.

Professional Hat Cleaning Services

Professional hat cleaning services offer a convenient and effective solution for those looking to maintain their hats in top shape. These services ensure your hats receive the proper care and maintenance they need without risking damage or altering their shape.

With specialized equipment, techniques, and expertise, professional cleaners can effectively remove dirt, stains, and odors from all types of hats while preserving their quality. Whether you have a cherished baseball cap or a fancy fedora, turning to professionals for hat cleaning will provide peace of mind, knowing that your favorite headwear is in capable hands.

Common FAQs about hat cleaning

There are several questions that people commonly ask when it comes to hat cleaning. Some wonder about the best methods to clean their hats without causing damage, while others are curious about how often they should clean their hats, among other questions. These FAQs below can provide answers to some of the most common queries.

QuestionAnswer
Can I wash my hat in the washing machine?You can wash your hat in the washing machine as long as the brim is not made of cardboard. It’s crucial to check if the hat has a cardboard or plastic brim before washing.
Is there an alternative to washing my hat in the sink?Yes, washing a hat in a bucket or basin is a suitable alternative to washing it in the sink.
How can I maintain the shape of my hat during washing?Using a hat mold can help maintain the shape of the hat during the washing process. Treating, cleaning, and drying a hat properly is also vital to maintain its shape and quality.
Can I put my hat in the dishwasher?It’s not recommended to put your hat in the dishwasher or dryer because it may not be colorfast and could lose its shape and quality.
What is the best way to clean a baseball cap?The best way to clean a baseball cap is to skip the laundry machine and dishwasher. There are three different ways to clean baseball hats effectively without losing their shape, including spot cleaning, hand washing, and using specific drying techniques.

Conclusion

In closing, while dry cleaners may offer hat cleaning services, it is generally recommended to hand clean hats for the best results. This comprehensive guide has provided various methods and tips for safely cleaning hats at home, including spot cleaning and hand washing techniques.

By following these guidelines, you can effectively clean your hats without damaging them or compromising their shape. Keep your hats looking fresh and well-maintained with proper care and regular cleaning.

FAQs

1. Can dry cleaners clean hats?

Yes, many dry cleaners offer hat cleaning services to safely and effectively clean your hats without causing damage.

2. How often should I have my hats cleaned?

The frequency of hat cleaning depends on how frequently you wear them and the level of dirt and sweat accumulation. Generally, it’s recommended to have them professionally cleaned every 6-12 months or as needed.

3. What types of hats can be cleaned by dry cleaners?

Dry cleaners can clean a wide range of hats including wool, felt, straw, cotton, and silk hats. It’s best to check with your dry cleaner for specific hat materials they can handle.

4. Will the cleaning process shrink or damage my hats?

Professional dry cleaners are skilled in handling different fabrics and ensuring proper cleaning techniques that minimize the risk of shrinking or damaging your hats. However, it’s important to follow care instructions provided by the manufacturer when possible.

5. Are there any alternatives to professional hat cleaning?

While professional hat cleaning is recommended for delicate or expensive hats, some less delicate fabric caps may be hand washed using mild detergent in cold water following specific care instructions found on the label or inside lining if applicable.

The Ultimate Guide To Storing Patio Cushions

The Ultimate Guide To Storing Patio Cushions And Keeping Them Safe All Year Round

Fabricare Center Blog , Household

Wave farewell to faded and moldy patio cushions with our comprehensive guide. Often, people underestimate the importance of properly storing patio cushions during the off-season, which can result in premature wear and tear. But fear not! Our step-by-step guide will take you through every aspect, from cleaning your cushions effectively to selecting the ideal storage solutions and maintaining them throughout their storage period.

Stay with us because you’re just one read away from enjoying fresh and vibrant patio cushions year-round!

Key Takeaways

  • Proper cleaning practices are essential for maintaining the longevity and appearance of patio cushions.
  • When storing patio cushions indoors, consider using airtight containers, deck boxes, or clear plastic storage bins to protect them from moisture and pests.
  • Folding techniques can help maximize storage space and prevent damage to different cushion sizes.
  • Packaging cushions in plastic storage totes with a tight seal, using protective covers or fabric bags, and avoiding direct contact with the ground can help prevent dirt, dust, and water damage during storage.

Proper Cleaning and Preparation of Patio Cushions

Proper Cleaning and Preparation of Patio Cushions

To ensure the longevity of your patio cushions, it is essential to clean them properly before storing them away.

How to clean fabric cushions

Cleaning fabric patio cushions requires a step-by-step approach to ensure optimal results. First, you should consult the manufacturer’s washing instructions. Next, remove any excess debris by vacuuming the cushions thoroughly. If your cushion covers are removable, hand wash or machine-wash them based on the manufacturer’s guidance.

Removing excess moisture

Soaking up excess moisture from your patio cushions is a key part of the cleaning process. By using towels, you can pat down and absorb as much water as possible. This initial drying technique plays a crucial role in preventing future damage to your cushions.

After dabbing them with towels, place the cushions in an airy space or under direct sunlight for thorough drying. Sunlight not only ensures complete moisture removal but also helps kill any lingering bacteria.

However, be mindful to avoid prolonged exposure as it could lead to sun damage over time.

Importance of proper cleaning practices

Proper cleaning practices play a pivotal role in keeping your patio cushions in top shape. This includes regularly shaking out the cushions to eliminate debris, which helps reduce stains over time.

If greasy spots show up, pre-treating your outdoor cushions with a degreaser and gently rubbing it is highly recommended.

Fabric choice is another element that impacts proper cleaning. Not all fabrics are equal when it comes to embracing the outdoors! With suitable fabric for outdoor cushions, thorough wash-and-rinse routines become easier and yield better results.

Finally, ensure your outdoor cushions air-dry completely before replacing their covers – this step prevents trapping moisture inside, warding off mold and mildew dangers!

Choosing the Right Storage Area and Containers

Choosing the Right Storage Area and Containers for Patio Cushions

When it comes to storing your patio cushions, selecting the optimal storage area and containers is paramount to ensure their year-round safety and longevity.

Indoor Storage Options

Patio cushions require proper storage to shield them from potential damage during the off-season. Here are some indoor storage solutions:

  • Airtight Containers: Utilize airtight containers for indoor patio cushion storage. These containers effectively ward off moisture and pests, safeguarding your cushions.
  • Deck Boxes: If you possess sufficient space, consider employing weatherproof deck boxes as storage for your patio cushions. They can accommodate multiple cushions while providing protection.
  • Trash Bags: Large, heavy-duty trash bags serve as a temporary storage option for patio cushions. Ensure a tight seal to prevent dust and moisture infiltration.
  • Clear Plastic Storage Bins: Opt for sturdy, waterproof clear plastic bins. Their transparency allows you to identify contents without opening them, offering enhanced protection.
  • Heavy-Duty Garage Totes: Garage totes with reinforced bottoms are ideal for indoor patio cushion storage. They offer durability and moisture resistance.
  • Waterproof Storage Options: Seek out waterproof storage bags or cases specifically designed for outdoor furniture cushions. These ensure maximum protection against water damage.

Airtight containers, deck boxes, and trash bags are recommended choices for winter indoor storage of patio cushions. Meanwhile, clear plastic storage bins, heavy-duty garage totes, and specialized waterproof storage options are among the top recommendations for safeguarding outdoor cushions indoors.

Outdoor Storage Options

When considering outdoor storage, prioritize covered storage areas or units that shield against UV rays. Here’s how to protect your outdoor cushions effectively:

  • Solid and Secure Storage Shed: Invest in a sturdy and secure storage shed to safeguard outdoor cushions from the elements. This will help maintain their condition over time.
  • Outdoor Furniture Storage: Employ outdoor furniture storage options like bins, boxes, and totes to keep patio cushions clean and dry.
  • Upper Shelves: Store outdoor cushions on elevated shelves to extend their lifespan by preventing contact with damp surfaces.
  • Fabric Storage Bags: Use fabric storage bags to shield outdoor cushions from potential damage.
  • Creative Solutions: Explore inventive storage options, such as mouse-proof storage containers or leaving cushions on covered outdoor furniture.

By implementing these storage suggestions, you can ensure the durability and longevity of your patio cushions, whether indoors or outdoors, throughout the seasons.

Techniques for Folding and Packaging Cushions

To maximize storage space and safeguard your patio cushions, it’s essential to master the art of proper folding. Here are various folding techniques tailored to different cushion sizes:

  1. Square or Rectangular Cushions: Begin by folding these cushions in half lengthwise, bringing the top edge down to meet the bottom edge. Next, fold them in half again horizontally, aligning the left side with the right side.
  2. Round Cushions: Start by folding the cushion in half to create a semi-circular shape. Then, fold it in half once more, joining the straight edges together.
  3. Irregularly Shaped Cushions: When dealing with oddly shaped cushions, strive to maintain their original form as closely as possible. This may entail folding them into thirds or quarters, depending on their unique contours.

Effective Patio Cushion Packaging Tips

Ensuring the safety of your patio cushions during storage involves more than just folding techniques. Here are some valuable tips to prevent any damage:

  1. Choose Plastic Storage Totes: Opt for plastic storage totes equipped with a secure seal to shield your patio cushions effectively.
  2. Mindful Folding: Exercise caution while folding cushions to prevent unsightly creases and potential damage during storage.
  3. Protective Covers: Place your cushions inside protective covers or fabric bags to safeguard them from dirt and dust.
  4. Elevated Storage: Avoid storing cushions directly on the ground to mitigate the risk of water and dirt damage.
  5. Innovative Storage Solutions: Consider alternatives such as mouse-proof or waterproof storage options to prolong the lifespan of your cushions.
  6. Ideal Storage Conditions: Keep your cushions in a cool, dry area away from direct sunlight to prevent sun damage.
  7. Regular Moisture Checks: Routinely inspect the storage area for any signs of moisture and address any issues promptly.
  8. Clear Labeling: Clearly label storage containers to facilitate easy retrieval of specific cushions when needed.
  9. Avoid Overpacking: Refrain from overloading storage containers to maintain cushion shape and prevent compression damage.
  10. Pest Vigilance: Periodically inspect stored cushions for signs of pest infestation and take necessary measures to prevent damage.

Remember, proper packaging plays a crucial role in protecting your patio cushions during storage. Utilizing plastic storage totes with secure seals will safeguard them from dirt, dust, and pests. By meticulously folding your cushions and employing these tips, you can ensure their safety throughout the year.

Tips for Maintaining Patio Cushions During Storage

Regularly Monitor Moisture Levels

Frequent moisture checks are essential when storing patio cushions to safeguard against damage and ensure their durability. Unaddressed moisture can lead to unsightly stains, mold, and mildew on the cushions.

Action Steps:

  • Promptly remove any water accumulation.
  • Thoroughly clean and dry the cushions before storing them to prevent dirt and moisture from causing stains or damage.
  • By consistently inspecting for moisture and promptly addressing it, you can ensure your cushions remain in optimal condition year-round.

Pest Prevention Measures

To shield your patio cushions from pests during storage, adopt the following pest prevention strategies:

Action Steps:

  • Store cushions in airtight containers: Utilize plastic storage totes or vacuum-sealed bags to keep pests out and maintain cushion quality.
  • Maintain a clean storage area: Regularly clean the storage space to eliminate food crumbs or debris that may attract insects or rodents.
  • Implement natural deterrents: Consider using cedar chips, lavender sachets, or dried citrus peels to discourage pests from approaching your cushions.
  • Avoid proximity to food sources: Keep stored cushions away from areas with food, as this can attract pests and elevate the risk of damage.
  • Monitor for infestation signs: Routinely inspect stored cushions for any indications of pest activity, such as droppings or fabric damage. If signs are detected, take immediate action to prevent further harm.
  • Elevate the storage location: Position your cushion containers on shelves, racks, or pallets to thwart pests from accessing them at ground level.

Tips for Prolonging Cushion Lifespan During Storage

To extend the life of your cushions while in storage, consider these suggestions:

Action Steps:

  • Thoroughly clean and dry your outdoor cushions before storing them.
  • Wrap the cushions in a protective layer or place them in an airtight fabric bag to prevent the accumulation of dirt and debris.
  • Utilize a protective cover when storing the cushions to shield them from dust, moisture, and pests.
  • Store the cushions on elevated surfaces or upper shelves to mitigate the risk of damage from flooding or leaks.
  • Periodically clean and shake out the cushions while in storage to eliminate any accumulated dust or debris.

By following these comprehensive guidelines, you can ensure your cushions remain in pristine condition, ready for use whenever needed.

Conclusion

Maintaining the longevity and vibrancy of your patio cushions year-round is achievable with the right care and storage strategies. Proper cleaning practices, including following manufacturer guidelines, moisture removal, and fabric choice, set the foundation for preserving their appearance and preventing issues like mold. Whether you opt for indoor or outdoor storage, selecting the right containers, such as airtight options or deck boxes, and employing protective covers ensures your cushions stay safe from moisture and pests. Mastering folding techniques, using plastic storage totes, and conducting regular moisture checks further safeguard your cushions.

Additionally, don’t overlook pest prevention measures, like keeping a clean storage area and utilizing natural deterrents. By diligently following these guidelines, including thorough cleaning, protective wrapping, and elevated storage, you’ll extend the lifespan of your patio cushions, ensuring they remain in pristine condition and ready for use whenever you need them. Say goodbye to faded and moldy cushions, and welcome years of comfort and style in your outdoor sanctuary.

FAQs

1. How should I clean my patio cushions before storing them?

Before storing your patio cushions, you can clean them by spot cleaning any stains with a mild detergent and water solution or by using a fabric cleaner recommended for outdoor use.

2. Can I leave my patio cushions outside all year round?

It is not recommended to leave your patio cushions outside all year round as they may be exposed to harsh weather conditions that can cause damage. It’s best to store them in a safe place when not in use.

3. What is the best way to store patio cushions during the off-season?

The best way to store patio cushions during the off-season is to keep them in a dry and well-ventilated area, such as a storage shed or garage. Make sure they are protected from dust and pests by using covers or plastic bags.

4. Should I remove the filling from my patio cushions before storing them?

If possible, it’s best to remove the filling from your patio cushions before storing them as this helps prevent mold and mildew growth. Place the cushion covers and foam inserts separately in storage containers.

5. How often should I check on my stored patio cushions?

It is recommended to check on your stored patio cushions periodically, especially if they are stored for an extended period of time, to ensure there is no moisture buildup or signs of damage that may require immediate attention.

How Much Vinegar Should You Use In Your Washing Machine? A Complete Guide

How Much Vinegar Should You Use In Your Washing Machine? A Complete Guide

Fabricare Center Blog , Laundry

Are you frustrated with your washing machine not having that fresh, clean scent? You’re not alone; this is a common problem that many people encounter. Luckily, in this article, we’ll demonstrate how the simple addition of vinegar can make your cleaning routine easier and leave your washer sparkling clean. So, stay with us to discover the magic of vinegar and how it can transform your washing machine!

Key Takeaways

  • Vinegar is a natural cleaning agent that effectively removes odors and stains from your washing machine.
  • It is safe for both the environment and your machine, as it does not cause any harm or damage.
  • The recommended amount of vinegar to use in a top load machine depends on the load size, ranging from 1/2 to 4 cups.
  • For front load machines, dilute one cup of vinegar with water and use hot water setting for optimal cleaning.

The Benefits of Using Vinegar to Clean a Washing Machine

Vinegar serves as a natural cleaning agent that effectively eliminates odors and stains, making it safe for both the environment and your washing machine.

Vinegar as a natural cleaning agent

Vinegar stands as a powerful, eco-friendly cleaning agent that can revitalize your washing machine. It’s not just for salads and pickles; this humble household item has the potential to deep-clean and deodorize your laundry appliances without causing environmental harm.

Thanks to its natural acidic properties, vinegar excels in cutting through stubborn stains and unpleasant odors, leaving your washing machine fresher than ever before. Moreover, it ensures proper water circulation by preventing clogs in the system.

While regular use helps keep your appliances spotless, caution is essential to avoid damage to rubber parts or counteracting effects when mixed with other cleaning agents. So next time you plan for a thorough cleanup of your washer, consider trading harsh chemicals with the versatile power of vinegar!

Effectiveness in removing odors and stains

Vinegar proves to be a powerhouse when it comes to tackling odors and stains in laundry. This naturally sourced, chemical-free alternative works wonders on lingering smells and stubborn marks that refuse to budge.

Because of its acidic properties, vinegar breaks down the bonds holding the stain or odor molecules together, making them easier to wash away.

Your clothes can experience a deep cleanse without any harsh, synthetic chemicals playing part. Thanks to vinegar’s ability for whitening and brightening fabrics, your whites stay white and colors remain vibrant.

It targets mildew effectively which often contributes greatly towards unpleasant clothing odors sometimes left behind even after washing. With vinegar as part of your laundry routine, enjoy fresh-smelling and stain-free clothes every time you open your washing machine.

Safe for the environment and your machine

Vinegar stands as an eco-friendly solution to keep your washing machine sparkling clean. Unlike harsh chemical cleaners, vinegar is a nontoxic cleaning option that poses no harm to our environment.

The grime, dirt, and mold that accumulates in your machine find vinegar a formidable foe. Distilled white vinegar’s safety for use extends beyond just being environmentally friendly; it also ensures no harm comes to your washing machine during the cleaning process.

Diluted with water to about 5% acidity, this natural cleaner gently but effectively eliminates unwelcome buildup by breaking down residues without damaging delicate parts of your appliance or causing discoloration.

Using these safe and effective cleaning techniques promises not only a cleaner wash but also prolongs the lifetime of your equipment – all while keeping our planet in mind.

How Much Vinegar to Use in Top Load Washing Machines

To use vinegar in a top load washing machine, start by selecting the desired load size.

Step-by-step guide for using vinegar in a top load machine

Here’s a step-by-step guide on how to use vinegar in a top load washing machine:

  1. Measure the vinegar: Depending on the size of your load, pour 1/2 to 1 cup of white vinegar into a measuring cup.
  2. Add the vinegar: Open the lid of your top load machine and locate the detergent dispenser or fabric softener dispenser. Pour the measured vinegar directly into this dispenser.
  3. Start the cycle: Close the lid of your washing machine and select a regular or normal cycle with hot water.
  4. Run the cycle: Let your washing machine complete its cycle, allowing the vinegar to work its magic.
  5. Wipe down: Once the cycle is finished, open the lid and use a clean cloth or sponge to wipe down any remaining residue or grime in the drum and around the edges.
  6. Rinse (optional): If you want to ensure there’s no lingering smell of vinegar, you can run an extra rinse cycle with plain water after using vinegar.

Recommended measurements for different top load machine load sizes

When using vinegar to clean a top load washing machine, the standard measurement is four cups of vinegar. It’s always advised to use a measuring cup for accuracy. However, the volume might vary slightly depending on the size of the machine. Below is a simple guide to help you determine the right quantity of vinegar to use for different load sizes.

Machine Load SizeRecommended Vinegar Quantity
Small (up to 3.5 cubic feet)2-3 cups of vinegar
Medium (3.6 to 5.1 cubic feet)3-4 cups of vinegar
Large (5.2 to 6.2 cubic feet)4-5 cups of vinegar
Extra Large (6.3 cubic feet and above)5-6 cups of vinegar

Using these guidelines, you can determine the right amount of vinegar to use for your top load machine size. Remember, using vinegar in the right quantity ensures effective cleaning and longevity of your machine.

How Much Vinegar to Use in Front Load Washing Machines

To determine the appropriate amount of vinegar to use in a front load washing machine, follow a step-by-step guide and recommended measurements based on different load sizes.

Step-by-step guide for using vinegar in a front load machine

Using vinegar in a front load machine is an effective way to clean and maintain it. Here’s a step-by-step guide on how to do it:

  1. Measure one cup of distilled white vinegar.
  2. Pour the vinegar into the detergent dispenser or directly into the drum.
  3. Close the door and select the hottest water setting.
  4. Start a regular wash cycle without any laundry.
  5. Let the machine fill with water and agitate for a few minutes to distribute the vinegar.
  6. Pause the cycle and let the vinegar soak inside the machine for about an hour.
  7. After an hour, resume the cycle and let it complete as usual.
  8. Once finished, wipe down the inside of the machine, including seals and gaskets, with a damp cloth.
  9. Leave the door open for a while after cleaning to allow air circulation.

Recommended measurements for different front load machine load sizes

The recommended vinegar measurements may vary depending on the size of front load washing machine you have. Keep in mind that you should dilute the vinegar with water in a ratio of 1 part vinegar to 2 parts water to effectively clean your machine without risking any damage to your clothes or the machine itself.

Machine SizeVinegar AmountWater AmountCycle Setting
Small1/2 Cup1 CupHot, Largest Load
Medium1 Cup2 CupsHot, Largest Load
Large2 Cups4 CupsHot, Largest Load

Remember, for the most effective cleaning, always add the vinegar to an empty washer and run it on the largest load size and the hottest water setting.

Frequently Asked Questions About Using Vinegar in Washing Machines

Can vinegar damage the washing machine?

Can vinegar damage the machine?

Using vinegar undiluted in your washing machine can potentially cause damage to the appliance. The acidity of vinegar can lead to corrosion and harm the rubber parts of the machine, which may result in leaks.

It’s important to avoid overdoing the use of vinegar as it can have a negative impact on your washer. While vinegar can be used to clean clothes effectively, excessive use should be avoided to prevent any potential damage to your washing machine.

Can vinegar be used with laundry detergent?

Vinegar can definitely be used with laundry detergent as a powerful cleaning combination. By adding vinegar to your laundry, you can remove tough stains, eliminate odors, and even soften your clothes.

It’s a safe and effective way to boost the cleaning power of your detergent while also being eco-friendly. So go ahead and add some vinegar to your next load of laundry for cleaner, fresher-smelling clothes.

Do you need to rinse after using vinegar?

After using vinegar in your washing machine, it is not necessary to do an additional rinse. Vinegar is a natural cleaning agent that helps remove odors and stains from your clothes and the machine itself.

It is safe for both your clothes and the environment. Simply follow the recommended measurements and add it to your laundry during the appropriate cycle. By using vinegar in moderation, you can prevent any potential damage to your clothes or washing machine while enjoying its benefits as a cleaning agent.

Tips for maximizing the effectiveness of vinegar cleaning

To make the most of vinegar’s cleaning power, consider these tips:

  1. Use white vinegar: White vinegar is the most effective type of vinegar for cleaning purposes. Stick to this variety for the best results.
  2. Mix it with water: Diluting vinegar with water can help prevent any potential damage to your clothes or washing machine. A common ratio is one part vinegar to four parts water.
  3. Pre-treat stains: Before adding your clothes to the washing machine, pre-treat any stubborn stains with a mixture of vinegar and water. Let it sit for a few minutes before starting the wash cycle.
  4. Add it during the rinse cycle: Rather than adding vinegar directly into the washer drum, pour it into the detergent dispenser during the rinse cycle. This allows it to mix evenly with the water and thoroughly clean your clothes.
  5. Don’t mix it with bleach: While both are effective cleaners, mixing vinegar and bleach together can release harmful fumes. Avoid using them together to ensure your safety.
  6. Regular maintenance: To keep your washing machine in top shape, run a cleaning cycle once a month using only hot water and white vinegar. This helps remove any buildup or residue that may affect its performance.

Conclusion

To conclude, using vinegar to clean your washing machine is an easy and effective way to maintain its freshness and performance. Whether you have a top load or front load machine, following the recommended measurements will ensure optimal cleaning results.

With vinegar’s natural cleaning properties and eco-friendly benefits, it’s a smart choice for keeping your laundry routine fresh and environmentally conscious. So go ahead, give vinegar a try in your washing machine – you won’t be disappointed!

FAQs

1. How much vinegar should I use in my washing machine?

For a regular-sized load, you can use about 1/2 to 1 cup of vinegar as a natural fabric softener and odor eliminator.

2. Can I mix vinegar with detergent in the washing machine?

Yes, you can mix vinegar with detergent in your washing machine to enhance the cleaning power of both substances.

3. Is it safe to use vinegar in all types of washing machines?

Yes, vinegar is safe to use in all types of washing machines including top-loaders and front-loaders.

4. Can vinegar help remove stains from clothes?

Vinegar can be effective at removing certain stains such as sweat or deodorant marks when used along with other stain-fighting techniques.

5. Will using vinegar in my washing machine leave a strong smell on my clothes?

No, using vinegar in your washing machine will not leave a strong smell on your clothes once they are dry. Any residual scent from the vinegar will dissipate during the wash cycle and drying process.

How To Clean Patio Cushions With Mildew: A Complete Guide

How To Clean Patio Cushions With Mildew: A Complete Guide

Fabricare Center Blog

Dealing with mildew on your patio cushions can transform your once-inviting outdoor haven into an unpleasant, malodorous problem. It’s important to note that mildew isn’t just a matter of appearance; it can also jeopardize the durability of your cherished cushions. In this guide, we’ll provide you with straightforward steps on how to clean patio cushions with mildew using readily available household items such as vinegar, bleach, and borax. Are you ready to reclaim the pristine condition of your cushions? Let’s get started on learning how to clean patio cushions with mildew!

Key Takeaways

  • Vacuum the patio cushions to remove loose dirt, debris, and mildew spores.
  • Remove cushion cases and inspect for visible mildew spots before washing.
  • Wash the cushions with a cleaning solution of bleach or borax to remove mold and mildew stains.
  • Rinse the cushions with a garden hose to remove any remaining cleaning solution.
  • Dry the patio cushions completely in a well – ventilated area to prevent mold growth.
  • Spray the cushions with a fabric protector to keep them cleaner for longer and protect against future stains and water damage.
  • Prevent mold and mildew on outdoor cushions by storing them properly, regularly cleaning them, using protective covers, and avoiding excessive moisture.


How to Clean Patio Cushions with Mildew: A Step-by-Step Guide

Patio cushions can easily fall victim to mildew and grime due to their exposure to the elements. To restore their freshness and cleanliness, follow this step-by-step guide on how to clean patio cushions with mildew:


1. Vacuum the Patio Cushions

Outdoor cushions are constantly exposed to harsh weather, pollen, dirt, mildew, and bird droppings. The first crucial step in cleaning patio cushions with mildew is to remove all loose debris before applying any cleaning solutions. Here’s how:

  • Get your vacuum cleaner ready, as it’s an essential tool for this task.
  • Gently move the vacuum over each cushion to remove surface dust and grime.
  • Pay extra attention to corners and crevices where dirt tends to accumulate.
  • Ensure you vacuum both sides of the cushions for a thorough cleanup.
  • Make sure your vacuum cleaner has an empty canister or fresh bag to prevent it from spreading dirt back onto your clean patio area.


2. Remove the Cushion Cases

Begin the cleaning process by removing the cushion cases from the patio cushions. Follow these steps:

  • Unzip each case carefully to avoid any damage.
  • Ensure all cushion inserts are removed and kept aside safely.
  • Inspect each case for visible mildew spots before proceeding.
  • Dry brush any visible mold or mildew off the cases using a nylon brush.
  • Prepare for washing by turning each case inside out, allowing for thorough cleaning.


3. Wash the Cushions with a Cleaning Solution

To effectively eliminate mildew from your patio cushions, it’s necessary to wash them with an appropriate cleaning solution. Here are some solutions you can consider:

  • Prepare a homemade cleaning solution by mixing 1 tablespoon of bleach with 1 pint of water. This solution is effective for removing mildew stains.
  • Another cleaning option involves using common household items: 1 teaspoon mild dish soap, 1 teaspoon borax, and 1 quart of water.
  • For routine cleaning, use a simple solution comprising 1/4 cup mild soap per gallon of lukewarm water. Brush off any loose dirt before applying the solution.
  • Consider the Borax Method for quick and easy removal of mold and mildew from outdoor cushions.
  • Combine 1/4 cup distilled white vinegar and 4 cups of warm water for an effective cleaning solution. Vacuum the surface of the cushions before spraying this concoction.


4. Rinse the Cushions with a Garden Hose

To ensure a thorough clean and remove any remaining mildew, rinse the cushions with a garden hose. This step is crucial in removing the cleaning solution and ensuring that your patio cushions are fresh and mold-free. Use high pressure to effectively wash away any dirt or residue.


5. Dry the Patio Cushions Completely

To ensure that your patio cushions are free from mildew, it is important to dry them completely. Here are some tips to help you achieve this:

  • Place the washed cushions on a clean, dry surface.
  • Use a towel to absorb as much water as possible from the cushions.
  • Flip the cushions over and repeat the process on the other side.
  • Leave the cushions in a well-ventilated area to air dry completely.
  • Ensure that both sides of the cushions are exposed to air for thorough drying.


6. Spray Cushions with a Fabric Protector

Extend the life of your patio cushions and keep them looking cleaner for longer by applying a fabric protector. You can also consider using a water sealer before applying the fabric protector for added protection against color fading and water damage. Using a fabric protector not only maintains the condition of your cushions but also makes them easier to clean in the future.

By following these steps, your patio cushions will be refreshed and free from mildew, ensuring they remain a comfortable and inviting addition to your outdoor space.


How to Prevent Mold and Mildew on Outdoor Cushions

How to Prevent Mold and Mildew on Outdoor Cushions

Preventing mold and mildew on outdoor cushions is essential for maintaining their longevity and ensuring your outdoor space remains inviting. Follow these steps to keep your cushions clean and fresh:


Proper Storage:

  • Store cushions in a dry, well-ventilated area.
  • Keep them away from damp or humid environments.
  • Avoid direct sunlight to prevent fading.
  • Place cushions in sealed bags or containers to shield them from dust and moisture.
  • Ensure cushions are completely dry before storing to prevent mold growth.
  • Consider using a dehumidifier or moisture-absorbing products in the storage area.


Regular Cleaning and Maintenance:

  • Vacuum cushions regularly to remove dirt and debris.
  • Remove cushion covers and wash them following the manufacturer’s instructions.
  • Use a cleaning solution (mild soap and warm water) to gently scrub the cushions.
  • Rinse cushions thoroughly with a garden hose to remove all soap residue.
  • Ensure the patio cushions are completely dry before placing them back on your furniture.
  • Consider applying a fabric protector to add an extra layer of protection.


Using a Protective Cover:

  • Protect your outdoor cushions by using a waterproof cover.
  • A cover shields cushions from moisture, preventing mold and mildew growth.
  • It also blocks harmful UV rays, preserving color and durability.
  • Keeps debris like dust, pollen, and leaves off your cushions, reducing the need for frequent cleaning.
  • Covers are easy to clean, extending the life of your cushions.


Avoiding Excessive Moisture:

  • Store cushions in a dry area when not in use.
  • Don’t leave cushions out during rainstorms or heavy dew.
  • Utilize waterproof covers to protect cushions from dampness.
  • If cushions get wet, remove them from their covers and allow them to air dry completely before storage.
  • Consider using a dehumidifier or moisture absorber in storage areas.


Final Tips and Thoughts for Cleaning Patio Cushions with Mildew

When it comes to cleaning patio cushions afflicted with mildew, there are some essential tips and considerations to bear in mind. First and foremost, always adhere to the manufacturer’s guidelines for cleaning and maintenance. This precaution ensures that you won’t inadvertently harm the fabric or any specialized coatings on the cushions.

Secondly, should you encounter stubborn stains or mildew in hard-to-clean spots, contemplate employing a more potent cleaning solution or targeted spot treatment designed explicitly for outdoor fabrics.

Lastly, once the cushions have undergone thorough cleaning and drying, it is advisable to apply a fabric protector spray. This step serves to prevent future staining and simplifies the task of cleaning the cushions down the line.

In conclusion, by heeding these final tips and considerations during the cleaning of patio cushions beset by mildew, you can guarantee that your outdoor space remains fresh and inviting throughout the entire season. By practicing proper maintenance and routine cleaning, you can extend the lifespan of your patio cushions while ensuring they always look their best. Don’t let mildew tarnish your outdoor seating experience—take proactive measures today!


Conclusion

In summary, this guide equips you with the know-how to tackle mildew on your patio cushions effectively. Vacuum, inspect, wash, rinse, and thoroughly dry your cushions to restore their freshness. Don’t forget to use a fabric protector for added longevity.

Preventing mildew is crucial: store cushions properly, clean regularly, use protective covers, and avoid excess moisture. Follow manufacturer guidelines, try targeted treatments for tough stains, and always apply a fabric protector.

By following these steps, your outdoor space will remain inviting and comfortable. Don’t let mildew disrupt your outdoor experience. Act now to enjoy your revitalized patio cushions season after season.


FAQs

1. Can I clean patio cushions with mildew using regular household cleaners?

No, regular household cleaners may not effectively remove mildew from patio cushions. It’s best to use a cleaner specifically designed for mold and mildew removal.

2. How often should I clean my patio cushions to prevent the growth of mildew?

To prevent the growth of mildew, it is recommended to clean your patio cushions at least once every few months or whenever you notice signs of mold or mildew.

3. Can I machine wash my patio cushions with mildew?

It depends on the care instructions provided by the manufacturer. Some patio cushions can be machine washed, but others may require hand washing or professional cleaning. Check the label or contact the manufacturer for specific recommendations.

4. Are there any natural remedies that can help remove mildew from patio cushions?

Yes, solutions like vinegar, hydrogen peroxide, or a mixture of water and baking soda can be effective in removing mildew from patio cushions. However, always test these remedies on a small hidden area before applying them to the entire cushion.

5.How do I store my patio cushions properly after they have been cleaned?

After cleaning your patio cushions and ensuring they are completely dry, store them in a cool and dry place away from direct sunlight to prevent future mold and mildew growth.

How To Drop Off Clothes At The Dry Cleaners A Step-by-Step Guide

How To Drop Off Clothes At The Dry Cleaners: A Step-by-Step Guide

Dry Cleaning , Fabricare Center Blog

Have you ever found it challenging to understand how to drop off clothes at your local dry cleaners? You’re not alone in feeling a bit overwhelmed by the intricacies of professional cleaning services. Fret not; our step-by-step guide will demystify the process, making it as simple as a leisurely stroll in the park. Ready to master the art of dropping off your garments for premium care? Let’s dive right in and learn how to drop off clothes at the dry cleaners with ease!

Key Takeaways

  • Always check your clothes for any personal items before taking them to the dry cleaners. This helps prevent losing important items and makes the cleaning process smoother.
  • Talk to the staff at the dry cleaner’s about any stains or specific care instructions. This ensures your clothes get properly treated and keep their high quality.
  • Don’t forget to pick up a receipt when you drop off your clothes. This will help you track what items you left and make picking up easier later on.
  • Regularly getting professional cleaning for delicate or heavily stained clothes can extend their lifespan, making it worth investing time in finding a reliable dry cleaner near you!

Step-by-Step Guide on How to Drop Off Clothes at the Dry Cleaners

Taking care of your garments with a professional dry cleaning service is essential for maintaining their quality and cleanliness. Here’s a comprehensive guide on how to successfully drop off your clothes at the dry cleaners:

Step 1: Gather Your Clothes and Check Pockets

To kickstart the dry cleaning process, follow these essential steps:

  1. Collect all the garments that require dry cleaning.
  2. Take a moment to meticulously inspect and empty the pockets of each garment, ensuring no valuables or debris are left behind.
  3. This attention to detail is crucial in preventing any lost or damaged items during the cleaning process.
  4. Prioritize the quality of your clothes by not overlooking this crucial step before heading to the dry cleaners.
  5. Remember that this simple act also makes the job easier and more effective for the professional cleaners, contributing to a higher level of service quality.
  6. Standardizing this practice can save both you and the dry cleaner’s time while ensuring the overall cleanliness of your clothes.

Step 2: Drop Off Your Clothes and Check Them In

Now that your garments are ready, proceed to the second step:

  1. Select a reputable dry cleaner near you or consider one that offers free pickup and delivery services.
  2. Hand over your clothes to the counter staff for a thorough inspection, focusing on pre-existing damages or stains.
  3. If needed, communicate any specific stain spots or fabric concerns to the staff.
  4. Ensure that each piece of clothing is tagged for proper identification, which helps maintain order and prevents mix-up with other clients’ clothes.
  5. Collect a receipt that records the items you’ve dropped off, ensuring a smooth pick-up process later.

Step 3: Inspection and Stain Pre-Treatment

The third step in the dry cleaning process focuses on inspection and stain pre-treatment:

  1. The dry cleaner’s team carefully identifies any spots or stains on your garments.
  2. The type of stain determines the appropriate pre-treatment method.
  3. Tailored stain removal solutions are applied during this pre-treatment process.
  4. This step aims to effectively treat and remove stains before the actual dry cleaning process begins.
  5. Stain pre-treatment significantly enhances the success of stain removal during dry cleaning.
  6. By following this step, you ensure that stain handling receives expert attention at the dry cleaners.

Step 4: Sorting and Cleaning Process

Before the cleaning machines come into play, the dry cleaner follows these meticulous steps:

  1. A thorough inspection of each garment is conducted to identify any special cleaning requirements.
  2. A careful pocket check ensures the removal of unwanted items.
  3. Garments are sorted based on color and the manufacturer’s cleaning instructions to achieve the best cleaning results.
  4. The sorted clothes are then placed into the dry-cleaning machine.
  5. Pre-treatment or spot treatment is administered to target stubborn stains before the machine begins its work.
  6. A detailed post-spot treatment ensures that any remaining stains receive extra attention.
  7. A final check guarantees that all stains have been successfully removed.

Step 5: Second Inspection, Pressing, and Packaging

Before your garments are ready for pick-up, they undergo a thorough final preparation stage:

  1. Each garment undergoes a detailed inspection even after the cleaning process.
  2. The inspector checks for any lingering stains or damage, ensuring the highest quality control.
  3. Professional pressing techniques are employed to eliminate wrinkles, resulting in impeccable presentation.
  4. If missing buttons or loose threads are detected, immediate repairs are carried out.
  5. Once every inch of the clothing passes the professional inspection, preparations for packaging begin.
  6. Packaging provides protection against accidental dirt or spills that could damage your freshly cleaned clothes.

Tips and Best Practices for Dropping Off Clothes at the Dry Cleaners

Always check the care labels on your garments before taking them to the dry cleaner and communicate any special instructions directly with the staff. Empty all pockets of personal belongings and separate delicate or heavily stained clothing from other items. Hold onto your dry cleaning receipt as you’ll need it when picking up your cleaned clothes.

Check the Care Labels of Your Garments

Before taking your clothes to the dry cleaner, start by checking the care labels on your garments. Here’s why it’s important:

  • Care labels are attached to clothing by manufacturers or importers as required by the Care Labeling Rule.
  • These permanent tags contain crucial apparel care information and instructions.
  • A tag with a square and circle icon indicates that the item requires dry cleaning only.
  • Care labels provide guidance on how to best maintain different fabric combinations for longevity.
  • It’s crucial to read these labels to ensure proper cleaning procedures are followed when you drop off your clothes at the dry cleaners.
  • Ignoring fabric care guidelines could potentially lead to irreparable damage during the pre-spotting process, where chemical solvents, heat, or vacuum are applied to eliminate stains.

Communicate Any Special Instructions or Concerns to the Dry Cleaner

Effectively communicating any special instructions or concerns is a crucial aspect of dropping off clothes at the dry cleaner. Enhance your dry cleaning experience with these tips:

  • Clearly express specific instructions, especially for items like embellished clothing, leather, or silk garments. Your knowledge about these fabrics, combined with the dry cleaner’s expertise, can ensure your clothes receive appropriate treatment.
  • Voice any strong concerns about clothing items, especially those with sentimental value. Discuss their handling with the dry cleaner to ensure they are treated with extra care.
  • Pay attention to dry cleaning labels, as they guide the cleaner on permissible procedures for each garment. Make it a habit to check these labels and inform the cleaner of any discrepancies.
  • Reference Federal Environmental Regulations as needed, as they serve as guidelines for dry cleaners. Provide additional instructions if you believe these regulations are not being followed.
  • Consider learning more about dry cleaning by exploring resources like “10 Secrets About Dry Cleaning” from HowStuffWorks.com. This knowledge can help you provide better instructions for the care of your clothes.
  • Explore options like home dry cleaning and familiarize yourself with stain removal techniques to establish your own “do’s and don’ts” for your garments when instructing a professional cleaner.

Remove Personal Items and Valuables from Pockets

Reducing the risk of damaged or lost possessions during the dry cleaning process is as easy as ensuring pockets are empty before dropping off clothes. Follow these steps:

  • Carefully check each garment’s pockets for overlooked items, including items like paper that can survive a wash-cycle but may cause issues in a dry-cleaning machine.
  • Don’t forget to inspect hidden compartments in jackets, suit coats, or uniforms, as they may also contain surprises.
  • Be thorough when checking hoodie or jean pockets, where items like headphones or chargers might be hiding. Removing these personal belongings prevents potential damage during the cleaning process.
  • If you’re using a laundry bag for dirty clothes, exercise extra caution, as small items could easily be overlooked and lost.
  • Keep track of any valuables you find during the pocket-checking process to ensure nothing important is misplaced.

Separate Delicate or Heavily Stained Items

Separating delicate or heavily stained items is a crucial step in preparing your clothes for the dry cleaner. Follow these four essential tasks:

  • Identify delicate fabrics such as silk, wool, velvet, and other soft materials. Dry cleaning is safer for these fabrics as it doesn’t involve the use of water.
  • Isolate heavily soiled garments from lightly soiled ones to enhance laundry cycle efficiency and ensure thorough cleaning.
  • Review care instructions on each garment’s labels, as they often provide guidance on special handling or specific cleaning methods.
  • Inform the dry cleaner about any delicate fabrics, stubborn stains, or attached embellishments when you drop off your clothes to ensure proper handling.

Keep Track of Your Dry Cleaning Receipt for Pickup

Maintaining possession of your dry cleaning receipt for pickup is crucial in the dry cleaning process. Follow these steps:

  • Obtain a receipt from the dry cleaner when you check in your clothes.
  • Safely store the receipt where it won’t get lost.
  • Note down any expected pickup dates mentioned on the receipt in your calendar or planner.
  • Use the receipt to pick up your cleaned garments on the indicated date.
  • Hand over the receipt to verify and retrieve your clothing items during pickup.

Benefits of Using a Professional Dry Cleaner

Opting for a professional dry cleaner for your garments guarantees expert care and the use of specialized equipment. This choice ensures effective stain removal, extends fabric lifespan, and offers unmatched convenience. Let’s delve into these advantages further.

Expert Handling and Specialized Equipment 

Professional dry cleaners employ seasoned experts who handle your garments with meticulous care. They can identify different fabric types, treat them appropriately, and prevent potential damage during the cleaning process. Specialized equipment designed for advanced fabric care, including delicate item protection features, is used. Solvent-based cleaning machines tackle stubborn stains that traditional washing methods can’t handle. Moreover, bulky items like heavy blankets or curtains can be cleaned with ease using specialized large-item cleaning apparatuses at professional dry cleaning services. This expert handling combined with cutting-edge equipment ensures each garment receives the superior treatment it deserves, delivering unbeatable stain removal and odor elimination compared to conventional home laundry methods.

Effective Stain Removal 

Professional dry cleaners excel at eradicating stubborn stains. Years of expertise, combined with specialized equipment, ensure your clothes return free of blemishes. They employ potent dry cleaning fluids that outperform traditional home-washing methods in tackling difficult stains. The process involves treating each stain individually, focusing on its unique properties to yield the best results. From oil-based stains to resistant dirt particles, no spot can withstand professional dry cleaning techniques. Chemical solvents penetrate deep into the fabric threads, breaking down and dissolving persistent dirt or lingering odors effectively, leaving garments fresher and cleaner than ever before.

Extended Garment Lifespan 

Dry cleaning provides an effective solution for preserving clothing and extending the lifespan of garments. It utilizes specialized equipment and gentle processes to clean fabrics without causing damage or shrinkage. Stubborn dirt, stains, and oils can be effortlessly eliminated while preserving delicate cloth fibers’ integrity. Regular professional dry cleaning ensures that your cherished outfits remain fresh, well-preserved, and wearable for an extended period. This unique process shields materials from wear-and-tear associated with traditional washing methods, ultimately granting your attire greater longevity.

Convenience and Time-Saving 

Having access to professional dry cleaning and laundry services is an undeniable time-saver. Imagine no longer spending hours on washing, drying, or folding clothes; instead, you can allocate that time to other essential tasks or relaxation. Moreover, professional dry cleaners excel at tackling stubborn stains and odors that are challenging to remove using conventional methods at home. It’s not just about clothes; dry cleaners also handle large items like comforters and draperies with ease. Leveraging the wash & fold services offered by most dry cleaners elevates this convenience even further, as they ensure your clothing is clean and tidy. Dry cleaning delivery simplifies the process further, with professionals handling pickup and drop-off right from your doorstep. In short, these services significantly streamline garment maintenance in terms of efficiency and effectiveness.

Conclusion

Understanding how to drop off clothes at the dry cleaners is a simple yet crucial skill for anyone looking to maintain the quality and cleanliness of their garments. By following our step-by-step guide, you can ensure that your clothes receive the premium care they deserve. Always remember to check your pockets for personal items, communicate any specific care instructions to the dry cleaner’s staff, and keep your receipt for a smooth pick-up process. Regularly utilizing professional dry cleaning services not only enhances the lifespan of your clothes but also offers expert handling, effective stain removal, extended garment longevity, and unmatched convenience. So, the next time you’re ready to refresh your wardrobe, rest assured that you now know how to drop off clothes at the dry cleaners with ease. Enjoy the benefits of pristine, well-preserved clothing, and make your life a little more convenient in the process.

Effective Methods For Cleaning Smoke Damaged Clothes

Effective Methods For Cleaning Smoke Damaged Clothes

Fabricare Center Blog , Smoke Restoration

Fire incidents can leave your clothes with a stubborn, lingering smoke odor, making it crucial to know that ordinary household items like vinegar and baking soda can effectively remove this unpleasant smell. In our informative blog post, we will guide you through the step-by-step methods for cleaning smoke-damaged clothes without causing harm to the fabric or fading their color, ensuring your wardrobe gets a well-deserved refresh. Stay tuned as we help you restore freshness to your garments!

Key Takeaways

  • You can use common household items like vinegar and baking soda to clean smoke – damaged clothes. Mix these ingredients with warm water to create a safe cleaning solution.
  • Separate your clothes by fabric type before washing to avoid damaging them further. Don’t forget to check the labels for wash instructions.
  • Air drying your clothes outside can help remove some of the leftover smoke odors. If it’s safe for the fabric, consider sprinkling baking soda while they hang dry to absorb more smell.
  • For deep stains or delicate fabrics, you might need professional cleaning services. They have special techniques and tools that can handle severe smoke damage effectively without hurting the material’s integrity.

Cleaning Smoke Damaged Clothes

Steps for Cleaning Smoke Damaged Clothes

Begin the process by categorizing your smoke-damaged fabrics based on their durability and color. To create a homemade cleaning solution, combine vinegar, baking soda, or lemon juice with salt and warm water to make a potent stain remover.

Sorting Your Fabrics

Smoke-damaged clothes require careful handling, beginning with segregating them by fabric type. Different materials demand distinct cleaning techniques to restore their original appearance and texture. Examine the labels on your garments and group them according to their material, such as cotton, nylon, or wool.

Garments sharing similar compositions can be washed together, using a cleaning method tailored to their delicate nature. Keep in mind that some fabrics should not be cleaned at home and require professional attention to avoid further damage.

Fabrics exposed to smoke may harbor significant contaminants typically associated with fire incidents. Therefore, it’s crucial to conduct a final clearance test after washing to ensure that the textiles are not only clean but also safe to wear.

Preparing a Cleaning Solution (Vinegar + Baking Soda or Lemon Juice + Salt + Warm Water Stain Remover)

Creating a cleaning solution for smoke-damaged clothes is a straightforward process:

  1. Gather the necessary ingredients: vinegar, baking soda, lemon juice, salt, and warm water.
  2. You have two options for the cleaning solution. The first option combines vinegar and baking soda. Fill a bucket with warm water, add one cup of baking soda, and once it dissolves, include two cups of vinegar.
  3. The second cleaning solution involves lemon juice, salt, and warm water. Combine equal parts lemon juice and salt in a separate bowl, stir until it forms a paste, and then dissolve this mixture in warm water in another bucket.
  4. Depending on the severity of the smoke damage, choose the appropriate solution. If your clothes are heavily affected by smoke, opt for the vinegar and baking soda solution due to its potent odor-removing properties. For less serious damage, primarily involving surface stains without deeply penetrated odors, use the lemon juice and salt solution.
  5. These solutions can be applied directly to stained areas of the clothing before washing or added directly to the washing machine.
  6. Run your regular washing cycle after applying your homemade cleaner.

Washing the Clothes

Washing your smoke-damaged clothes is a crucial step in the cleaning process. Here’s an efficient method:

  1. Begin by segregating your clothes, grouping polyester and cotton fabrics together as they can be washed with warm water.
  2. Pour warm water into the washing machine or sink, depending on where you’re doing the washing.
  3. Add a mild detergent, such as Dawn, to the water. This combination effectively removes smoke stains from clothing.
  4. Place all your sorted clothes into the solution and wash them thoroughly.
  5. Incorporate baking soda into your washing routine, known for its odor-eliminating capabilities, it helps eliminate smoke odor from clothes.
  6. For thorough decontamination, rinse each garment with clean water after the initial wash.
  7. Consider dry cleaning certain clothes if necessary. Seek a professional cleaner certified in dealing with smoke-damaged attire for optimal results.

Airing Out the Clothes

Allowing your smoke-damaged clothes to breathe in open air is a simple yet effective step. Follow these guidelines:

  1. Find an outdoor area away from direct sunlight and harsh weather conditions.
  2. Hang the clothes to maximize air circulation around each garment.
  3. Leave them outside for at least 24 hours, allowing the natural breeze to dissipate some of the smoke odors.
  4. If a noticeable smell persists after 24 hours, consider leaving them out for another day or two.
  5. Utilize baking soda by sprinkling it over each piece of clothing while they’re hanging up; it helps absorb residual odor.

Utilizing Common Household Items (White Vinegar, Vodka, Lemon Juice, Steam, Freezer)

Effective removal of smoke stains and odors from clothes can be achieved using common kitchen ingredients and other household items. Consider these methods:

  • White Vinegar: Add one cup of vinegar to your wash cycle along with your regular detergent. It functions as a natural deodorizer and stain remover.
  • Vodka: Similar to vinegar, vodka possesses deodorizing properties. Spray vodka onto the stained areas of your clothes before washing them.
  • Lemon Juice: Create a paste using lemon juice and salt to treat smoke stains. Apply it to the stains, let it sit for 15 minutes, and then rinse before washing.
  • Steam: Steaming garments loosens embedded smoke particles and helps dissipate the odor. Consider steam-ironing or hanging the clothes in the bathroom while taking a hot shower.
  • Freezer Method: An unconventional approach involves sealing smoke-stained garments in an airtight plastic bag and freezing them overnight. This helps reduce smoke odor, making further cleaning more effective.

Considering Professional Cleaning Services

Dealing with smoke damage on clothes becomes less daunting when you enlist the services of professional restoration experts. They can swiftly assess and treat even the most stubborn smoke odors, saving time that might otherwise be spent experimenting with various DIY methods.

Moreover, professional cleaners are equipped to handle all types of fabrics, including those that are difficult to wash at home. They offer pickup and delivery services, alleviating stress from your busy schedule. Their access to high-grade cleaning agents ensures the safe yet thorough removal of heavy smoke damage.

This is particularly beneficial for delicate items such as silk blouses or wool suits that require meticulous care. Expert fire restorers not only clean but also restore these garments to near their original condition without causing additional harm.

When seeking professional help, focus on finding an expert specializing in clothing restoration following fire or similar incidents. Avoid entrusting your valuable items to local dry cleaners or janitorial companies ill-equipped for this demanding task. Instead, choose professionals skilled in fire and water damage remediation for the best results.

Benefits of Professional Cleaners

Benefits of Professional Cleaners - Cleaning Smoke Damaged Clothes

Professional cleaners offer convenient pick-up and delivery services for your smoke-damaged clothing, employing expert techniques specifically designed to treat smoke damage and restore fabrics.

By opting for professional cleaning services, you can ensure that your garments will be free of any residual smoke odors or stains. These experts pay meticulous attention to the type of fabric and apply appropriate methods accordingly.

Choosing professional cleaners not only saves you time but also guarantees optimal results in restoring your wardrobe after an unfortunate event involving smoke or fire damage.

Convenient Pickup and Delivery Services

Professional cleaners lighten your load by providing pickup and delivery services. They swiftly collect your smoke-damaged clothes from your doorstep, dedicate time and effort to restore them, and return fresh, odorless items to you.

This hassle-free service is perfect for individuals leading busy lives or residing far from nearby dry cleaners. Since the removal of soot and smoke odors requires expert techniques, these professionals ensure every garment receives a thorough cleaning.

The convenience extends beyond saving travel time; working with professionals also ensures successful smoke damage removal.

Expert Techniques for Smoke Damage

Professional cleaners employ expert techniques to clean smoke damage, effectively removing lingering smells and stains. The process commences with soot removal, a crucial step in ensuring no residual damage remains.

These specialists are trained to handle different types of fabrics, including non-washable pieces that require special procedures for optimal results. Deodorization, performed by professionals, is commonly employed as it offers an effective solution to eliminate lingering smoke scents.

Consulting a fire restoration company, such as ServiceMaster Restore, proves valuable as they not only provide cleaning but also offer guidance on maintaining fabric integrity post-treatment. They understand the specific steps required to clean garments severely damaged by smoke and can employ specialized methods accordingly.

Leaving Clothes Fresh and Odorless

Dry cleaners employ a unique deodorizing process that erases even the most persistent smoke odors from fabrics, leaving garments fresh and odor-free. Their highly skilled professionals use exclusive cleaning solutions to restore your clothes’ original freshness.

Specially formulated detergents work wonders on smoking residues trapped in the threads of different fabrics. Moreover, these professional cleaning services completely eliminate offensive odors that might persistently cling to your clothes after attempting home laundering. The final step in their drying process includes treating the fabrics with pleasantly fragranced conditioners.

It’s not just about removing the smell; it’s also about restoring your garments to their natural “out-of-the-store” scent and cleanliness.

Dealing with Non-Washable Fabrics

Dealing with Non-Washable Fabrics

Cleaning non-washable fabrics that have been affected by smoke can present a unique challenge. However, with the right methods and expertise, you can restore your garments to their original condition. In the following sections, we will delve into detailed techniques to help you achieve this. So, keep reading!

1. Airing Out Your Clothing

The initial step in the cleaning process for smoke-damaged non-washable fabrics is to air them out. This crucial step assists in the removal of smoke particles that have become trapped in the fabric.

2. Professional Cleaning Services

When it comes to handling smoke-damaged non-washable fabrics, professional cleaning services are your best bet. Experts like the team at ServiceMaster Restore® are equipped with efficient techniques to address soot removal and eliminate odors comprehensively.

They employ ozone chambers to sanitize and deodorize soft goods over several days, leaving your valuable fabrics fresh and revitalized. If you require more specialized treatment, dry cleaning is another potent option for tackling smoke damage.

But that’s not all—these professionals offer the added convenience of pickup and delivery services, saving you both time and stress. Entrusting these challenging tasks to seasoned experts ensures excellent results.

By following these steps and seeking professional help, you can effectively restore your non-washable fabrics that have been affected by smoke damage.

Conclusion

In conclusion, dealing with smoke-damaged clothes can be a challenging and frustrating task, but with the right knowledge and methods, you can effectively restore your garments to their former freshness. We’ve provided you with a comprehensive guide on how to clean smoke-damaged clothes using common household items like vinegar and baking soda, as well as professional cleaning services when necessary.

In the end, the goal is not just to remove the smoke smell but also to restore your clothes to their original freshness and cleanliness. Whether you choose to tackle the cleaning process yourself or opt for professional assistance, the key is to act promptly and efficiently to salvage your valuable wardrobe after a smoke or fire incident. By following the steps outlined in this blog post, you can enjoy your revitalized garments once again.

Can Raw Silk Be Dry Cleaned? Caring For Your Silk Garments

Can Raw Silk Be Dry Cleaned? Caring For Your Silk Garments

Dry Cleaning , Fabricare Center Blog

If you’re the proud owner of a raw silk garment, deciphering the best way to clean it without risking damage can feel like an unsolvable puzzle. Raw silk, known for its exquisite colors and unmatched luster, is particularly vulnerable to water-related harm and the perils of shrinking. In our blog, we explore the question, “Can raw silk be dry cleaned?” and provide invaluable insights into the essential care strategies that will help you maintain your raw silk garments in pristine condition. Discover these insider secrets to safeguard your wardrobe against avoidable wear and tear.

Key Takeaways

  • Raw silk can be dry cleaned if label instructions allow, but hand washing is a gentle alternative.
  • Check for colorfastness on your silk item before cleaning to avoid color loss or damage.
  • Treat stains right away and use a light dabbing method with no harsh rubbing.
  • Silk garments need careful storage – avoid plastic bags and choose breathable fabric covers instead.
  • Use gentle detergent without harsh additives when hand washing raw silk.
  • Lay flat to dry after washing, keep away from direct sunlight, and never machine dry.

Can Raw Silk Be Dry Cleaned?

Determining whether raw silk can be dry cleaned primarily requires paying close attention to the garment’s label instructions. It is always wise to test for colorfastness before cleaning. If dry cleaning isn’t an option, hand washing serves as a gentle yet viable alternative.

Follow the Label Instructions

Proper silk care necessitates meticulous attention to detail. Silk garment care labels are an indispensable guide for maintaining the fabric’s quality. These labels provide information on whether a piece can be washed at home or requires professional dry cleaning.

Misreading or disregarding these instructions may result in color bleeding, material shrinking, or even complete damage to the item. It is advisable to diligently adhere to the guidelines provided on these tags, which include valuable details such as the correct temperature settings and recommended detergent types specifically formulated for silk fabrics.

Test for Colorfastness

Testing for colorfastness is crucial before washing your silk garments. This process helps identify whether the dye in your silk fabric will bleed or fade during cleaning, especially when exposed to water.

So, how do you test for colorfastness? Start by selecting an inconspicuous area on the garment, then dampen this spot slightly and gently dab it with a clean white cloth. If any color transfers to the cloth, it means the item isn’t colorfast.

Understanding this information is essential because machine washing can be particularly harsh on raw silk items due to aggressive agitation and hot water cycles, which can potentially cause damage and severe color loss.

Dry cleaning might be recommended, but hand washing can also work for some ‘dry-clean-only’ labels as long as proper care measures are taken after confirming colorfastness.

Hand Wash as an Alternative

Hand washing is a reliable alternative for cleaning raw silk garments. Begin by filling a basin with cold water and adding a small amount of gentle detergent. Submerge the silk piece in the solution to kickstart the cleaning process.

Carefully agitate the fabric in the water to release dirt or oils without damaging the delicate material. Examine your garment for any signs of color bleeding; this is an important step before proceeding further with hand washing.

After thorough cleansing, rinse it well, but avoid wringing or twisting it harshly, as this could lead to stretching or tearing of its fibers. Pat dry using a towel, then lay it flat on an absorbent surface, away from direct sunlight and heat, which can subtly shrink and discolor your precious item over time while maintaining its lustrous sheen intact.

Caring for Your Silk Garments

Caring for Your Silk Garments

Giving your silk garments the care they deserve is simple. Keep them away from plastic storage to let them breathe. Tackle any stains immediately, but delicately to avoid damaging the fabric.

Opt for a gentle detergent without harsh additives as these can harm the texture and luster of your garment. Proper care assures longevity and maintains their elegant appeal for years to come.

Avoid Plastic Storage

It’s crucial to store your silk garments correctly to ensure their longevity. First and foremost, avoid using any form of plastic storage. Plastic inhibits the essential air circulation needed to preserve your beloved silk outfits, leading to irreversible damage over time.
Freshly cleaned silks can turn yellow or develop mildew if left in those flimsy plastic bags often provided by cleaners. Additionally, silk material can weaken when subjected to such confining conditions. Instead, opt for breathable fabric bags and boxes that provide proper protection while preventing potential staining, aging, and deterioration caused by poor storage choices.

Tackle Stains Appropriately

Stains on silk garments require immediate and careful attention. Silk fabric easily absorbs stains, so it’s crucial to act as soon as a stain occurs. Use a gentle dabbing method to softly remove any excess substance from the material’s surface without rubbing it deeper into the fibers.
Always check the care label instructions before attempting any DIY stain removal. Some silks can water-stain, meaning random splashes during spot cleaning could lead to color shifts or marks around the treated area, causing more prominent damage. For tough spots or old stains that have set in over time, consult professional dry cleaners experienced with silk.
To prevent potential staining and discoloration, store your silk garments away from direct sunlight in a breathable bag after each use and clean-up session. Proper storage is essential to reduce exposure to harmful elements that contribute to fabric degradation.

Use a Gentle Detergent

Selecting the right detergent is crucial when washing silk. Opt for a gentle cleaning solution designed for delicate fabrics. Regular detergents can be harsh on silk, causing it to become brittle and degrade over time.
Silk-friendly detergents not only clean but also condition the fabric, preserving its natural luster and softness. Examples of such products include Studio by Tide Delicates Liquid Laundry Detergent and Woolite, both of which have proven effective for silk care. Consider using a hypoallergenic fabric cleaner or fragrance-free detergent without harmful additives to prevent irritation to sensitive skin while maintaining your precious garments’ integrity.

How to Wash Silk at Home

Learning how to effectively wash silk at home is not as daunting as it may seem. Explore detailed techniques on hand washing, drying methods, and proper storage for maintaining the quality of your precious silk garments.

Hand Wash Method 

Taking care of delicate fabrics is essential for their longevity, and raw silk is no exception. One proven method for silk garment care is hand washing. This method requires you to delicately clean your silk attire by hand, avoiding rough agitation that could damage the fabric’s fibers.

Here’s how to do it properly:

  1. Fill a sink or a small tub with cold water: Always use cold water, as high temperatures can harm silk.
  2. Add a gentle detergent: Choose a detergent without harsh additives that could degrade the fabric.
  3. Submerge the garment: Silk releases dirt quickly, so excessive washing is unnecessary.
  4. Avoid twisting or wringing: Gently pat down the garment to remove excess water without causing damage.
  5. Rinse thoroughly: Ensure there’s no detergent residue left in the fabric.
  6. Lay flat to dry: Do not expose it to direct sunlight or tumble dry, as both can cause irreparable damage to your precious silk attire.

Drying Techniques 

Proper drying techniques are crucial for taking care of your silk garments. Not every method works well with this delicate fabric.

Follow these steps:

  1. Always lay your silk pieces flat on a clean, dry towel. This prevents them from losing shape and shrinking.
  2. Gently roll the wet garment in the towel to remove excess moisture. This step ensures that colors stay vibrant and the fabric remains smooth.
  3. Never use a dryer on silk clothes, as the intense heat can cause irreversible damage to the silk structure.
  4. Avoid direct sunlight when air-drying your silks, as too much exposure can fade the natural colors of your garments.
  5. Follow care label instructions for silk, as some pieces may have specific recommendations for drying methods.

Proper Storage 

Correct storage is vital to preserving the quality and longevity of your silk garments. After washing, opt for flat drying techniques to maintain the fabric’s integrity, avoiding direct sunlight or heat exposure.

Here are some storage tips:

  1. Avoid using wire hangers, as they may distort the garment’s shape. Padded hangers work best for preserving its form.
  2. Do not use plastic covers, as they can trap moisture and lead to mildew damage. Instead, use breathable cotton bags to promote fabric health by permitting air circulation.
  3. When storing heavier items like jackets or sweaters, fold them rather than hanging them. This helps prevent stretching and deformation.

Conclusion

The care and maintenance of raw silk garments require a delicate touch and careful attention to detail. While the question of whether raw silk can be dry cleaned depends on the garment’s label instructions, it’s essential to prioritize the preservation of color, texture, and overall quality. Remember these key takeaways:

  1. Follow the Label Instructions: The garment care label is your best friend. Always heed the manufacturer’s recommendations for cleaning methods, temperature settings, and detergent types.
  2. Test for Colorfastness: Before attempting any cleaning, test an inconspicuous area for colorfastness to prevent color loss or fading during washing.
  3. Hand Wash as an Alternative: Hand washing with cold water and a gentle detergent is a safe and effective method for cleaning raw silk. Handle the fabric with care to avoid damage.
  4. Proper Storage: Store your silk garments in breathable fabric bags or boxes, avoiding plastic covers that can trap moisture. Use padded hangers or fold heavier items to maintain their shape.
  5. Tackle Stains Carefully: Act promptly to remove stains using a gentle dabbing method. Check the care label and consult professionals for tough or old stains.
  6. Use a Gentle Detergent: Choose a detergent specifically formulated for delicate fabrics to maintain the silk’s natural luster and softness.
  7. Drying Techniques: Lay silk garments flat on a dry towel, avoiding direct sunlight and heat exposure. Never use a dryer, as it can harm the silk’s structure.

By implementing these care strategies, you can ensure that your raw silk garments retain their exquisite colors, unmatched luster, and overall appeal for years to come. With the right care, you’ll enjoy the elegance of your silk wardrobe without the fear of avoidable wear and tear.