Dry cleaning doesn’t have to be a hassle. In 2025, new and innovative dry cleaning services will transform the way you care for your clothes, saving you time, effort, and worry.
Did you know the average American spends up to 8.5 hours per month on laundry? Imagine reclaiming that time for things you truly enjoy. This blog highlights five groundbreaking dry cleaning services you’ll want to try in 2025. From doorstep pickup to eco-friendly methods, these services will revolutionize your laundry routine.
Key Takeaways
On-demand dry cleaning offers doorstep pickup and delivery, saving you time and effort.
Eco-friendly methods like GreenEarth® Cleaning are safer for your clothes and the environment.
Subscription-based plans provide convenient and cost-effective options for regular users.
Specialty fabric care ensures delicate items like leather and suede are expertly cleaned.
Wedding dress preservation protects cherished gowns from yellowing and damage.
1. Save Time with Doorstep Dry Cleaning
On-demand dry cleaning services bring convenience right to your door. These services offer next-day delivery in many areas, starting at competitive rates. Some companies provide 24-48 hour delivery, saving busy professionals countless hours each month.
Imagine scheduling a pickup through an app and receiving freshly cleaned clothes without ever leaving your home. With competitive pricing and fast turnaround times, doorstep dry cleaning is the ultimate solution for a hectic lifestyle.
2. Embrace Sustainable Dry Cleaning Techniques
Eco-conscious consumers can now choose sustainable dry cleaning methods. GreenEarth® Cleaning uses a silicone-based solvent called D5, which is non-toxic and gentle on fabrics. Clothes come out fresh, odor-free, and less likely to shrink. This method also reduces environmental impact compared to traditional dry cleaning chemicals.
GreenEarth® is just one example of how the industry is shifting towards greener practices. By choosing eco-friendly options, you not only protect your wardrobe but also contribute to a healthier planet.
3. Simplify Laundry with Subscription-Based Plans
Subscription-based laundry plans offer personalized services and predictable costs. These plans start at affordable monthly rates, eliminating extra fees. Some services reward referrals with credits and let you set laundry preferences through an easy-to-use app. Others use AI to remember your specific needs.
These plans cater to busy households by offering unlimited pickups, green cleaning options, and cost savings over time. For anyone juggling work, family, and personal commitments, subscription-based plans are a game changer.
4. Trust Experts for Specialty Fabric Care
Delicate materials like leather, suede, and embellished garments require expert handling. Specialty fabric care services ensure your prized items stay in perfect condition. These tailored cleaning services preserve texture and appearance while extending the life of your valuable items.
With advanced techniques and professional care, these services handle everything from intricate beading to vintage fabrics. Whether it’s a favorite leather purse or a cherished suede coat, specialty care extends the life of your valuable items.
5. Preserve Memories with Wedding Dress Preservation
Your wedding dress is more than just clothing; it’s a cherished memory. Wedding dress preservation services clean and store gowns in acid-free packaging to prevent yellowing and fabric breakdown. Costs range from $250 to $1,000, depending on the dress and level of care required.
Professional preservation ensures that stains are removed, delicate fabrics are protected, and gowns remain beautiful for decades. This service is perfect for brides looking to keep their dresses as timeless keepsakes.
Bonus: Restore Vintage Treasures
Comprehensive garment restoration revives damaged or vintage clothing. Skilled technicians fix tears, replace buttons, and remove stains, bringing new life to treasured items. These services use museum-grade methods to preserve military uniforms, antique gowns, and more.
Conclusion
In 2025, dry cleaning services are evolving to meet modern needs. From on-demand pickups to eco-friendly practices and specialty care, these innovative solutions make caring for your clothes easier and more sustainable. Why not try one of these services and see how they can simplify your life?
Winter is here, and it’s time to store your comforter. But wait! Did you clean it first? Many people forget this vital step. Dirty comforters can breed dust mites, mold, and bad smells while in storage.
Experts say that cleaning your comforter before storing it can make it last longer. A clean comforter stays fresh and fluffy for the next cold season. This blog will show you how to clean and store your comforter the right way.
Key Takeaways
Clean your comforter before storage to prevent dust mites, mold, and odors.
Washing removes body oils, dirt, and allergens that can break down fibers.
Fully dry your comforter to avoid moisture and mildew.
Use breathable storage bags or cotton pillowcases to allow airflow.
Store comforters in cool, dry, and dark spaces away from sunlight and humidity.
Why Cleaning Your Comforter Matters
Cleaning your comforter before storage keeps it fresh and ready for next winter. This step prevents dust, allergens, and unpleasant odors from building up while it’s tucked away.
Prevent Dust, Allergens, and Odors
Bedding collects body oils, dirt, and grime over time. These contaminants attract dust mites, bacteria, and other allergens. A thorough wash removes these unwanted guests and ensures your bedding stays clean.
Top benefits of cleaning before storage:
Reduces allergens and dust buildup.
Eliminates unpleasant odors.
Prevents mold and mildew growth.
Extends the life of your comforter.
A clean comforter ensures you avoid breathing in harmful particles and keeps your bedding healthy and cozy.
Best Practices for Cleaning Your Comforter
Cleaning your comforter doesn’t have to be a chore. Follow these simple steps to keep your bedding fresh and extend its life.
1. Washing Tips
Check the care label for specific instructions.
Use a large-capacity washer for even cleaning.
Wash on a gentle cycle with cold water and mild detergent.
If your comforter is too big for your home washer, take it to a laundromat or consider professional cleaning.
2. Drying Thoroughly
Drying your comforter properly is just as important as washing it:
Air dry it on a large rack for at least 24 hours.
Or tumble dry on low heat, adding dryer balls to fluff the filling.
Make sure the comforter is completely dry before storage to avoid mildew.
3. When to Consider Professional Cleaning
For comforters that are delicate or oversized, professional cleaning is a great option:
Laundromats have heavy-duty machines perfect for large bedding.
Many services like ours (Fabricare Center Cleaners in Sandy Springs, GA), offer free pickup and delivery for your convenience.
Proper Storage Tips for Your Comforter
Proper storage is just as important as cleaning. Follow these steps to keep your comforter fresh and fluffy:
Use Breathable Storage Bags
Choose cotton storage bags or large pillowcases for airflow.
Avoid vacuum-sealed bags, which can compress and damage the filling.
For heirloom comforters, wrap them in acid-free tissue paper before storage.
Choose the Right Storage Area
Store your comforter in a cool, dry, and dark place such as a linen closet or wardrobe.
Avoid areas prone to humidity, like basements or attics.
Keep comforters away from painted wood, cardboard boxes, or direct sunlight.
Extra Tips
Place an open box of baking soda near your comforter to absorb odors and moisture.
Label your storage bags or containers for easy access.
Quick Checklist for Storing Your Comforter
Wash the comforter following care instructions.
Dry it completely (air dry or low heat with dryer balls).
Use breathable storage bags or pillowcases.
Wrap delicate comforters in acid-free tissue paper.
Store in a cool, dry, dark place, such as a linen closet.
Place baking soda nearby to absorb moisture and odors.
Avoid vacuum-sealed bags, cardboard boxes, and humid spaces.
Label storage bags or containers for quick identification.
Conclusion
Cleaning your comforter before storage keeps it fresh and ready for next winter. Washing and drying it properly prevents dust, mold, and odors. Store it in breathable bags and in a cool, dry place away from light and moisture.
Taking these steps now will save you time and money later. Your future self will thank you for a clean, cozy comforter when the cold weather returns!
Accidents happen, and unfortunately, they often occur right where you least want them: on your comforter. Stains from food, drinks, or even mishaps can make your cozy bedspread look less inviting. You might think it’s impossible to remove these stains at home without ruining the fabric. But did you know that most stains can be removed with simple household items? In this blog post about “How To Remove Stains From Your Comforter,” we will share easy DIY solutions for those pesky spots.
With our tips, you’ll have your comforter looking fresh and clean in no time.
Key Takeaways
Use household items like baking soda, vinegar, and Woolite for effective stain removal. These are non-toxic and safe for most fabrics.
Act quickly with spot cleaning to prevent stains from setting. Immediate care makes removing juice, wine, or blood stains easier.
Check the care label before washing to avoid shrinking or fading. Follow specific instructions carefully.
Hand wash delicate fabrics using mild detergents and cold water. For machine washing, use a large-capacity washer on a gentle cycle with mild detergent.
Consider professional cleaning services for stubborn stains or dry clean-only comforters to ensure deep cleaning without damaging the fabric.
Preparing Your Comforter for Cleaning
Read the Care Label
Always check the care label on your comforter for specific cleaning instructions. Some comforters, especially down-filled ones, require dry cleaning to maintain their quality. Following these guidelines will help avoid damage such as fading or shrinkage.
Spot Clean Early Stains
Act fast when you notice stains. Early spot cleaning can prevent stains like blood or grease from setting into the fabric. Dab the stained area with cold water using a clean cloth—avoid rubbing, as this can push the stain further in.
DIY Stain Removal Solutions
You can tackle stains on your comforter using simple household items. These solutions are easy and effective for various types of fabric.
Baking Soda and Water Paste
Mix 4 tablespoons of baking soda with ¼ cup of cold water to create a paste. Spread the mixture on the stained area and let it sit for about 30 minutes. Gently scrub with a soft brush or cloth, rinse with cold water, and blot dry. This nontoxic solution is safe for most fabrics.
Gentle Cleaning Agents Like Woolite
For small stains, dilute Woolite with water and dab it onto the spot using a soft cloth. This gentle cleaner is great for delicate fabrics, lifting stains without causing damage. Be sure to rinse thoroughly afterward.
Vinegar and Water Solution
Mix equal parts water and white vinegar for an effective cleaning solution. Blot the stain with a cloth dipped in the mixture, and avoid scrubbing hard to protect the fabric. This eco-friendly method is safe for most comforters.
Cleaning Specific Comforter Stains
Juice & Wine
Flush fresh juice spills with cold water immediately to prevent the stain from setting. For tougher juice stains, apply a small amount of Tide HE Turbo Clean detergent and blot with a clean cloth.
For wine stains, blot up as much liquid as possible without rubbing. Then, mix one part vinegar with two parts water and gently dab the stain.
Vaseline
For Vaseline stains, scrape off the excess with a blunt knife. Then, apply a mixture of equal parts vinegar and water to the stain and dab with a cloth. Finish by machine washing the comforter with liquid detergent.
Yellow Stains
Yellowing caused by sweat, oils, or detergent residue can be tackled with lemon juice. Squeeze lemon juice onto the yellowed spots and leave the comforter in direct sunlight for a few hours. Alternatively, mix equal parts vinegar and water, spray it on the stains, and sprinkle baking soda on top before gently scrubbing.
Makeup
Makeup stains, especially from foundation or mascara, can be stubborn but manageable. Start by gently scraping off any excess makeup with a blunt knife or a credit card.
For liquid makeup or foundation, mix a solution of mild dish soap and cold water. Dab the stain with a clean cloth soaked in the soapy solution, being careful not to rub it in. Blot the area gently until the stain begins to lift. For stubborn makeup stains, you can also use a small amount of makeup remover on a cotton ball and dab the stain before washing.
For mascara or eyeliner stains, apply a few drops of rubbing alcohol to the stain and blot it with a cloth. Be sure to rinse thoroughly afterward to remove any residual chemicals before drying.
Blood & Organic Stains
Dab blood stains with cold water, then apply hydrogen peroxide directly onto the stain. Let it bubble for a few minutes before blotting with a clean cloth. For organic stains like food or sweat, use an enzyme cleaner, followed by a thorough rinse.
Washing Your Comforter at Home
Hand Washing Techniques
Soak the comforter in cold water with mild detergent for 15-20 minutes. Gently rub the fabric to remove stains, then rinse thoroughly. Air dry the comforter on a drying rack or lay it flat—avoid wringing the fabric.
Machine Washing Tips
For machine washing, use a washer with at least 5.0 cubic feet capacity. Set it to a gentle cycle with cold or warm water, and use a mild detergent. After washing, dry the comforter on low heat, adding dryer balls to maintain its fluffiness.
Professional Comforter Cleaning
For stubborn stains or dry clean-only comforters, consider professional cleaning services. Experts can deep clean without damaging delicate fabrics, ensuring your comforter looks fresh and inviting.
Conclusion
Keep your comforter clean with these easy DIY tips. Early spot cleaning can save you time and effort later. Always check care labels, and use gentle cleaning agents like baking soda or vinegar for the best results. Regular cleanings will keep your bed cozy and fresh all year long!
Are you struggling to clean your faux suede items? Many people find it challenging to keep their faux suede furniture, shoes, and accessories looking fresh and new. Faux suede is a popular material that mimics the look of real suede but can be tricky to clean without the right know-how.
Faux suede, also known as vegan suede, is made from microplastics like PV and PVC. It offers a stylish appearance similar to natural suede but requires specific care. This article will guide you through expert tips and techniques on how to clean faux suede.
We’ll cover everything from daily maintenance to tackling tough stains. Get ready to learn the secrets of keeping your faux suede items in top shape.
Key Takeaways
Faux suede is made from synthetic materials like polyester microfibers and is more durable than real suede.
Use dry cleaning methods like brushing or spot cleaning with rubbing alcohol for light dirt and stains.
For wet cleaning, use mild soap and water or a delicate machine wash cycle for washable items.
Tackle water stains by dabbing with distilled water and feathering outward to blend edges.
Maintain faux suede by vacuuming weekly, brushing gently, and avoiding harsh chemicals or excessive water.
Understanding Faux Suede
Faux suede looks and feels like real suede but is made from synthetic materials. It’s popular for furniture, shoes, and clothing due to its durability and easy care.
Composition and Characteristics
Faux suede is a synthetic fabric that looks like real suede. It’s made from polyester microfibers and uses a polyurethane binder. This manmade suede is tough and lasts longer than natural suede.
Composition
Characteristics
Made from polyester microfibers and polyurethane binders
Durable, water-resistant, stain-resistant, soft, and suitable for furniture and accessories
Common Uses
Imitation suede has many uses in clothing and home goods. Its thin, soft texture feels nice to touch. Unlike real suede, this vegan option resists water and stains better. Microsuede’s durability makes it a popular choice for furniture and accessories.
Home Decor: Couches, chairs, throw pillows, blankets
Clothing: Jackets, shoes, ponchos
Car Interiors: Steering wheel covers, seat upholstery
Preparing to Clean Faux Suede
Getting ready to clean faux suede is key. You’ll need the right tools and know-how to tackle different stains.
Gathering Necessary Supplies
To clean faux suede, you’ll need some key items. Grab rubbing alcohol or a mix of water and vinegar for spot cleaning. A soft toothbrush works great for brushing the fabric. For tough stains, get enzyme-based detergents like OxiClean or Tide Stain Release.
Don’t forget a vacuum cleaner for regular upkeep.
Supplies Needed
Spot cleaning: Rubbing alcohol or a mix of water and vinegar
After gathering your cleaning supplies, you’ll need to spot stains on your faux suede. Different stains require specific treatments.
Different stains require specific treatments:
Deodorant/Sweat: Apply liquid laundry soap for 10 minutes before washing.
Oil: Flip the fabric, apply soap on the back.
Organic stains: Pre-treat with enzyme detergents.
Care Label Codes
Meaning
W
Water-based cleaners allowed
S
Solvent cleaners only
S-W
Water or solvent cleaners allowed
X
Vacuum only, no liquids
Knowing these codes helps you pick the right cleaning method for your faux suede item.
Cleaning Techniques for Faux Suede
Cleaning faux suede requires specific techniques. You can use dry or wet methods to clean your faux suede items.
Dry Cleaning Methods
Dry cleaning methods work well for faux suede. You can use a soft brush or cloth to remove dirt and dust. For tougher stains, try spot cleaning with clear alcohol like rubbing alcohol or vodka.
Apply the alcohol to a clean sponge and dab the stained area gently. Don’t rub too hard, as this can damage the fabric.
Most faux suede is wet cleanable, so you don’t need harsh solvents. A mild soap and water solution often does the trick for general cleaning. Test any cleaner on a hidden spot first to make sure it won’t harm the fabric.
Avoid soaking the material or using too much liquid, as this can leave water stains.
Wet Cleaning Methods
Wet cleaning methods can work well for faux suede that can handle water. You can spot clean stains with soapy water, clear alcohol, or diluted laundry detergent. For machine-washable items, use a delicate cycle with mild soap.
Group faux suede pieces together to avoid lint transfer.
Handwashing is another option for wet cleaning faux suede. Fill a sink with warm, soapy water and gently agitate the fabric. Rinse thoroughly and let air dry. These wet methods help remove tough stains and refresh the material.
Special Considerations
Special considerations play a key role in cleaning faux suede. Water stains and tough marks need special care to keep your faux suede looking great.
Handling Water Stains
Water stains on faux suede can be tricky, but you can fix them with some simple steps. Use distilled water on a clean rag to tackle these spots. Gently dab the stain and feather it outward to blend the edges.
This method helps spread the moisture evenly and prevents new water marks.
For tougher stains, try spot cleaning with soapy water or clear alcohol like vodka. You can also use a mix of water and laundry soap. Always test any cleaner on a hidden area first.
Regular care of your faux suede items will help stop water stains from setting in. Brush the fabric often and clean spills right away to keep your items looking great.
Dealing with Difficult Stains
Tough stains on faux suede need special care. For stubborn marks, use mild solvents like naphtha or paint thinner. These work well on non-water-soluble stains. Apply the solvent from the edges inward to avoid spreading the stain.
Ink stains require a mix of Wisk detergent and rubbing alcohol. Dab this solution on the ink mark gently.
Organic stains call for enzyme-containing detergents. These break down natural substances effectively. Always test any cleaning method on a hidden spot first. This step helps prevent damage to your faux suede item.
With the right approach, even the most challenging stains can be removed from faux suede surfaces.
Maintenance and Care Tips
Faux suede needs regular care to stay in top shape. Learn easy tips to keep your faux suede items looking great for years.
Regular Maintenance
Regular upkeep keeps faux suede looking great. Vacuum your furniture weekly to remove dirt and allergens. This simple step helps maintain the fabric’s softness and appearance. For spills, act fast.
Dab them right away to stop stains from setting in.
Proper care extends the life of your faux suede items. Always check furniture labels before using any cleaning products. This ensures you use safe methods that won’t harm the material.
After cleaning, brush the fabric gently. This restores its soft texture and keeps it looking fresh.
What to Avoid
Avoid Using
Why
Harsh chemicals or abrasives
Can damage or discolor the material
Excessive water
Leads to water stains and weakens the fabric
Solvent-based glue removers
May cause discoloration
Cleaning without vacuuming first
Pushes dirt deeper into the fabric
Conclusion
Cleaning faux suede can be straightforward. With effective techniques, you can maintain the fresh and stylish appearance of your faux suede items. Regular care helps prevent stubborn stains and prolongs the lifespan of your faux suede pieces.
It’s advisable to test cleaning methods on a small, inconspicuous area before applying them more broadly. These expert tips will help you clean faux suede efficiently and effectively.
FAQs
1. How do I clean faux suede without damaging it?
To clean faux suede safely, use a soft brush to remove dirt. For tougher stains, dab with a damp cloth and mild soap. Avoid soaking the fabric. Let it air dry, then brush gently to restore texture.
2. Can I machine wash faux suede items?
Most faux suede items should not be machine washed. Check the care label first. If machine washing is allowed, use cold water and a gentle cycle. Air dry the item and brush it to restore its texture.
3. What’s the best way to remove oil stains from faux suede?
For oil stains on faux suede, sprinkle cornstarch or talcum powder on the spot. Let it sit overnight to absorb the oil. Brush off the powder the next day. Repeat if needed. For stubborn stains, seek professional cleaning.
4. How often should I clean my faux suede furniture?
Clean faux suede furniture weekly with a soft brush to remove dust and debris. For deeper cleaning, use a damp cloth with mild soap every few months. Always test cleaning methods on a hidden area first to ensure no damage occurs.
Have you noticed your clothes losing their color after several washes? Faded garments can make your wardrobe look less lively and more worn. This common issue affects many people who want to keep their favorite pieces looking bright. Understanding How To Restore Faded Clothes is key to reviving your wardrobe without buying new items.
Did you know that simple household solutions can bring back the color you love? In this blog, you’ll find easy steps and tips to breathe new life into your clothes.
Ready to refresh your wardrobe?
Key Takeaways
Identify Fading Causes: Sun exposure, frequent washing, and excessive detergent use make clothes lose color. Reducing these factors helps keep colors vibrant.
Use Home Remedies: Restore colors by adding salt or vinegar to your wash, dyeing fabrics, or drying clothes in sunlight to naturally brighten them.
Prevent Future Fading: Wash clothes in cold water, turn them inside out, and choose gentle detergents. These steps preserve color and extend garment life.
Advanced Restoration: Utilize baking soda or hydrogen peroxide for extra brightening. For delicate items, consider professional color restoration services.
Maintain Washing Machines: Keep your washing machine clean to avoid detergent buildup, which can accelerate color fading and damage fabrics.
What Causes Clothes to Fade?
Clothes lose their color over time from various sources, below are the main reasons colors fade.
Sun Exposure
Cause: UV rays break down color molecules, leading to fabric fading.
Effects: Clothes bleach and become brittle over time.
Prevention:
Dry clothes in the shade to minimize UV exposure.
Use UV protection measures like curtains or drying indoors.
Frequent Washing
Cause: Hot water and agitation during washing weaken fibers and fade colors.
Effects: Fiber breakage and color deterioration.
Prevention:
Wash dark fabrics in cold water.
Avoid over-drying clothes in the dryer.
Chemical Damage
Cause: Excessive use of detergent breaks down dyes and causes discoloration.
Effects: Vibrant colors lose intensity and fade over time.
Prevention:
Use the correct amount of detergent.
Regularly maintain your washing machine to ensure proper rinsing.
How To Restore Faded Clothes: Practical Methods
Revitalize your faded clothes using simple home techniques. Explore effective methods to bring your favorite garments back to life.
Using Salt in the Wash
Add half a cup of salt to your washing machine without using detergent. This simple laundry tip helps remove detergent residue that can dull colors. Salt aids in restoring faded clothes during the wash cycle by loosening fibers and reviving fabric colors.
Regular use of salt maintains the vibrancy of colored fabrics, ensuring your clothes stay bright longer. Incorporate this clothing care technique into your routine for effective fabric maintenance and color restoration.
Vinegar to Remove Detergent Buildup
Vinegar removes detergent residue from your clothes, boosting their brightness and restoring vibrant colors. Add vinegar directly to the softener compartment during your laundry cycle to eliminate buildup effectively.
This simple step helps lock in colors, preventing them from fading over time. Using vinegar instead of traditional fabric softener cleans your clothes better and maintains their softness.
Incorporate vinegar into your routine to keep your wardrobe looking fresh and new.
Dyeing to Refresh Color
After removing detergent buildup with vinegar, dyeing offers a great way to restore your garment color. Gather a bucket, hot water, fabric dye, salt, and rubber gloves to start. For every two t-shirts, use about 4 ounces of dye.
Larger items like jeans will need around 8 ounces. Submerge your clothes in the dye mixture and let them soak for 30 minutes to an hour. This process rejuvenates faded fabrics, giving your clothes a fresh, vibrant look.
Whether you’re refreshing a favorite shirt or bringing new life to your denim, garment dyeing techniques make color renewal simple and effective.
Sunlight for Natural Brightening
Sunlight naturally brightens faded fabric by breaking down stains and lifting dull colors. Spread clothes evenly under natural light to ensure all areas receive sun exposure. This sunlight treatment enhances color fading, making colors appear more vibrant.
Sun bleaching can rejuvenate textiles, restoring their original brightness without harsh chemicals.
Using natural light as a brightening method is simple and effective. Hang garments outside on a sunny day, turning them inside out to protect delicate colors. This fabric restoration technique preserves the integrity of your clothes while revitalizing their appearance.
Incorporate sunlight treatment into your routine to keep your wardrobe looking fresh and lively.
Preventative Measures to Avoid Fading
Protect your favorite outfits by adopting simple fading prevention strategies. Small changes in how you wash and store your clothes can keep colors vibrant longer.
Washing Clothes in Cold Water
Washing clothes in cold water keeps colors bright and prevents fading. Cold water laundry uses less energy, making it eco-friendly and sustainable. This method supports fabric care and color preservation, ensuring your clothes last longer.
By choosing cold water cleaning, you practice energy-efficient laundry and promote garment conservation.
Frequent washing can wear out clothes quickly, but cold water minimizes this damage. Sustainable washing with cold water extends the longevity of your wardrobe. This approach aids in fade prevention and supports ecofriendly washing practices.
Embracing cold water cleaning helps maintain your clothes’ appearance while saving energy.
Turning Clothes Inside Out Before Washing
Turning clothes inside out before washing shields the fabric’s exterior from rough agitation and friction in the washing machine. This simple step enhances garment preservation by minimizing wear and tear, helping colors stay vibrant longer.
By protecting the outer surfaces, you reduce pilling and maintain the fabric’s appearance.
Furthermore, this practice limits sun exposure when line-drying, preventing colors from fading under UV rays. Including this laundry best practice into your routine supports color retention and extends the lifespan of your wardrobe.
Embracing such washing tips ensures effective fabric care and overall textile maintenance.
Using Gentle Detergents
Choose gentle laundry products to protect colors and prevent garment fading. Mild soap cleans fabrics without stripping dyes, ensuring color preservation. Delicate washing with these detergents avoids color loss and maintains the vibrancy of your clothes.
Washing in cold water with a gentle detergent further helps in preventing color fading. By using gentle cleansing methods, you enhance fabric care and extend the life of your favorite garments.
Advanced Tips for Restoring Faded Clothes
Take your restoration skills to the next level with these expert tips. Learn how to make your faded clothes look fresh and new.
Trying Other Household Items for Brightening
Use baking soda to brighten clothes naturally. It whitens and deodorizes fabrics. Add one cup to your laundry to boost your detergent. Hydrogen peroxide safely removes stains. Mix half a cup with water and apply it to faded areas before washing.
Vinegar clears detergent buildup and restores color vibrancy. Pour a cup into the rinse cycle for brighter garments. Salt sets colors and prevents further fading. Soak clothes in a solution of half a cup salt and water before washing.
These household items provide effective DIY laundry solutions for maintaining your wardrobe.
Professional Services for Color Restoration
Commercial color restoration services like ours are ideal for delicate items like silk, satin, and leather. Professionals specialize in garment color restoration and textile color reconditioning, ensuring your clothes regain their vibrant appearance safely.
Leather reconditioning specialists handle items such as jackets and vintage purses with expert care. For those needing custom dye jobs, fabric dyeing services are the best choice instead of attempting a DIY approach.
Advanced clothing color restoration techniques by experts can rejuvenate your faded wardrobe effectively.
Reviving your the colors of in your wardrobe is easier than you think. You’ve learned why clothes fade and how to fix them. Simple methods like using salt or vinegar can restore colors. Taking proper care prevents clothes from losing their vibrancy. Check our newsletter for more tips and discounts. Start reviving your wardrobe today and enjoy bright clothes once again.
Is your waterproof jacket losing its effectiveness? You might be washing it wrong. Many people struggle to keep their outdoor gear in top shape. How to wash a waterproof jacket properly is a common question among outdoor enthusiasts. Waterproof jackets use special fabrics like Gore-Tex that need careful cleaning. Regular detergents can damage these materials. This guide will show you the right way to wash and care for your waterproof jacket at home.
You’ll learn about proper cleaning methods, drying techniques, and how to maintain your jacket’s water-repellent coating. Get ready to extend the life of your favorite outdoor gear!
Key Takeaways
Always check the care label before washing your waterproof jacket for proper temperature, spin speed, and detergent info.
Use gentle liquid soap made for outdoor gear instead of regular detergents, fabric softeners, or bleach when washing.
Machine wash on a warm (40°C/104°F) gentle cycle with an extra rinse and low spin speed to protect the waterproof coating.
Tumble dry on low heat for 30 minutes to help spread the DWR coating, then air dry if still damp.
Reapply waterproofing treatments like wash-in or spray-on DWR products when water stops beading on the jacket’s surface.
Preparing Your Waterproof Jacket for Washing
Getting your waterproof jacket ready for washing is key. You’ll need to check the care label and deal with any stains first.
Check the care label
Before washing your waterproof jacket, always check the care label. This small tag holds vital info about how to clean your gear safely. It tells you the right temperature, spin speed, and detergent to use.
These details help keep your jacket’s waterproofing intact and extend its life.
Care labels often include tips for reactivating the DWR (Durable Water Repellent) coating after washing. They may suggest spray-on or wash-in treatments to restore water resistance.
Don’t skip this step! Proper care keeps your jacket working well in wet weather.
The care label is your roadmap to maintaining a waterproof jacket’s performance and longevity.
Pre-treat stains
Pre-treating stains is key to keeping your waterproof jacket in top shape. Dirt, sunscreen, and body oils can clog the jacket’s waterproof layers. This makes it less effective at keeping you dry.
To tackle stains, use a damp cloth for small marks. For bigger messes, you’ll need to wash the whole jacket.
Spot cleaning works well for minor stains on waterproof clothing. But if your jacket is really dirty, you’ll need to give it a full wash. Don’t use fabric softeners, powder detergents, or bleach.
These can harm the jacket’s waterproof coating. Instead, use a gentle liquid soap made for outdoor gear. Proper care will help your jacket stay waterproof and breathable for longer.
Washing Techniques for Waterproof Jackets
Washing your waterproof jacket correctly keeps it in top shape. You can use hand washing or machine washing methods to clean your gear.
Hand washing methods
Hand washing is a gentle way to clean your waterproof jacket. This method works well for fabric-lined raincoats and helps keep their protective coating intact.
Fill a sink or tub with cool water.
Add a small amount of rain-gear-specific detergent to the water.
Submerge the jacket in the soapy water.
Gently scrub the fabric with your hands, paying extra attention to dirty areas.
Rinse the jacket thoroughly with clean, cool water.
Squeeze out excess water without twisting the fabric.
Hang the jacket to air dry in a well-ventilated area.
Avoid using heat to speed up drying, as this can harm the waterproof coating.
Once dry, apply a waterproofing spray to restore the jacket’s water-repellent finish.
Use a spray bottle for even coverage on fabric-lined raincoats.
Machine washing settings
Machine washing settings play a key role in cleaning waterproof jackets. Follow these steps to ensure your jacket stays in top shape:
Use warm water: Set your machine to a warm wash setting, around 40°C (104°F).
Choose the right cycle: Select a delicate or gentle cycle for most waterproof jackets.
Add an extra rinse: This step helps remove all detergent from the fabric.
Set a low spin cycle: High spin speeds can damage the jacket’s waterproof coating.
Don’t overload: Fill the machine only halfway to allow proper cleaning.
Wash alone: Prevent contamination by washing your jacket separately from other clothes.
Pick the right detergent: Use a tech wash or small amount of non-bio detergent made for waterproof gear.
Avoid fabric softeners: These can harm the jacket’s water-repelling properties.
Next, we’ll explore the best ways to dry and re-waterproof your jacket after washing.
Drying and Re-Waterproofing Your Jacket
Drying your waterproof jacket correctly keeps it in top shape. You can also boost its water-repelling power with special treatments.
Proper drying techniques
Proper drying techniques are crucial for maintaining your waterproof jacket’s performance. Follow these steps to ensure your jacket stays in top shape:
Use low to medium heat in the dryer for 30 minutes. This helps spread any remaining DWR (Durable Water Repellent) coating.
Hang the jacket to air dry if it’s still damp after tumble drying. Keep it away from direct sunlight to prevent damage.
Avoid high temperatures when drying. Excessive heat can harm the jacket’s waterproof properties.
Close all zippers and hooks before drying. This step helps maintain the jacket’s shape and prevents snagging.
Skip fabric softeners and dryer sheets. These products can reduce the jacket’s water-repellent abilities.
Tumble dry on low heat after washing to reactivate the DWR coating. This simple step can boost your jacket’s water resistance.
Check the jacket’s care label before drying. Some jackets may have specific drying instructions you should follow.
Air dry the jacket if you don’t have access to a dryer. Hang it in a well-ventilated area away from heat sources.
Applying waterproofing treatments
Waterproof jackets need regular care to maintain their water-repellent properties. DWR coatings wear off over time, but you can easily restore them at home.
Try reactivation first: Put your jacket in the dryer on medium heat for 30 minutes. This often revives the DWR coating.
Check water beading: If water still soaks into the fabric, it’s time to reapply DWR.
Choose a DWR product: Buy a wash-in or spray-on waterproofing solution from an outdoor gear store.
Wash the jacket: Use your washing machine and the DWR product according to package instructions.
Dry as usual: Follow your normal drying method after applying the waterproofing treatment.
Test the results: Sprinkle water on the jacket to see if it beads up and rolls off.
Reapply if needed: Some jackets may need a second treatment for full water resistance.
These steps will help renew your jacket’s water repellency and enhance its performance. Next, we’ll wrap up with some final thoughts on caring for your waterproof gear.
Conclusion
Caring for your waterproof jacket doesn’t have to be hard. With the right steps, you can keep your gear in top shape at home. Regular cleaning helps your jacket stay waterproof and breathable.
Always check the care label and use special detergents for best results. Proper drying and re-waterproofing will extend your jacket’s life. Take good care of your gear, and it will protect you on many outdoor trips to come.
FAQs
1. How often should I wash my waterproof jacket?
Clean your jacket when it’s visibly dirty or after heavy use. Most outdoor gear experts suggest washing every 10-12 wears or once a season.
2. Can I use regular detergent to wash my waterproof coat?
No, don’t use regular detergent. Choose a special cleaner made for technical garments. These products clean without harming the water-resistant coating.
3. Is it safe to put my waterproof jacket in the dryer?
Yes, but use low heat. Tumble drying on low actually helps reactivate the water-repellent finish. Always check the care label first.
4. How can I restore the water-repellent finish on my jacket?
After washing and drying, apply a spray-on or wash-in waterproofing treatment. This renews the jacket’s ability to repel water and keep you dry.
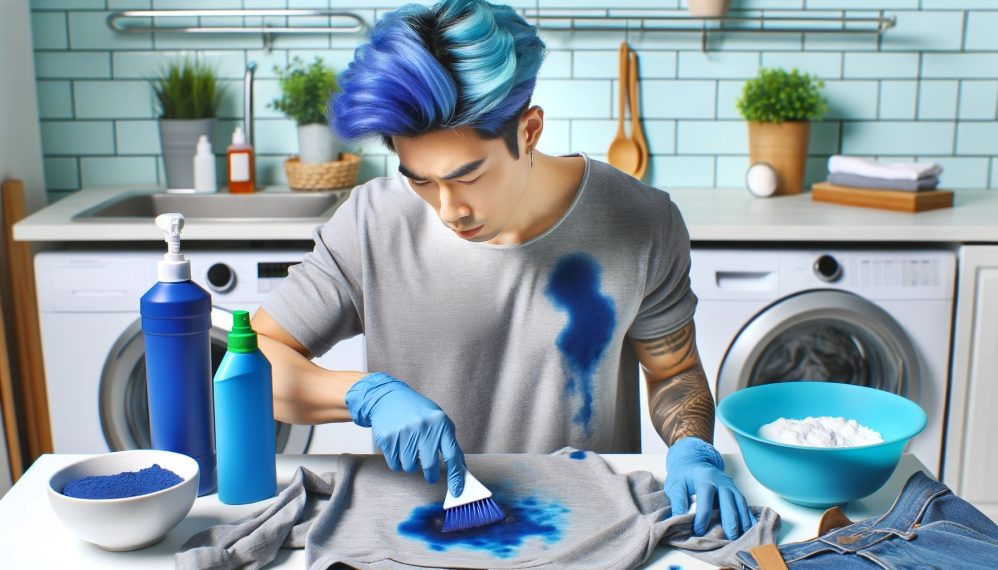
Spilled coffee on your favorite shirt? It happens to the best of us. Coffee stains can be a real nuisance, especially when you’re running late or far from home. Not knowing how to quickly and effectively remove these spots can leave you feeling frustrated.
Here’s something interesting: common household items like vinegar, salt, and baking soda can work wonders in tackling those pesky stains! In this article, we’ll walk you through “How To Remove Coffee Stains From Clothes” effortlessly using methods that are both practical and accessible.
From natural remedies to specific tips for different fabrics—we’ve got all your stain removal needs covered. Ready to save your clothes from coffee disasters? Keep reading!
Key Takeaways
Act Quickly: Coffee stains are easier to remove when treated immediately. Blot with a dry cloth and use cold water to rinse the stained area as soon as possible.
Household Items Help: Common items like white vinegar, baking soda, dish soap, and even egg yolk can effectively remove coffee stains from various fabrics.
Pretreat Stains: Apply liquid detergent or a stain remover before washing. Soaking in solutions made from warm water, dishwashing detergent, and vinegar also helps break down tough coffee particles.
Different Fabrics Need Different Care: Cotton and linen should be rinsed well with cold water first. Synthetic fabrics like polyester require soaking in a mixture of warm water, dishwashing detergent, and white vinegar.
Carry Essentials for Emergencies: Keep a stain pen or small travel kit with items like baking soda and white vinegar handy for quick fixes on the go.
How to Remove Coffee Stains from Different Types of Fabric
Different fabrics react differently to coffee stains. Knowing the right method for each type saves your favorite clothes from ruin.
Cotton, Cotton-Blend, and Linen Fabrics
Rinse the stained area with cold water for 10 to 15 minutes until the water runs clear. The quicker you do this, the better. Apply liquid detergent or dish soap directly on the stain and gently rub it in.
Let it sit for about 3 to 5 minutes. For tougher stains, soak the fabric in warm water for another 5 to 15 minutes.
Pretreat with a good stain remover if needed—then follow up by washing according to clothing instructions. Use oxygen bleach laundry detergent if stubborn spots remain. Air-dry your clothes afterward and check carefully for any traces of discoloration before considering further steps.
Act fast with coffee stains—the sooner, the better!
Synthetic Fabrics
Synthetic fabrics, like polyester and nylon, can be tricky to clean. Quick action is key because fresh stains are much easier to remove. First, blot the excess coffee with a dry cloth.
Mix 1 quart of warm water, 1/2 teaspoon dishwashing detergent, and 1 tablespoon white vinegar. Soak the fabric for 15 minutes. After soaking, rinse under warm water. If any stain remains, use a sponge dipped in rubbing alcohol to blot it gently.
Air-dry the fabric instead of using a machine dryer until completely sure that no stain persists.
Steps for Removing Coffee Stains
Blot the stain gently to remove any excess coffee. Apply a bit of detergent or baking soda directly on the spot… and then, let’s get scrubbing!
Blotting
Blot the coffee stain with a cold, damp paper towel. This helps lift excess liquid without spreading it around. Absorb any remaining coffee using a dry cloth.
Use cold water right away to rinse the stained area. Follow up by blotting the spot again with a dry paper towel to remove as much moisture as possible.
Blotting is your first defense against stubborn coffee stains.
Apply detergent or baking soda
Apply liquid laundry detergent or dish soap to the coffee stain with a little cold water. This helps break down the oils in the coffee. Gently rub it into the fabric using your fingers or a soft brush.
Sprinkle baking soda over the treated area and let it sit for about 10 minutes. Baking soda acts as an abrasive to lift out stubborn stains. Use a dry towel to blot any excess moisture, then rinse thoroughly with cold water before washing normally.
Pretreat and wash
Pretreat the stained area with a commercial stain remover. Ensure to fully cover the coffee stain for optimal results. If immediate laundering is not possible, soak the clothing in warm water mixed with dishwashing detergent for 15 minutes.
This helps break down and loosen the coffee particles from the fabric.
After soaking, wash as soon as possible using your regular laundry routine. Inspect thoroughly before drying; if any discoloration remains, repeat treatment steps until satisfied. Air-dry and check again to prevent permanent setting of residual stains or damage from heat during drying….
Additional tips
Sprinkle table salt on a fresh coffee stain to stop it from spreading. The salt will soak up the liquid, making it easier to clean later. If you have baby powder on hand, it can also help.
Just sprinkle it over the stain and brush off after a few minutes.
Carrying a stain pen is super handy for quick fixes on-the-go. Keep one in your bag, car, or desk at work for emergencies. White vinegar works too but leaves an odor—so use sparingly!
Natural Remedies for Removing Coffee Stains from Clothes
Vinegar, baking soda, and even egg yolk can work wonders on coffee stains… Curious to know how?
Remedy
Action
White Vinegar
Apply 1-2 drops directly on the stain and let it sit for a few minutes before blotting with a cloth.
Baking Soda
Mix with water to form a paste. Scrub gently into the stain. Acts as a natural cleaning agent and abrasive.
Egg Yolk
Beat and apply to the stain with a terry cloth. Rub gently for one minute, then rinse with cold water.
White vinegar
Applying white vinegar directly onto a coffee stain can work wonders. Use one or two drops right on the spot and let it sit for a few minutes. Then, gently blot with a clean cloth.
This method helps break down the stain molecules, making them easier to remove during washing.
For stubborn stains, mix white vinegar into your regular laundry routine. Add half a cup of vinegar to your wash load along with your usual detergent. The acetic acid in vinegar aids in loosening tough coffee stains while softening fabrics too.
This eco-friendly cleaning agent is safe and effective for maintaining your clothes’ fabric care without harsh chemicals.
Baking soda
Mix baking soda with water to form a thick paste. Scrub this paste gently into the coffee stain. This method works great because baking soda acts as a natural cleaning agent and an abrasive that helps lift the stain from the fabric.
First, blot the coffee spill with a damp paper towel. Then apply your baking soda paste directly onto the stained area. At home or in the office, this quick DIY solution is nontoxic and eco-friendly, making it perfect for everyday use on clothes without harming them.
Egg yolk
Egg yolk can be an effective remedy for removing coffee stains from clothes. Beat the egg yolk and apply it directly to the stain using a terry cloth. The lecithin in egg yolks acts as an emulsifier, helping to lift the stain.
Rub the stained area gently for about one minute.
You’ll notice the stain starting to break down. After rubbing, rinse with cold water and check if the stain is gone, then proceed with regular washing. This method offers a natural cleaning solution that’s both simple and eco-friendly.
Tips for Removing Coffee Stains in Different Settings
Coffee spills can happen anywhere, from home to the office. Each setting requires a unique approach… find what works best for your situation!
At home
Act quickly when coffee spills at home. Start by blotting the stain with a clean cloth to absorb as much liquid as possible—do not rub, as this can spread it further into the fabric.
Next, flush the back of the stained area with cold water.
Create a solution using lukewarm water, dishwashing detergent, and white vinegar. Soak the garment in this mixture for 15 minutes. Finally, wash it following your usual laundry routine but avoid putting it in the dryer until you’re sure all stains are gone!
In the office
Coffee spills happen often in the office. Quick action can save your clothes from permanent stains. Keep essential supplies like white vinegar, dish soap, and baking soda handy at work.
If you spill coffee on your shirt during a meeting, blot the stain with a paper towel right away.
Mix a small amount of dish soap with cold water and dab it onto the stain using another clean cloth. For tougher stains, apply a paste made from baking soda and water directly to the stained area—let it sit for a few minutes before rinsing off.
These simple methods can help maintain professionalism by keeping your wardrobe stain-free throughout busy workdays….
On the go
Quick action is key for removing coffee stains. Carry a travel kit with essentials like baking soda, white vinegar, and dish soap. Dab the stain gently with water to prevent it from setting.
In the office or on the go? Baking soda can absorb the liquid fast.
White vinegar works wonders too; just dab some on a cloth and blot until the stain lifts. Egg yolk acts as an unusual but effective remedy—simply apply and let sit before rinsing off.
Having these solutions at hand saves your clothes anytime you face an unexpected spill!
Conclusion
Getting rid of coffee stains can be easy. You just need the right tools and techniques. Try using vinegar, baking soda, or detergents to tackle fresh spills. Carry a stain pen for quick fixes on the go.
Act fast and you’ll keep your clothes looking great!
FAQs
1. What are some effective methods for removing coffee stains from clothes?
First, blot the stain with a clean cloth to absorb as much coffee as possible. Then, rinse the area with cold water. Apply liquid laundry detergent and gently rub it in. Let it sit for 5 minutes before rinsing again.
2. Can household items help remove coffee stains?
Yes, vinegar and baking soda can be very effective. Mix one part vinegar with one part water and apply to the stain, then sprinkle baking soda on top. Gently scrub and rinse well.
3. Is hot or cold water better for treating coffee stains?
Cold water is best for treating fresh coffee stains because it helps prevent the stain from setting into the fabric fibers.
4. How soon should I treat a coffee stain on my clothes?
You should treat a coffee stain as soon as possible to increase your chances of completely removing it from your clothes.
Wrinkled table linens can ruin the look of a perfectly set table. Whether you’re hosting a dinner party or just enjoying a family meal, those pesky creases can be a real eyesore. Many people struggle with how to get wrinkles out of table linens effectively and efficiently.
Did you know that most wrinkles in table linens occur after washing? This makes proper care techniques crucial. This article will guide you through expert cleaning tips to smooth out those stubborn wrinkles.
From ironing methods to fabric-specific strategies, we’ve got you covered. Ready for wrinkle-free table linens?
Key Takeaways
Ironing damp linens from the center outward is the most effective method for removing wrinkles from table linens.
Tumble dryers with clean tennis balls or dryer balls can quickly smooth light wrinkles in tablecloths.
Fabric steamers, which can be rented for $10, offer a gentle way to remove wrinkles from delicate materials like satin and sequins.
Different fabrics require specific care – polyester can be ironed on low heat, while vinyl and plastic should never be ironed.
Proper storage, choosing wrinkle-resistant fabrics, and using fabric softener can help prevent wrinkles from forming in table linens.
Common Causes of Wrinkles in Table Linens
Table linens often develop wrinkles after washing and drying cycles. Improper storage, such as folding or cramming tablecloths into small spaces, can create deep creases. Regular use of tablecloths leads to natural wrinkles from movement and pressure during meals.
Different fabric materials wrinkle more easily than others. Lack of proper care and maintenance results in stubborn wrinkles that are hard to remove. Exposure to heat and moisture can also cause unwanted creases in table linens.
Wrinkles in table linens are like battle scars – they tell the story of many memorable meals shared.
Effective Methods for Smoothing Out Tablecloth Wrinkles
Ironing isn’t the only way to smooth out tablecloth wrinkles. You can also use tumble dryers, steam, or wrinkle-release sprays for quick and effective results.
Using an Iron
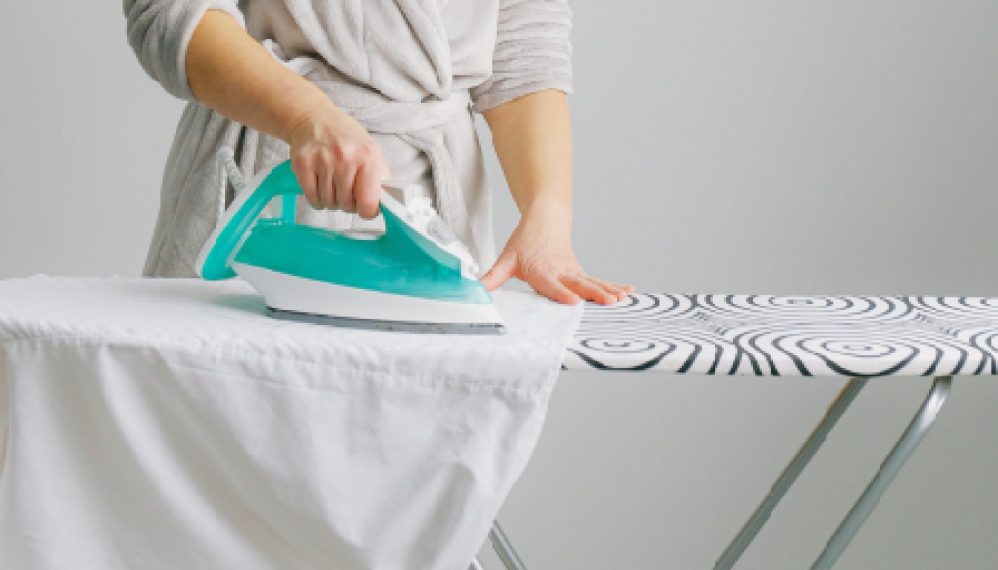
Ironing remains the most effective method for banishing wrinkles from table linens. For optimal results, iron linens while they’re still damp. If your linens have already dried, rewet them using a spray bottle or a quick rinse cycle in the washer.
Opt for a dry iron paired with a spray bottle instead of water-filled irons – this gives you more control over moisture levels.
Start ironing from the center and work your way outward, or follow the seams for a crisp finish. Before tackling the entire tablecloth, test the iron on a small, inconspicuous area to ensure the fabric can withstand the heat.
After use, empty any remaining water from steam irons to prevent mineral buildup and extend the appliance’s lifespan.
Utilizing Tumble Dryers
Tumble dryers offer a quick fix for wrinkled tablecloths. Set the dryer to warm or permanent press, toss in clean tennis balls or dryer balls to fluff the fabric. This method works best for lightly wrinkled linens.
Remove items promptly once the cycle ends to prevent new creases from forming.
For stubborn wrinkles, dampen the tablecloth slightly before drying. The heat and motion will help smooth out creases. Air-drying remains the gentlest option – reshape damp linens and hang them to dry naturally.
Always check fabric care labels first; some delicate materials may not tolerate machine drying.
Applying Steam
Steam offers a quick and effective method for smoothing out tablecloth wrinkles. Using a fabric steamer, move directly up and down on the tablecloth to release creases. For optimal results, hang the tablecloth on backdrop stands – available for rent at $40 – while steaming.
This technique works well for various fabrics, from delicate linens to sturdy polyester blends.
Renting equipment can be cost-effective for large events. Steamers typically rent for $10 and include a water pitcher. Paired with rented tablecloths at $3 to $4 each, you can achieve wrinkle-free table settings without investing in expensive equipment.
The combination of proper tools and technique ensures crisp, professional-looking linens for any occasion.
Spraying Wrinkle-Release Products
Wrinkle-release sprays offer a quick fix for stubborn tablecloth creases. These fabric refreshers work by relaxing fibers, making wrinkles easier to smooth out. Simply spray the product evenly over your tablecloth, then gently tug and smooth with your hands.
Let the linen air dry – no iron needed.
For best results, use a pH-balanced formula without bleach or brightening agents. Avoid fabric softeners, as they can leave residue. This ironing alternative saves time and effort, especially for delicate fabrics or last-minute touch-ups before guests arrive.
Fabric-Specific Strategies to Remove Wrinkles
Different fabrics need specific care methods for wrinkle removal. Polyester, vinyl, plastic, satin, and sequin tablecloths each require unique approaches to achieve a smooth finish.
Handling Polyester Tablecloths
Polyester tablecloths require specific care to maintain their appearance. Wash them in warm water and dry on low heat to prevent excessive wrinkling. For stubborn creases, iron on a low setting with a protective cloth between the iron and fabric.
This method safeguards the polyester from heat damage while smoothing out wrinkles.
Steaming offers another effective solution for polyester tablecloths. Hang the fabric in a steamy bathroom to relax the fibers naturally. After washing, use the permanent-press or delicate cycle in the dryer.
Once dry, smooth remaining wrinkles by hand for a polished finish. Next, we’ll explore strategies for caring for vinyl tablecloths.
Caring for Vinyl Tablecloths
Unlike polyester, vinyl tablecloths require different care methods. Vinyl covers are prone to wrinkling from folding, but ironing isn’t recommended as it can burn the material. Instead, try using sunlight exposure to naturally smooth out creases.
For quicker results, a hair dryer on low heat can effectively remove wrinkles without damaging the fabric.
Proper storage is key to wrinkle prevention in vinyl table linens. Rolling the tablecloth rather than folding helps minimize creases. If wrinkles do appear, gentle heat treatment or alternative smoothing methods are safer options than traditional ironing techniques.
Regular maintenance and careful handling will keep your vinyl tablecloths looking crisp and presentable for longer periods.
Managing Plastic Tablecloths
Plastic tablecloths need special care to keep them wrinkle-free. Ironing isn’t recommended – high heat can melt or damage the material. Instead, lay the tablecloth flat on a clean surface and smooth out wrinkles with your hands.
For stubborn creases, use a hairdryer on low heat, moving it back and forth over the problem areas.
Storing plastic tablecloths properly prevents future wrinkles. Roll them loosely around a cardboard tube rather than folding. If you must fold, use tissue paper between the folds to reduce creasing.
For outdoor use, consider investing in wrinkle-resistant plastic tablecloths. Now, let’s explore strategies for handling vinyl tablecloths.
Treating Satin Tablecloths
Satin tablecloths require gentle care to maintain their luxurious sheen. Steam ironing on low heat with a pressing cloth protects the delicate fabric from direct heat damage. For a quicker fix, a handheld steamer works wonders – keep it 1-2 inches away from the fabric to avoid water spots.
Proper storage is key to preventing wrinkles in satin tablecloths. Hang them up rather than folding to minimize creasing. For stubborn wrinkles that won’t budge, professional dry cleaning is your best bet.
This ensures your satin linens stay smooth and elegant for your next special occasion.
Dealing with Sequin Tablecloths
Sequin tablecloths require special care to remove wrinkles without damaging the delicate fabric. Steaming is the safest method – hold the steamer at least 6 inches away from the tablecloth to avoid melting sequins.
For stubborn wrinkles, use a clean white pressing cloth over the sequins before applying steam. This protects the sequins while allowing heat to smooth out creases.
Direct ironing can ruin sequin tablecloths, so it’s best avoided. If necessary, set the iron to its lowest heat setting and place a pressing cloth between the iron and sequins. Always check the fabric backing first, as some materials may not tolerate heat well.
Gentle handling and proper storage help prevent wrinkles in sequin tablecloths long-term.
Preventing Wrinkles in Table Linens
Proper storage and handling are key to keeping table linens wrinkle-free. Choosing wrinkle-resistant fabrics and using fabric softener can also help minimize creases.
Proper storage and handling
Proper storage and handling of table linens is crucial for preventing wrinkles and maintaining their quality. Keep your linens in a cool, dry space away from direct sunlight to avoid fabric degradation.
Use padded hangers or rollers to minimize creases, and wrap delicate pieces in acid-free tissue paper for extra protection.
Avoid placing linens directly on wood surfaces, as this can lead to discoloration and damage. Instead, store them in breathable containers or on shelves lined with acid-free materials.
Regular rotation of stored linens helps prevent permanent creases and ensures even wear across your collection.
Choosing wrinkle-resistant fabrics
Moving from proper storage to fabric selection… Choosing wrinkle-resistant fabrics can significantly reduce the need for ironing and steaming. Polyester blends, microfiber, and nylon are excellent options that naturally resist creasing.
These materials maintain their smooth appearance even after washing and folding, making them ideal for busy households or frequent use. Synthetic fabrics often require less maintenance and can be easily cared for with low heat settings during laundering and drying.
For those who prefer natural fibers, look for cotton-polyester blends or wrinkle-resistant cotton treatments. These fabrics combine the breathability of cotton with the wrinkle-resistant properties of synthetics.
Linen-polyester blends offer a similar compromise, providing the elegant look of linen with improved wrinkle resistance. Always check care labels for specific instructions to maintain the fabric’s wrinkle-resistant qualities over time.
Using a fabric softener
After selecting wrinkle-resistant fabrics, incorporating fabric softener into your laundry routine can further combat wrinkles. Fabric softeners work wonders in relaxing fibers and reducing creases in table linens.
Adding this laundry care product during the wash cycle results in softer, smoother textiles that are less prone to wrinkling.
Fabric softeners offer an easy solution for wrinkle prevention in your table linens. They help maintain the fabric’s flexibility, making it less likely to develop stubborn creases.
This simple step in your laundry process can significantly improve the appearance of your tablecloths and napkins, keeping them looking fresh and crisp for longer periods.
Avoiding high heat in drying and ironing
High heat can wreak havoc on delicate table linens. Drying tablecloths on low heat settings prevents excessive wrinkles and fabric damage. For ironing, start with a cooler temperature and gradually increase if needed.
This gentle approach preserves fabric integrity while smoothing out creases.
Steaming offers a heat-controlled alternative to traditional ironing. Hang the tablecloth and use a handheld steamer for wrinkle removal without direct contact. This method works well for sensitive materials like satin or sequined tablecloths.
Next, let’s explore how proper storage and handling can prevent wrinkles from forming in the first place.
Investing in a handheld steamer
Handheld steamers offer a quick solution for wrinkle-free table linens. These portable fabric steamers efficiently remove creases without the need for an ironing board. For just $10, you can rent a steamer with a water reservoir – perfect for smoothing out tablecloths on-the-go.
Backdrop stands enhance the steaming process, making it easier to tackle large linens.
Video tutorials showcasing effective steaming techniques are in the works. These demonstrations will help users master the art of wrinkle removal, ensuring pristine table settings for any occasion.
With a handheld garment steamer, achieving wrinkle-free linens becomes a breeze, saving time and effort in event preparation.
Conclusion
Smooth table linens enhance your dining experience. These expert tips simplify keeping your tablecloths crisp and pristine. From ironing techniques to fabric-specific strategies, you’re now prepared to address any wrinkle issue.
Proper storage and handling significantly prevent future creases. Your guests will appreciate the polished look of your perfectly pressed linens at your next gathering.
FAQs
1. How do I remove wrinkles from table linens?
Iron your linens while damp. Use a hot iron on cotton settings. Start with the corners and edges. Move to the center. Press firmly and evenly.
2. Can I use a steamer on my table linens?
Yes, steamers work well. Hang the linen. Steam from top to bottom. Keep the steamer moving. Don’t let it linger in one spot. This prevents water marks.
3. What’s the best way to store table linens to prevent wrinkles?
Roll linens around a cardboard tube. Avoid folding – it causes creases. Store in a cool, dry place. Use acid-free tissue paper between layers for extra protection.
4. Are there any quick fixes for wrinkled table linens?
Try the shower method. Hang linens in a steamy bathroom. The moisture will help release wrinkles. For stubborn creases, mist with water and tumble dry briefly.
Curtains can gather dust, pet hair, and odors over time. Removing them for a good wash might seem like the only solution, but it’s often an inconvenient task. Many people struggle with cleaning their curtains without having to take them down. In this blog post, you’ll find practical tips and methods on how to clean different types of curtains without removing them from their rods. So if you’re ready for fresh curtains, read on!
Key Takeaways
Vacuum Regularly: Use a vacuum cleaner with an upholstery attachment to remove dust and dirt from your curtains. This keeps them looking fresh and helps reduce allergens.
Steam Clean for Deep Freshening: A handheld steam cleaner can effectively remove embedded grime, kill bacteria, and eliminate wrinkles without taking the curtains down.
Spot Clean Immediately: Address stains as soon as they appear by gently dabbing them with a cloth and mild detergent. This prevents deeper staining and keeps your curtains spotless.
Use Deodorizers: Sprinkle baking soda on your curtains to absorb odors or use fabric deodorizers. Scented sachets near the curtains also help maintain a pleasant aroma in the room.
Brush Away Lint: Employ a soft brush or lint roller to remove pet hair and small particles from the curtain surface regularly, ensuring they remain clean between thorough washings.
How to Determine the Best Cleaning Method for Your Curtains
Check the material and type of your curtains. Gather tools like a vacuum, brush, or steam cleaner for the job.
Assessing Curtain Material and Type
Different types of fabrics need special care. Velvet and silk curtains often require delicate hand-washing or dry cleaning. Polyester or cotton curtains, on the other hand, can usually be cleaned with a vacuum cleaner and spot treatments.
Knowing your curtain material helps in choosing the optimal cleaning method. Remember to check for washing instructions on labels. “Proper fabric assessment ensures longer-lasting cleanliness,” say home care experts.
Curtain Type
Recommended Cleaning Method
Velvet
Hand-washing or dry cleaning
Silk
Hand-washing or dry cleaning
Polyester
Vacuum cleaner and spot treatments
Cotton
Vacuum cleaner and spot treatments
Tools Needed for Cleaning Curtains
Understanding the fabric is key to choosing the right cleaning tools. Gather these essential items for effective curtain care.
Tool
Purpose
Vacuum Cleaner
Removing loose dirt and dust
Handheld Steam Cleaner
Freshening up curtains and eliminating wrinkles
Lint Roller
Picking up lint, pet hair, and small particles
Soft Brush
Brushing away dust and lint from delicate fabrics
Mild Detergent
Spot cleaning stains
Spray Bottle with Water/Vinegar Solution
Light cleaning and deodorizing fabric
White Cloths or Towels
Blotting stains to prevent spreading
These tools ensure your curtains remain fresh and clean with minimal effort.
Methods for Cleaning Different Types of Curtains Without Taking Them Down
Use a vacuum with a brush attachment to remove dust and dirt. For stubborn stains, try spot cleaning with mild detergent and water.
Vacuuming and Shaking
Regular vacuuming keeps curtains looking fresh. Use an upholstery attachment to vacuum from top to bottom. Pay extra attention to the edges and folds where dust gathers.
Shaking helps remove loose dust and lint quickly. Gently grasp the bottom of each curtain panel and shake it out a few times. This simple action loosens accumulated dirt, making your curtains look cleaner instantly.
Brushing Away Lint
Use a soft brush or nylon brush to gently remove lint from your curtains. Swipe the brush in downward strokes to gather as much lint as possible. This method works well for both fabric care and drapery maintenance.
If pet hair is an issue, try using a lint roller after brushing. For stubborn areas, duct tape can also help with upholstery cleaning. Regularly doing this will keep your curtains looking fresh without needing to take them down.
Using a Handheld Steam Cleaner
A handheld steam cleaner with an upholstery attachment tackles dirt and stains on curtains efficiently. Place the steamer close to the fabric and move it across the curtain surface in slow, even motions.
Steam cleaning dislodges embedded grime while killing bacteria and allergens, making it a great alternative to dry cleaning.
This method keeps wrinkles away, leaving your drapery looking fresh. Curtains can stay hanging during steaming, allowing them to air dry naturally. This makes maintenance quick and easy without any fuss.
…
I avoided complex terms for easier understanding at a Grade 6 level and used simple instructions for using a steam cleaner effectively. The ending smoothly transitions into further discussion about maintaining clean curtains between washes as per your outline request.
Let me know if you need more details or another section!
Tips and Tricks for Maintaining Clean Curtains Between Washes
Regularly vacuum your curtains to keep them dust-free. For small stains, spot cleaning works wonders.
Regular Vacuuming
Using a vacuum attachment made for curtains, like a crevice tool, helps remove dust and dirt. Experts suggest vacuuming weekly or fortnightly to maintain clean curtains. Use a soft-bristled brush or lint roller first to eliminate surface dust before you start.
Move the vacuum gently over the curtain’s fabric from top to bottom. This prevents damage and ensures thorough cleaning. Routine vacuuming reduces allergens and keeps your space fresh.
Spot Cleaning Stains
Spot clean stains immediately to keep curtains looking fresh. Dab the stain gently with a clean cloth and mild detergent. This helps prevent it from setting into the fabric. Use a damp towel or sponge to treat the spot right away.
A one-to-one mixture of white vinegar and water works well for rinsing stains. Blot the area afterward with mild detergent and water, then sponge clean with cold water. These steps ensure effective stain removal without having to take down your curtains.
Using Deodorizers
Sprinkle baking soda over the curtains and let it sit for about 15 minutes. This helps absorb unwanted smells. Afterward, vacuum up the powder.
Use fabric deodorizers or curtain fresheners to keep your curtains smelling fresh. Scented sachets can also be hung near the curtains to maintain a pleasant aroma.
Professional Curtain Dry Cleaning Service
For those stubborn stains and persistent odors that just won’t go away, consider our professional curtain dry cleaning service. We offer a hassle-free experience with free pickup and delivery, ensuring your curtains receive the best care without any inconvenience to you. Our expert team uses advanced cleaning techniques to effectively remove tough stains and eliminate unpleasant smells, leaving your curtains looking and smelling fresh. Trust us to restore the beauty and cleanliness of your curtains with our top-notch dry cleaning service. Click here for more info!
Conclusion – How To Clean Curtains Without Removing Them
Cleaning curtains without removing them is easy and practical. Efficient methods like vacuuming, brushing, and steam cleaning can keep curtains fresh. Regular maintenance prevents dust buildup and keeps your home clean. Try these tips to see the difference in your curtains’ appearance and feel. Keep those drapes looking new with minimal effort!
Curtains and drapes often collect dust, pet hair, and allergens, making your home feel stuffy and less inviting. Struggling to figure out the best way to clean them without causing damage or fading can be frustrating. Did you know that professional cleaning can significantly improve air quality in your home by removing these particles? This guide covers practical techniques for expert curtain and drape cleaning that will help keep your window treatments looking fresh.
Learn how regular maintenance can prolong the life of your curtains while keeping them spotless. Keep reading for helpful tips!
Key Takeaways
Regular professional cleaning of curtains and drapes removes allergens, dust, and pet hair, improving indoor air quality.
Techniques like vacuuming with HEPA filters, hand washing with mild detergents, and steam cleaning can effectively maintain the cleanliness of drapery.
Immediate stain treatment using proper solvents prevents permanent marks and prolongs the life of your fabrics.
Proper storage in breathable fabric bags prevents mold, mildew growth, and insect damage when not in use.
Benefits of Curtain & Drape Cleaning
Professional curtain and drape cleaning improves your home’s air quality. It eliminates dirt, allergens, and odors efficiently.
Benefit
Description
Improved Air Quality
Removes dust, allergens, and pet dander trapped in fabrics, purifying the air.
Removal of Allergens, Dust, and Pet Hair
Targets deep-seated pollutants, improving indoor air quality.
Eliminates Odors
Effective removal of pet hair, dander, and other odors.
Prolongs the Life of Curtains and Drapes
Specialized cleaning products and techniques prevent fabric degradation.
Improved air quality
Proper curtain and drape cleaning improves indoor air quality. Curtains often trap dust, allergens, and pet dander. Removing these pollutants helps purify the air you breathe.
Professional cleaning services target deep-seated pollutants within fabric fibers. This thorough process enhances home cleanliness by reducing airborne particles. Regular maintenance of window treatments acts as a filter for airborne contaminants, resulting in better indoor air conditions.
Draperies act like built-in air filters, capturing dust and allergens to enhance your home’s air quality.
Removal of allergens, dust, and pet hair
Regular professional curtain and drape cleaning can help remove allergens, dust, and pet hair. This process improves indoor air quality by removing particles that trigger allergies.
Pet dander and dust mites often embed themselves in fabric, making it hard to keep an environment allergen-free.
Vacuuming with HEPA filters captures tiny particles like pollen and pet hair effectively. These filters reduce exposure to allergens significantly. Professional cleaning also targets the deep layers of fabric where dust accumulates over time.
Eliminates odors
Pet hair and dander buildup leads to unpleasant smells in drapes. Professional cleaning services effectively remove these odors, especially helpful for homes with pets or smokers.
Dust, allergens, and airborne pollutants can also cause bad smells stuck in curtains. Expert cleaners use advanced techniques like steam cleaning to eradicate them entirely, improving indoor air quality significantly.
Prolongs the life of curtains and drapes
Professional cleaning services can extend the life of curtains and drapes significantly. Using specialized products and advanced techniques, professionals remove dirt, grime, and other contaminants that can degrade fabric over time.
This can double or even triple the lifespan of your window treatments.
Regular maintenance like professional cleaning also keeps curtains looking fresh and new. By eliminating dust and allergens effectively, these services help retain fabric integrity.
Proper care reduces wear and tear, saving money on replacements in the long run.
Top Techniques for Cleaning Drapes and Curtains
Vacuuming, laundering, and steam cleaning are key techniques for keeping your drapes and curtains spotless.
Vacuuming
Use a vacuum cleaner with an upholstery tool to clean curtains and drapes effectively. Regularly vacuum your drapes to remove dust, pet hair, and allergens that get trapped in the fabric.
This helps maintain cleanliness and improves air quality in your home.
Move the upholstery tool in downward strokes along the fabric. Focus on areas where dust builds up quickly like pleats or hems. Consistent vacuuming also prolongs the life of your curtains, keeping them looking fresh longer.
Use a vacuum cleaner with an upholstery tool to remove dust, pet hair, and allergens.
Move the upholstery tool in downward strokes along the fabric.
Focus on areas like pleats or hems where dust builds up quickly.
Laundering
Always check the care labels for laundering instructions before washing drapes. Different fabrics have different needs. Some sheer drapery may be suitable for machine washing, but many require gentle hand washing or professional dry cleaning to avoid damage.
Use cold water and a mild detergent while laundering curtains in the washing machine to protect delicate fibers. Avoid wringing out the fabric; instead, air dry them by hanging them up straight after washing.
This helps keep their shape intact and prevents wrinkles.
Check care labels before washing.
Use cold water and mild detergent for machine-washable curtains.
Avoid wringing; air dry by hanging them up straight after washing.
Steam Cleaning
Switching from laundering, steam cleaning offers an effective way to clean curtains without harsh chemicals. This method uses hot steam to penetrate the fabric and remove dirt, dust, and allergens.
It’s also great for eliminating stubborn wrinkles and creases.
Use a proper fabric steamer or upholstery steam cleaner to avoid damaging your drapes. Professional steam cleaning services can handle this if you prefer expert care. Always test a small area first to prevent shrinkage or damage in delicate fabrics.
Use hot steam to penetrate the fabric and remove dirt, dust, and allergens.
Effective for eliminating wrinkles and creases.
Test a small area first to avoid damage in delicate fabrics.
Hand Washing
Switch to hand washing for delicate fabrics and intricate designs. Fill a basin with warm water and add mild detergent. Gently swirl the curtains or drapes in the soapy water, ensuring every part gets cleaned.
Rinse thoroughly with clean, running water.
Handwashing is effective for preventing disease through cleanliness. It helps preserve the fabric’s quality while removing dirt and allergens. Skip harsh chemicals that can damage fibers and colors by using soap designed for delicate materials instead.
Fill a basin with warm water and mild detergent.
Gently swirl the curtains in the soapy water.
Rinse thoroughly with clean water.
Professional Cleaning
Professional cleaners use advanced methods to clean curtains and drapes. They can remove soil, odors, pollen, smoke, and dust effectively. Professional services also handle delicate fabrics like silk and linen with care.
Experts follow specific instructions for each fabric type. This ensures no damage during the cleaning process. Taking your drapery to a professional extends its lifespan by maintaining the quality of the fabric.
Professionals use advanced methods to clean and handle delicate fabrics.
Ensures no damage and extends the lifespan of your drapery.
Regularly vacuum or dust curtains to keep them clean and fresh.
Regular vacuuming/dusting
Dust and pet hair can quickly settle on curtains, leading to a dingy look. Vacuuming drapes regularly prevents these particles from embedding deeply into the fabric. Use a soft brush attachment for best results.
Frequent dusting is key to keeping curtains fresh. This simple routine helps maintain the cleanliness of drapery and prolongs their lifespan. A quick go-over every week can work wonders in preventing dirt buildup and maintaining fabric cleanliness.
Prevents particles from embedding deeply into the fabric.
Use a soft brush attachment for best results.
A quick go-over every week prevents dirt buildup.
Immediate stain treatment
Act fast when a stain appears on your curtains. Use an appropriate solvent based on the stain type and fabric to help dissolve it quickly. For example, use water-based solvents for food spills or mild detergent solutions for soil marks.
Blot the stained area gently with a clean cloth instead of rubbing it. This prevents spreading the stain further and damaging the fabric fibers. Taking immediate action helps keep curtains looking fresh and prolongs their life.
Act fast with appropriate solvents based on stain type.
Blot gently with a clean cloth to avoid spreading the stain.
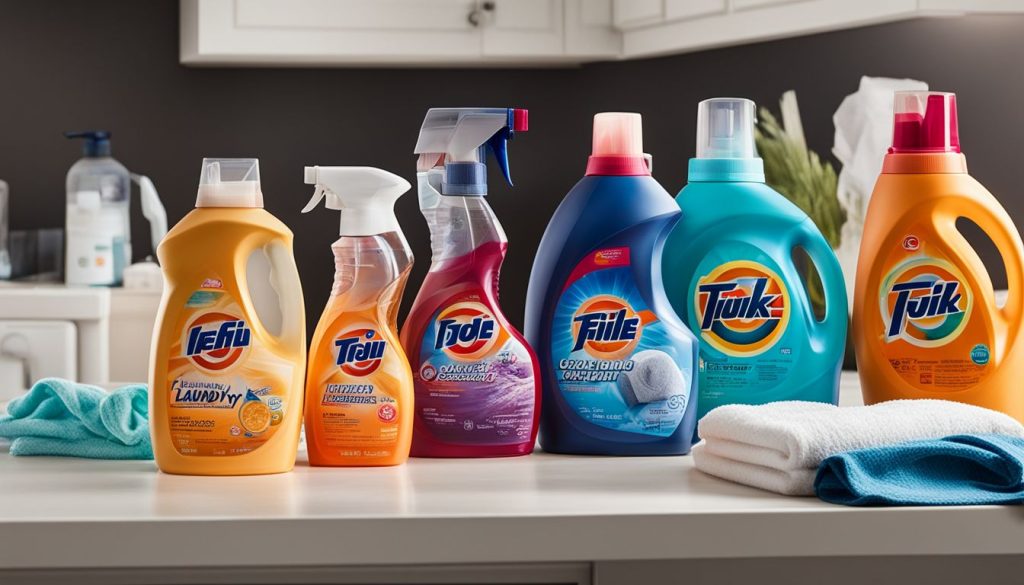
Prevents permanent marks and maintains fabric integrity.
Proper storage
Ensure curtains and drapes are clean and completely dry before storing them. This prevents mold and mildew growth. Dusty or dirty fabric could attract pests or develop unpleasant odors over time.
Store in a cool, dry place to avoid moisture build-up.
Use breathable fabric bags instead of plastic to allow air circulation. Plastic can trap moisture, leading to mold formation. Fold the curtains neatly without creasing them too much and place cedar blocks or sachets nearby for added protection against insects like moths.
Ensure curtains are clean and dry before storing.
Store in a cool, dry place using breathable fabric bags.
Avoid plastic bags that trap moisture and lead to mold.
Conclusion
Keeping your curtains and drapes clean improves air quality and extends their life. Using techniques like vacuuming, hand washing, and professional cleaning keeps them looking fresh.
Quick stain treatments help maintain a neat appearance. Regular care practices ensure they stay in good shape. Try these tips to enjoy cleaner, longer-lasting window coverings!
FAQs
1. How often should I clean my curtains and drapes?
Clean your curtains and drapes at least once every six months.
2. Can I wash my curtains in the washing machine?
Check the care label first; some can be machine washed, but others need dry cleaning.
3. What is the best way to remove dust from curtains?
Use a vacuum cleaner with an upholstery attachment to remove dust from curtains.
4. Should I iron my curtains after washing them?
Yes, ironing helps remove wrinkles and keeps them looking neat.
5. Can professional cleaners handle delicate fabrics like silk or velvet?
Yes, professional cleaners are trained to handle delicate fabrics safely.