February 2024 - Fabricare Center

Monthly Archives: February 2024

Expert Tips On Removing Sweat Stains From Hats Quickly & Easily

Expert Tips On Removing Sweat Stains From Hats Quickly & Easily

Household

Sweat stains on hats can ruin their appearance and make them hard to wear with confidence. Adding vinegar or dish soap enhances stain removal efforts, offering a powerful solution. This blog will guide you through several effective methods for removing those stubborn sweat stains from your favorite hats. Discover easy cleaning hacks below!

Key Takeaways

  • Vinegar and dish soap are powerful agents for removing sweat stains from hats, making them appear new again.
  • Different materials like cotton, polyester, and wool in hats react differently to sweat – with some showing stains more than others.
  • Hand washing with detergent and using a baking soda and vinegar solution are effective, eco – friendly methods for tackling tough sweat marks on hats.
  • Using enzyme – based stain removers can break down protein stains from sweat, offering a safe alternative to harsh chemicals.
  • Regular cleaning practices like rotating hats, spot cleaning after each use, proper storage, utilizing hat liners or bands, and applying protectants like Hat Saver spray help prevent sweat stains and extend the life of your favorite headwear.

Understanding Sweat Stains on Hats

Understanding Sweat Stains on Hats

Sweat stains on hats happen because of salt and oils from your skin mixing with the fabric. They mainly affect cotton, wool, and polyester materials in hats.

Why Sweat Stains Occur

Sweat stains on hats happen because the body produces natural oils and salts. These substances can soak into hat fabrics, leading to discoloration. Different types of headwear, from baseball caps to straw hats, get these marks.

Some materials show stains more easily than others.

Now let’s explore which common fabrics and materials are most affected by sweat stains on hats.

Common Fabrics and Materials Hat Stains Affect

Sweat stains often find their way onto our favorite hats, affecting a variety of materials and fabrics. Cotton, polyester, and wool are the most common victims of these tough-to-remove marks.

These textiles absorb perspiration easily, leading to discoloration and moisture damage over time.

Each material reacts differently to sweat. Cotton hats may show yellowing more prominently due to the natural fibers reacting with the salts in sweat. Polyester, being synthetic, might not yellow as much but can still hold onto odor and become stiff from salt buildup.

Wool hats are delicate; they require special care as moisture can alter their shape and texture significantly. Proper handling is crucial for maintaining these materials’ integrity while tackling pesky sweat stains effectively.

Effective Ways to Remove Sweat Stains

Effective Ways to Remove Sweat Stains

Several methods can make your hats look new again. Explore how hand washing, dishwashers, and natural solutions tackle those tough stains effectively.

Hand Washing With Detergent

Mix cool water and a mild laundry detergent in a basin or sink for hand washing hats. This approach effectively lifts sweat stains and eliminates odors without harming the fabric. Gently scrub the stained areas with a soft brush or cloth, focusing on heavily marked spots.

Rinse thoroughly under running water to remove all soap residue. For hats with stubborn sweat marks, applying an enzyme-based cleaner before washing can break down stains more effectively.

Always air dry hats away from direct sunlight to avoid shrinking or warping the material.

Dishwasher Method

Place your hat on the top rack of the dishwasher to clean it without harming its shape. Use a mild detergent and add a cup of white vinegar for extra stain-fighting power. Ensure the brim is plastic before choosing this method, as other materials might get damaged.

This approach keeps your ball cap looking new while effectively removing sweat stains.

Run a regular cycle but skip the heated dry option to prevent any possible damage or shrinkage. Hats come out clean, maintaining their form perfectly. Remember, this method is ideal for quick and easy cleaning, making it a great choice for busy individuals who value both efficiency and hat care.

Washing Machine Gentle Cycle

After considering the dishwasher method, another effective technique involves using your washing machine’s gentle cycle. This approach is ideal for hats made from delicate fabrics or those with structured shapes.

Set your washer to a cold, gentle cycle and add bleach-free detergent. Pre-treat any tough sweat stains by applying a stain remover directly onto the marks before putting the hat in the wash.

This step helps target stubborn areas and shields your hat from damage.

Finish by air drying your hat away from direct sunlight to maintain its shape and color. Pretreating sweat stains with products like liquid Clorox 2 can assist in loosening perspiration marks, making them easier to wash out during this gentle cycle.

Remember, using cold water not only prevents shrinkage but also keeps fabric colors vibrant through numerous washes.

Baking soda and vinegar solution

Moving from the gentle cycle of a washing machine, another eco-friendly and effective method for sweat stain removal is using a baking soda and vinegar solution. This DIY sweat stain remover works wonders on hats without causing damage to sensitive skin.

To prepare, mix equal parts of white vinegar and baking soda to form a paste. Apply this natural stain remover directly onto the perspiration stains and let it sit for 30 minutes.

Rinse the hat with cold water after the time is up. The combination not only tackles tough sweat marks but also helps in sweat odor removal, leaving your hat fresh. This organic stain treatment is safe for various fabric types, making it an excellent choice for those looking for homemade solutions to keep their hats clean.

Tips for Removing Tough Sweat Stains on Hats

For tough sweat stains on hats, applying an enzyme-based stain remover can break down the stain for easy cleaning.

Using an Enzyme-based Stain Remover

Choose an enzyme-based stain remover like Zout or Krud Kutter Sports Stain Remover for tough sweat stains on hats. These cleaners break down protein stains, making them ideal for perspiration spots.

Before washing, pretreat stained areas and the sweatband with the enzyme cleaner. This step helps remove stubborn yellowing from white hats and other tough stains.

Enzyme stain removers work using plant enzymes as a catalyst to tackle various messes. This makes them effective against protein-based stains such as sweat. They offer a safe alternative to harsh chemicals, avoiding damage to hat materials while thoroughly cleaning.

Gentle Bleach-free Dish Soap

After considering enzyme-based cleaners, it’s vital to explore gentle bleach-free dish soap as another effective tool for tackling tough sweat stains on hats. This mild cleaning agent is perfect for scrubbing out stubborn marks without damaging the fabric.

Its formula, designed to be tough on stains but soft on materials, ensures your hat remains intact during the cleaning process. Apply a small amount directly onto the stain and use a soft brush or cloth to gently work it into the area.

Rinse thoroughly with cool water to remove any soap residue.

For added stain-fighting power, mix lemon juice with the dish soap before applying it to the stain. The natural bleaching effect of lemon juice can lighten sweat stains significantly before rinsing.

This combination of natural ingredients creates a powerful solution that lifts away dirt and grime without harsh chemicals or bleach, keeping your baseball caps and other hats looking their best.

Always test this method on an inconspicuous area first to ensure colorfastness and avoid potential damage to special fabrics or designs on your hat.

Avoiding Hot Water and Harsh Chemicals

Moving from using gentle bleach-free dish soap, it’s crucial to avoid hot water and harsh chemicals in hat cleaning. Hot water can set stains permanently and weaken fabric fibers. Always opt for cold water washes to prevent damage and maintain the hat’s shape.

Similarly, harsh detergents can fade colors and degrade material quality over time. Stick to laundry care with mild detergents designed for gentle washing. This approach ensures sweat mark removal while protecting your hat’s longevity and appearance.

Cold water rinsing also plays a key role in stain treating without risk of setting them further into the fabric. Strictly using mild solutions helps preserve hat fabrics during the stain removal process, ensuring they stay vibrant and intact through multiple washes.

For effective laundry care, following maker instructions on detergent use is essential for optimal results in fabric care and clothing maintenance without resorting to damaging practices.

Preventing and Caring for Sweat Stains on Hats

Keeping hats free from sweat stains starts with proactive steps in care and maintenance. Techniques like regular cleaning and using protective liners keep your hats looking fresh longer.

Regularly Rotating Hats

Switching between different hats allows each one to air out, reducing the buildup of sweat and odor. This practice helps in maintaining the freshness of your headwear and extends its lifespan by preventing stains.

Wearing different hats also ensures even usage, minimizing wear and tear on a single item.

For effective sweat management, include spot cleaning after wearing. This simple step can help keep perspiration at bay and maintain the quality of your hat accessories. Proper storage is crucial; it ensures that hats retain their shape and are protected from dust and direct sunlight which can cause fading and weaken fibers over time.

Spot Cleaning After Each Use

Spot cleaning hats right after they’re used can prevent sweat stains from setting in. Quickly blot any damp areas with a clean cloth or paper towel. This step helps manage perspiration and keeps the hat looking fresh.

Make this practice part of your routine hat care to avoid deep-set stains later on.

Use mild soap and water for spot treatment on visible sweat marks. Gently rub the stained area, then rinse thoroughly. Stick to gentle, bleach-free products to safeguard the fabric’s integrity.

Regular attention to sweat spots maintains the hat’s appearance and extends its life, making each wear as good as new.

Proper Storage

Keep hats in a cool, dry place to stop sweat stains before they start. Use hat boxes or hooks away from direct sunlight and moisture to preserve their shape and prevent odor. Placing a small towel inside the cap keeps its form intact while drying.

Rotate your hats regularly and consider using a sweatband or liner for extra protection. These steps help in maintaining the hat’s condition, reducing the likelihood of permanent stain buildup and keeping your hats looking fresh longer.

Using a Sweatband or Hat Liner

Wearing a sweatband or hat liner offers an effective barrier between your scalp and the hat. This simple method prevents sweat from soaking into the fabric, keeping stains at bay. These liners capture perspiration and body soil, making them essential for maintaining hygiene and odor control in headwear.

They are especially useful in extending the life of your hats by shielding them from moisture damage.

Rotating hats gets easier with these accessories since they absorb much of the sweat, allowing each hat to air out properly between uses. Consider these tools as an investment in both the cleanliness of your hats and their longevity.

Not only do they help keep your favorite pieces looking new, but they also promote better fabric care by reducing the need for frequent washes that can wear down materials over time.

Utilizing Hat Saver for Long-Term Protection

Hat Saver is a cutting-edge spray that fights off sweat and stains on all hat types. This product makes sure sweat stays in the headband, stopping yellow stains especially on white hats.

It not only repels water, dirt, and oily stains but also allows hats to breathe. This keeps your headwear looking fresh and clean for longer periods.

Applying Hat Saver spray is easy and works well for any hat material. Its design focuses on stain prevention, offering a long-term solution to keeping your hats free from unsightly sweat marks.

With Hat Saver, maintaining headgear protection becomes simple, ensuring your favorite hats stay in prime condition without the hassle of frequent washing or stain removal attempts.

Conclusion

Maintaining the fresh appearance of your hats and keeping them free from sweat stains is not only possible but can be easily achieved with the right care and techniques. From utilizing natural cleaning agents like vinegar and dish soap to adopting more specialized methods such as enzyme-based stain removers and Hat Saver spray, this blog has outlined a comprehensive guide to tackle those persistent sweat marks effectively. 

Remember, the key to success lies in understanding the material of your hat and choosing the appropriate cleaning method. Regular maintenance, including spot cleaning and proper storage, alongside preventive measures like using hat liners or bands, can significantly extend the life of your favorite headwear. By following these expert tips, you can ensure that your hats remain a stylish and confident part of your wardrobe for years to come, free from the blemish of sweat stains.

FAQs

What’s the first step to remove sweat stains from hats?

Start by lightly brushing the stained area to remove any loose dirt.

Can I use regular laundry detergent on my hat?

Yes, applying a small amount of gentle laundry detergent directly on the stain works well.

Is it okay to put hats in the washing machine for stain removal?

No, washing hats in machines can damage their shape; hand wash them instead.

How do I dry my hat after removing the sweat stains?

Let your hat air dry naturally by placing it on a clean towel or over a container to keep its shape.

Are there any home remedies for removing sweat stains from hats?

Mixing baking soda and water into a paste and applying it to the stains can be effective.

What's The Difference Between Tailoring And Alterations

What’s The Difference Between Tailoring And Alterations

Fabricare Center Blog

Have you ever bought a piece of clothing that just didn’t fit right? Tailoring involves custom-fitting clothes, while alterations make adjustments to already made items. This guide will explain the differences between tailoring and alterations and how they can solve your fitting issues.

Keep reading to find your perfect fit.

Key Takeaways

  • Tailoring creates custom – fitted clothes by making significant modifications, while alterations adjust the fit of already made items with minor changes.
  • Tailors offer personalized services that can reshape a garment’s silhouette or adjust specific details like sleeve length, whereas alterations focus on fitting issues such as hemming pants or taking in a waistband.
  • Selecting experienced professionals for tailoring and alteration needs is crucial; researching, reading reviews, and asking for referrals can lead to finding skilled experts who ensure garments fit perfectly.
  • Costs for tailoring and alterations vary based on the complexity of the service, type of garment, and fabric. It’s important to discuss prices upfront to avoid surprises.
  • Properly tailored or altered clothing not only enhances comfort and appearance but also boosts confidence by ensuring clothes look custom-made for the wearer.

Understanding Tailoring and Alterations

Understanding Tailoring and Alterations

Diving into the world of clothing customization reveals two essential services: tailoring and alterations. Each plays a unique role in ensuring your garments fit perfectly, enhancing both comfort and style.

What is Tailoring?

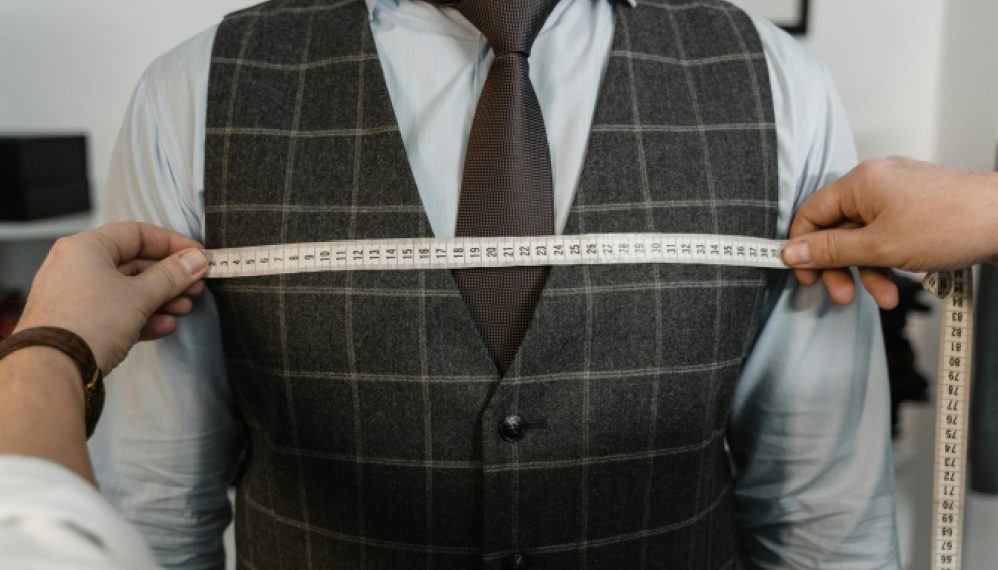
Tailoring transforms ordinary clothing into custom-fitted garments that flawlessly match the wearer’s body shape and size. This craft involves extensive customization, from detailed stitching to major adjustments, ensuring each piece of clothing fits perfectly.

Tailors assess a person’s measurements and attire needs, then meticulously alter the garment using sewing techniques that cater specifically to those requirements.

Through personalized tailoring services, individuals can achieve a bespoke look that highlights their best features while hiding any imperfections. Unlike simple alterations, tailoring provides comprehensive modifications allowing for a significantly tailored fit.

This customization ranges from adjusting sleeve lengths on jackets to reshaping the entire silhouette of a dress, making every garment unique to its owner’s form and style preferences.

What are Alterations?

Alterations involve making changes to a garment after you’ve bought it to ensure a perfect fit. They aim at enhancing the comfort of the wearer by adjusting the size, either length or width, without altering the original design or style of the clothing item.

A skilled seamstress or tailor can perform these adjustments, which may include shortening sleeves, taking in a waistband, or hemming pants to just the right length. These modifications allow clothes to flatter your body shape better.

The process often includes fittings where you try on your clothing and the professional marks areas needing adjustment. Whether it’s refitting an old favorite shirt that no longer fits well due to weight change or sizing down a dress for a special occasion, alterations make sure your garments look custom-made for you.

This service extends beyond mere repairs; it’s about achieving an ideal fit that boosts confidence and makes any piece of clothing feel brand new again.

The Difference Between Tailoring and Alterations

AspectTailoringAlterations
PurposeTransforms clothing into custom-fitted pieces.Adjusts existing garments for a better fit.
Service ScopeComprehensive, may include altering garment structure.Focused, typically on smaller, specific changes.
Customization LevelHigh, considers all aspects of an individual’s physique and style preferences.Moderate, aims at fitting issues without extensive customization.
Common ChangesReshaping silhouette, adjusting sleeve length, overall fit customization.Hemming pants, adjusting waistbands, simple size adjustments.
FocusEnhancing fit and complementing the wearer’s body shape perfectly.Making pre-purchased clothing feel more comfortable and look more flattering.

Tailoring transforms a clothing item into a custom-fitted masterpiece for the wearer, going beyond simple adjustments to ensure every detail complements the individual’s body shape perfectly.

It involves a comprehensive service that includes altering the structure of the garment if necessary, offering personalized tailoring to fit like it was made just for you. On the other hand, alterations typically focus on making smaller changes such as hemming pants or adjusting a waistband to achieve a better fit.

These are manageable changes intended to make pre-purchased clothing feel more comfortable and look more flattering without extensive customization.

While both processes aim to improve how clothes fit, tailoring provides that extra level of customization by considering all aspects of an individual’s physique and style preferences.

This ensures tailored garments not only fit well but also highlight the wearer’s best features through customized adjustments. Moving from understanding these differences can help when exploring common alteration services and their costs, guiding choices for specific wardrobe updates.

Common Alteration Services and Costs

Common Alteration Services and Costs

The cost of tailoring and alteration services varies significantly based on the complexity of the work and the type of garment. Here’s an improved guide to help you budget for custom fitting needs, complete with average costs for each service.

Jackets

  • Services: Shortening sleeves, resizing, adjusting seams for a better silhouette.
  • Benefits: Converts off-the-rack jackets into pieces that look bespoke.
  • Average Costs: Sleeve shortening ($20-$40), jacket resizing ($40-$100), seam adjustments ($20-$50).

Suit Pants

  • Services: Waist alterations, hemming, length adjustments, tapering for a tailored fit.
  • Benefits: Enhances appearance and comfort, providing a custom fit.
  • Average Costs: Hemming ($10-$20), waist adjustments ($20-$50), tapering ($20-$40).

Shirts

  • Services: Shortening sleeves, taking in sides, adjusting collar size.
  • Benefits: Offers a tailored fit for off-the-rack shirts, improving comfort and style.
  • Average Costs: Sleeve shortening ($15-$30), side adjustments ($20-$40), collar resizing ($10-$20).

Dresses

  • Services: Hemming, waist and bodice adjustments, adding or removing embellishments.
  • Benefits: Achieves a perfect fit for casual and formal dresses, enhancing silhouette and comfort.
  • Average Costs: Hemming ($20-$40), bodice adjustments ($30-$60), adding embellishments ($50+ depending on complexity).

Wedding Dresses

  • Services: Gown shortening, seam resewing, adding straps or altering sleeves.
  • Benefits: Customizes bridal wear to fit perfectly, reflecting the bride’s personal style.
  • Average Costs: Shortening ($100-$300), seam adjustments ($150-$300), adding straps ($20-$100).

Tailoring and alterations not only improve the fit of your garments but also enhance your overall appearance and confidence. Whether updating an old favorite or ensuring your wedding dress fits like a dream, investing in professional tailoring services is worth every penny. Remember, the costs can vary based on your location, the tailor’s expertise, and the specific requirements of your garment. Always discuss prices upfront to avoid surprises.

Finding the Right Professional

Selecting the perfect tailor or seamstress transforms your clothing from fitting okay to fitting flawlessly. This step ensures your garments not only look great but feel custom-made just for you.

Tips for Finding a Skilled Tailor or Seamstress

Finding the right professional for your clothing alterations or custom tailoring can greatly enhance the fit and look of your garments. It’s crucial to choose a skilled tailor or seamstress who can meet your specific needs and preferences. Here are some actionable tips that can help you in your search:

  1. Start by doing thorough research on local sewing specialists, couturiers, and tailoring shops. Look for those with good reputations in bespoke tailoring and fabric alterations.
  2. Read online reviews to gain insights into others’ experiences. Pay attention to comments about the quality of garment adjustments and customer service skills.
  3. Ask friends, family, or colleagues for referrals. Personal recommendations often lead to finding dressmakers who have proven their expertise in apparel modifications.
  4. Check out the portfolio of potential tailors or seamstresses. This will give you an idea of their skill level in handling various stitching services.
  5. Have a conversation with them about their experience, especially if you need work on specific items like wedding dresses or suit pants.
  6. Inquire about turnaround times and costs upfront to avoid any surprises later on.
  7. Always bring the garment you want altered or tailored when consulting with a professional to ensure they fully understand what you are looking for.
  8. Consider starting with a small adjustment before committing to more significant alterations or custom work.
  9. Ensure that the tailor or seamstress understands the importance of buying clothes that minimize the need for extensive modifications.

Do Your Research

Diving into the world of tailoring and alterations requires more than just a keen eye for detail; it demands thorough research on local dressmakers, alteration services, and custom clothing professionals.

This step is vital because different tailors and seamstresses specialize in various aspects of garment modification. By investigating sewing and alterations businesses near you, you ensure that your clothing receives the attention it deserves.

Begin by exploring tailored clothing solutions that are available in your area. Look into personalized tailoring services to see who offers exactly what you need, whether it’s adjusting a suit or transforming a wedding dress.

The importance of this groundwork cannot be overstressed—it connects you with the right garment modification experts who can turn your vision into reality while preserving the integrity of your attire.

Read Reviews

Checking out reviews can be your secret weapon in finding the right professional for custom clothing and garment adjustments. Happy customers often share detailed insights about their experiences, which helps you gauge the quality of tailoring and alterations services offered by various professionals.

Look for comments on the tailor’s expertise, timeliness, and how well they communicated throughout the process.

Customers might also highlight any issues they encountered, giving you a clearer picture of potential pitfalls. This information proves invaluable as it steers you towards skilled tailors who consistently deliver excellent work.

After gathering this intel, your next step should be reaching out to get firsthand referrals from trusted sources.

Ask for Referrals

Don’t hesitate to ask for referrals when searching for the right professional in tailoring and alterations. People who always seem well-dressed likely know where to find skilled tailors or seamstresses.

Their recommendations can lead you to experts who have already proven their worth with impeccable work. Well-dressed individuals understand the importance of a good fit and will gladly point you in the right direction.

Explore local boutiques and high-end dress stores too; staff there often have nominations for competent tailors familiar with luxury fabrics and complex alteration needs. Their endorsements come from regular interaction with professionals who deliver exceptional results on high-quality garments, ensuring your clothing receives top-notch care.

Following these tips not only streamlines your search but also connects you with artisans capable of transforming your wardrobe pieces into custom-fitted attire.

Conclusion

Understanding the nuances between tailoring and alterations is crucial for anyone looking to enhance their wardrobe’s fit and appearance. Tailoring offers a transformative custom-fitting process, while alterations adjust existing garments for a better fit. The key to achieving that perfect, confidence-boosting look lies in selecting the right professional. This involves researching, reading reviews, and seeking referrals to find skilled experts who can tailor your clothes to your unique shape and style preferences. The investment in tailoring and alterations is not just about modifying clothes but perfecting them for comfort, style, and a custom-made feel. Whether it’s a complex adjustment to a bridal gown or a simple hemming of pants, the right alterations can significantly elevate your wardrobe and ensure that every piece looks like it was made just for you.

FAQs

1. What’s the main difference between tailoring and alterations?

Tailoring customizes clothing to fit your body perfectly, while alterations modify existing clothes for a better fit.

2. Can any piece of clothing be altered or tailored?

Yes, most pieces of clothing can be either altered or tailored to improve their fit.

3. Is tailoring more expensive than alterations?

Generally, tailoring is more expensive because it involves more complex changes to make clothes fit uniquely to your body.

4. How long does it take to get clothes altered or tailored?

The time needed depends on the complexity of work but usually takes from a few days up to 2 weeks.

5. Should I consider tailoring or altering my new suit?

Consider tailoring your new suit if you want it custom-fitted, or choose alterations for simple adjustments like hemming the pants.

5 Effective Methods For Removing Candle Wax From A Tablecloth

5 Effective Methods For Removing Candle Wax From A Tablecloth

Fabricare Center Blog , Household

Candlelit dinners can quickly go from romantic to frustrating when wax drips onto your tablecloth. In fact, frozen candle wax is easier to remove by scraping it off than softened wax. Our blog offers a treasure trove of simple and effective methods for removing candle wax stains from your tablecloth. Keep reading and we’ll show you how!

Key Takeaways

  • Use a blow dryer on medium heat to soften candle wax on your tablecloth, then absorb it with paper towels before washing.
  • For tougher wax stains, lay a towel over the spot and press with a warm iron to transfer wax off the fabric.
  • Freezing the tablecloth makes hard candle wax easy to break away; after removal, treat any remaining stains with vinegar or detergent.
  • Boiling water can loosen and melt away candle wax from tablecloths; pour slowly and follow up with a wash for best results.
  • Washable tablecloths can go through a combined process of freezing, scraping, soaking in an oxygen – based cleaner overnight, and machine washing to remove all traces of candle wax.

Common Methods for Removing Candle Wax From a Tablecloth

Common Methods for Removing Candle Wax From a Tablecloth

Removing stubborn candle wax from your tablecloth doesn’t have to be a hassle; there are several tried-and-true techniques that can restore your linens to their former glory. From the gentle heat of a blow dryer to the surprising efficacy of freezing, each method offers a unique approach for tackling those waxy accidents without damaging delicate fabrics.

Blow Dryer Method

The blow dryer method stands out as a top choice for cleaning up candle wax spills. It turns hard wax pliable, making stain removal from your tablecloth or hard surface more manageable.

  • Set up your workspace by laying the wax-stained tablecloth over a flat, heat-resistant surface.
  • Plug in your hair dryer and adjust it to a medium heat setting to avoid damaging the fabric.
  • Begin heating the wax with the blow dryer, holding it several inches away from the cloth to prevent scorching. Keep moving the blow dryer back and forth until you see the wax start to soften.
  • Press a layer of paper towels gently over the softened wax. The goal is to absorb as much of the now pliable melted wax as possible.
  • Repeat with fresh paper towels if necessary, ensuring all excess wax has been lifted from the tablecloth.
  • Once most of the candle wax is gone, use more heated air from the blow dryer on any remaining stains. This will further soften them for easier removal.
  • Blot these softer areas with white paper towels, which won’t transfer any color onto your tablecloth while absorbing any leftover waxy residue.
  • Inspect your tablecloth for any lingering marks. If some residue persists, consider repeating these steps or follow up with additional cleaning methods if needed.

Iron Method

Moving from the gentle heat of a blow dryer, the iron method steps it up with a bit more heat to tackle wax on tablecloths. It’s a trusted technique for those pesky wax spills that seem to love fabric too much.

  • Set your iron to a low or medium setting; too much heat can damage the tablecloth.
  • Place a thin towel over the wax stain on your tablecloth, which will act as a protective layer between the iron and the fabric.
  • Press the iron gently onto the towel above the wax stain. The idea is to heat the wax, melting it into a softer state for removal.
  • Keep the iron moving slowly over the stain. This ensures even heating and prevents singeing any area of your delicate tablecloth.
  • As you apply heat, you’ll notice the absorbed wax transferring onto your protection towel or paper.
  • Once enough wax has been absorbed by your towel, lift it to check progress. If there’s still some left, replace with a fresh section of towel as needed.
  • Continue this process until no more wax transfers from the fabric to your absorbing material.
  • After removing most of the melted wax, any remaining residue can often be cleaned up with rubbing alcohol or nail polish remover for an impeccable finish.

Boiling Water Method

Removing candle wax from a tablecloth doesn’t need to be stressful. The boiling water method effectively melts away the mess with ease.

  • First, remove as much of the solidified wax as possible using the edge of a spoon or a butter knife.
  • Boil enough water to fully submerge the stained portion of your tablecloth. Ensure it is just off the boil for optimal results.
  • Pour the hot water over the wax stain slowly, letting it penetrate and heat up the wax. This allows the melted wax to separate from the fabric fibers.
  • As you pour, you’ll see the melted wax start to float towards the surface; this means it’s working.
  • After pouring, gently agitate the water to encourage any remaining bits of wax to detach from the cloth.
  • Carefully drain away the hot water and floating wax. Be cautious not to burn yourself with splashes of boiling water.
  • Examine your tablecloth for any lingering wax residue or stains after removing most of it through this process.
  • If any spots remain, apply a spot treatment with laundry detergent and wash in warm water if your tablecloth material permits washing.
  • For stubborn remnants or dye stains left behind by colored candles, try blotting with vinegar or stain remover before washing.

Freezer Method

While the boiling water method is great for melting away wax, the freezer method takes a completely different approach by firming it up. This technique harnesses cold temperatures to solidify candle wax, making it simpler to lift off your tablecloth. Here’s how you can use the freezer method effectively:

  • Begin by removing as much of the excess wax as possible from the tablecloth using a spoon or butter knife; be gentle to avoid tearing the fabric.
  • Fold the tablecloth so that the waxy area lays flat and can easily fit into your freezer.
  • Place the tablecloth in your freezer and leave it there for about 45 minutes or until you’re certain that the wax has fully hardened. Referencing our important facts, this step is crucial for setting up an easy removal process.
  • Once the wax is hard enough, take out your tablecloth and immediately start peeling off the now brittle and frozen wax with your fingernail or a credit card edge.
  • For stubborn remnants, lay an ice cube wrapped in a thin cloth over them for a few minutes to chill further, then try scraping again.
  • After most of the wax has been chipped away, check if there are any leftover stains on your tablecloth. Treat these spots with a mixture of vinegar and warm water before laundering.

Washer Method (for washable tablecloths)

Removing candle wax from washable tablecloths can be straightforward with the Washer Method. This approach combines freezing, scraping, and machine washing to effectively eliminate wax stains.

  • Freeze the tablecloth to solidify the candle wax, making it easier to handle.
  • Carefully remove the tablecloth from the freezer and lay it flat on a hard surface.
  • Scrape off as much wax as possible using a dull knife; aim for gentle motions to prevent fabric damage.
  • Keep rigid and consistent pressure to lift the wax without tearing the cloth.
  • Place your tablecloth in a bucket or sink filled with warm water and an oxygen – based cleaner.
  • Soak overnight or for several hours; this will help loosen any remaining wax pieces.
  • Transfer the fabric directly into your washing machine, using caution not to spill any loosened wax.
  • Add laundry detergent as you normally would for a regular wash cycle.
  • Set the washer for a warm water cycle; heat helps dissolve residual wax and any lingering oils.
  • Check your tablecloth after washing; repeat soaking if faint stains are still visible before drying your cloth.

Tips and Tricks for Removing Candle Wax

Tips and Tricks for Removing Candle Wax

Delving into the realm of wax removal, we uncover a trove of clever techniques that go beyond the basics. Whether it’s leveraging everyday items to tackle stubborn spills or employing creative solutions for those pesky wax remnants, these tips and tricks are set to elevate your cleaning prowess to new heights.

Use nail polish remover or rubbing alcohol

For stubborn candle wax stains on your tablecloth, reach for nail polish remover or rubbing alcohol. These household staples are great for tackling the waxy buildup that resists regular washing.

Begin by gently dabbing a cotton swab dipped in acetone or rubbing alcohol onto the affected area. This will help break down the wax’s structure, making it easier to remove.

Before tossing the tablecloth into your laundry machine, blot any remaining residue with more of the nail polish remover or rubbing alcohol. This extra step ensures that most of the wax is lifted from the fabric, significantly reducing the risk of a lingering stain after washing.

Remember to handle these solutions with care, as they can act as solvents and may affect certain fabrics differently.

Scrape off hardened wax with a dull knife

Scraping off wax from your tablecloth doesn’t have to be a daunting task. Once the candle wax has hardened, gently use a dull knife to lift and remove the larger chunks. Be careful not to tug at the fabric or push too hard, which might damage your tablecloth.

For any stubborn residue that remains after using the dull knife method, consider popping your tablecloth into the freezer for about 30 minutes. Chilling will make the wax brittle and much easier to scrape away without leaving marks behind.

This trick helps you tackle even the most persistent spots of hardened candle wax with ease.

Place in freezer to harden wax before scraping

Once you’ve done your best to remove wax with a dull knife, take the next step for stubborn remnants. Tuck the tablecloth into the freezer and give it time to chill thoroughly. This simple trick transforms gooey wax into a more manageable solid that’s easier to dislodge from fabric fibers without leaving a mess.

After an hour or so, check if the wax feels firm to the touch; then gently chip away at it using your fingers or a blunt object like a spoon.

Freezing is not just effective; it’s also gentle on delicate table linens, ensuring your textiles come out looking as good as new. If you’re short on freezer space or need a quick fix, grab some ice cubes and nestle them in a plastic bag.

Place this directly onto the stained area. The cold will work its magic, hardening wax swiftly and allowing you to lift those pesky blotches without breaking a sweat or resorting to harsh chemicals that could damage the fabric of your beautiful tablecloth.

Remedy colored wax stains with vinegar

After you’ve managed to harden and scrape off the bulk of the candle wax, tackling any lingering colored stains is the next step. These pesky marks from colored candles may seem stubborn, but white vinegar often does the trick.

Prepare a cleaning solution by mixing one part vinegar with two parts hot water, blending them together for an effective stain-fighting mix.

Apply this vinegar mixture directly onto the stained area of your tablecloth or wood furniture. Let it soak in for a few minutes to break down the wax residue thoroughly—patience is key here.

Once saturated, rub gently with a clean cloth to lift off those colorful streaks without harming your fabric or wood surfaces. This simple tip ensures that remnants left behind after wax removal won’t linger on your cherished items, keeping them looking pristine and free of unsightly blemishes.

How to Remove Wax from Different Surfaces

Discover the versatility of wax removal techniques tailored for every surface in your home, ensuring that whether it’s your favorite tablecloth or cherished wood furniture, you’re equipped with the know-how to tackle those stubborn spots effectively.

Tabletops

Candlelit dinners can add a glow to your dining experience, but spilled wax on the table can be a real mood dampener. Fear not, there are effective methods to tackle candle wax on various tabletop surfaces, ensuring your furniture remains pristine.

  • Blow Dryer Method: Grab your hair dryer and set it on medium heat to gently warm the wax spill. This heating process will soften the wax, allowing you to wipe it away from the glass tabletop with ease.
  • Iron Method: If the wax is on a wooden surface, place a thin cloth or paper towel over the wax residue and gently press with an iron on low heat setting. The warmth transfers the wax onto the cloth, leaving your wood clean.
  • Boiling Water Method: For hard surfaces like granite or marble, boiling water can work wonders. Pour it carefully over the pooled wax to loosen its grip without damaging your table’s finish.
  • Scraping Method: Use a plastic scraper or credit card edge on stone tabletops. Gently nudge beneath cooled wax to lift it off without scratching the surface.
  • Wax Absorption Technique: Sprinkle some baking soda over softened candle wax on metal tables before wiping. It absorbs excess oils and helps in cleaning residue effectively.
  • Vinegar Solution: After removing the bulk of candle wax from any table surface, tackle remaining spots with a mixture of water and vinegar—the gentle acidity helps clear away any leftover smudges.
  • Professional Products: Specialty cleaners designed for specific materials like wood polish or stone sealant can give that extra touch of care while dealing with stubborn wax residue after most of it has been removed.

Table Linens

Table linens add elegance to any dining experience, but wax stains can quickly dampen the mood. Removing candle wax from tablecloths involves a combination of heat treatment and careful cleaning.

  • Blow Dryer Method: Use a hairdryer on medium heat to soften the wax. Once pliable, gently peel away the residue with your fingers.
  • Iron Method: Place a brown paper bag over the wax stain and lightly iron over it. The heat draws out the wax into the paper—lifting it off your linen.
  • Boiling Water Method: Stretch the stained area of the tablecloth over a bowl and secure it tightly. Pour boiling water over the wax to melt it away, letting gravity do its work.
  • Freezer Method: As per our crucial facts, freeze your table linen to harden any remaining wax after scraping. After about 30 minutes in the freezer, take it out and break away the chilled wax easily.
  • Washer Method: For washable tablecloths, once you’ve removed most of the solid wax, launder according to fabric care instructions using hot water to dissolve any lingering residue.

Upholstery

Transitioning from table linens to furniture, let’s shift our focus to upholstery—a common victim of candle wax spills. Upholstery maintenance requires a gentle hand and the right techniques to avoid damage.

  • Begin by addressing wax spills on upholstery promptly to prevent the wax from setting deep into the fabric. Quick action can save you time and effort in the long run.
  • If you encounter a fresh spill, place an ice cube over the wax to hasten its solidification. This makes scraping it off easier without pressing it further into the upholstery fibers.
  • Once the wax hardens, use a dull knife or a plastic card to gently scrape off as much as possible. Apply minimal pressure to avoid tearing or scratching the fabric.
  • For any remaining wax residue, lay a brown paper bag or absorbent cloth over the affected area. Use an iron set on a low heat setting—without steam—to lightly go over the paper or cloth. The heat will melt the wax, allowing it to be absorbed by the paper or cloth.
  • Repeat with fresh paper or clean sections of cloth until no more wax transfers from the upholstery onto your absorber.
  • Should there be any lingering waxy stain, dab at it carefully with rubbing alcohol or nail polish remover using a white cloth; this helps break down and lift away any remaining coloration without spreading it further.
  • Test any cleaning solution on an inconspicuous area of your furniture first to ensure there’s no discoloration or damage to your upholstery fabric.
  • Mix one part vinegar with one part water for colored wax stains that may have left a mark. Gently sponge this solution onto the stain and blot dry with a clean towel.
  • After treating upholstery for candle wax removal, give it ample time to air out before using any cleaning agents again—this minimizes chemical buildup that could potentially harm the material.

Rugs and Carpeting

As we shift our focus from upholstery to rugs and carpeting, the approach to wax removal needs to adapt. Carpet fibers and floor coverings require gentle yet effective techniques to lift away stubborn wax without damaging the texture.

  • Begin by gently scraping off as much of the hardened candle wax as you can with a dull knife or credit card. This reduces the amount of wax that needs to be treated with heat or cleaning solutions.
  • Next, place a brown paper bag or a clean cloth over the remaining wax stain on your rug. With an iron set on low heat, carefully press over the top. The heat will melt the wax and absorb it into the paper or cloth.
  • For smaller spills, rub an ice cube over the wax to harden it further, making it easier to break off from delicate carpet fibers without pulling them out.
  • Apply a small amount of rubbing alcohol onto a clean cloth and dab at any oily residue that might have been left behind after removing the main wax spill. This helps in lifting off leftover coloration and avoiding permanent stains.
  • If you’re dealing with a colored candle wax spill, mix one part vinegar with two parts water and lightly blot the area after you’ve removed most of the solidified wax. Vinegar helps neutralize colors that may seep into textile care fabrics.
  • Once all physical traces of candle wax are gone, use your regular carpet cleaner or make a solution using mild dish soap and warm water to clean up any lingering dirty patches for an overall fresh home maintenance touch.
  • In cases where you’ve managed most of the spill but still see faint marks, consider calling professional cleaners who specialize in stain removal for rugs and carpeting – they know exactly how to handle tricky situations without causing harm.

Wood

Removing candle wax from wooden surfaces requires a gentle touch to avoid damaging the finish. The hot water method with white vinegar works wonders on wood tabletops and furniture, helping maintain their beauty and integrity.

  • Gently scrape: Use a credit card or plastic scraper to remove as much of the hardened wax as possible without scratching the wood surface.
  • Prepare vinegar solution: Mix equal parts white vinegar and warm water to create a cleaning mixture that can help dissolve wax residue.
  • Soften wax with heat: Briefly apply a hairdryer on low heat setting over the wax to soften it, making it easier to wipe away.
  • Dampen cloth: Moisten a soft cloth in the vinegar and water solution, ensuring it’s not too wet to prevent water damage on your wood.
  • Wipe gently: Carefully rub the affected area with the damp cloth until the remaining wax lifts off, working in the direction of the wood grain for best results.
  • Buff dry: Immediately after wiping, use a clean, dry microfiber cloth to buff the area dry and restore shine to your wooden surface.
  • Condition wood: Once all traces of wax are removed, condition your wood furniture or tabletops with appropriate oil or polish designed for wood care.

Conclusion

Banish those stubborn wax stains from your tablecloth with confidence, using the techniques we’ve shared. Whether you choose to apply heat or embrace the cold, each method is designed to tackle that waxy mess efficiently.

Keep your linens looking pristine and dinner-ready by mastering these simple yet effective cleaning hacks. Remember, a spotless table setting starts with knowing how to handle accidental drips and spills—no stress necessary!

FAQs

1. What is the first step in removing candle wax from a tablecloth?

Scrape off the excess wax gently with a dull knife or spoon.

2. Can I use my iron to help remove wax from a tablecloth?

Yes, you can use an iron on low heat with paper towels to absorb the melted wax.

3. Will freezing the tablecloth make it easier to remove candle wax?

Placing the tablecloth in the freezer allows the wax to harden, making it easier to crack and peel away.

4. Are there any household products that can remove remaining candle wax stains?

Rubbing alcohol can help lift residual stains after scraping and ironing away most of the candle wax.

5. Should I wash my tablecloth after getting all of the candle wax out?

Yes, washing your tablecloth according to its care instructions is recommended after removing all traces of candle wax.

How To Make Laundry Smell Good Naturally Without Chemicals

How To Make Laundry Smell Good Naturally Without Chemicals

Laundry

Are you tired of your laundry lacking that fresh, clean scent without using harsh chemicals? It’s a common challenge, but there’s good news. This article will look into how to make your laundry smell good naturally. Using methods to infuse your clothes with delightful fragrances, ensuring they come out smelling great while keeping things environmentally friendly.

Key Takeaways

  • Hang your laundry outside in the sun for a natural, fresh scent and to use the sun’s bleaching properties on white clothing.
  • Make a homemade fabric softener with essential oils like lavender or lemon by mixing them with vinegar, which leaves clothes smelling great without chemicals.
  • Add dryer balls infused with essential oils to your dryer for an eco – friendly way to fluff up clothes while adding a natural fragrance.
  • Store clean laundry properly in a cool, dry place and use scented sachets or scent bars in storage areas to keep clothes smelling fresh longer.
  • Use baking soda during wash cycles to neutralize odors naturally; it also brightens whites and softens fabrics without harsh chemicals.

Natural Ways to Make Laundry Smell Good

Natural Ways to Make Laundry Smell Good

Transform your laundry routine into a sensory journey with simple, natural alternatives that infuse your clothes with delightful fragrances. Embrace the power of nature’s scents by incorporating elements like essential oils and sun-dried freshness to revive fabrics without harsh chemicals.

Hang Laundry Outside to Air Dry in the Sun

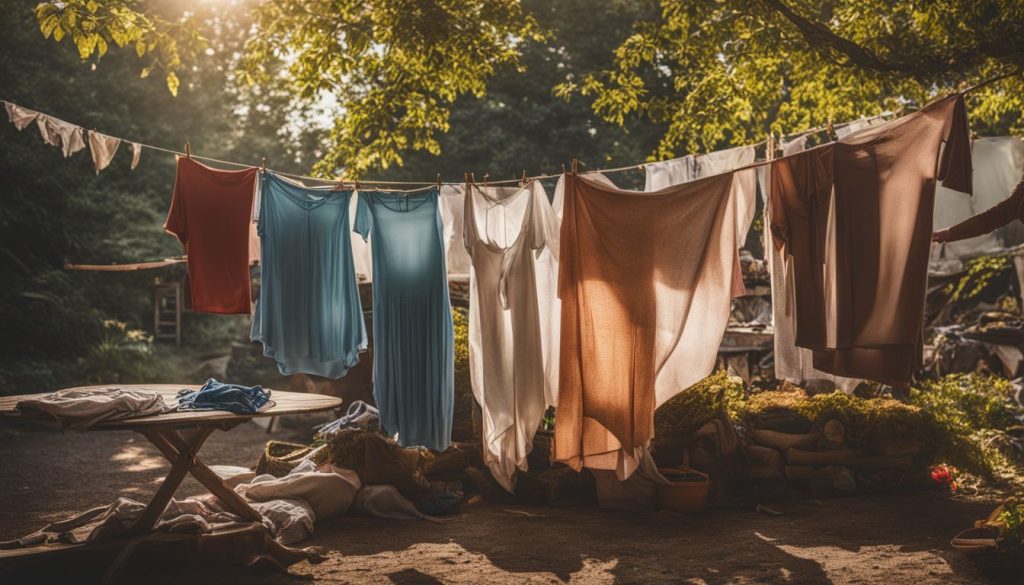
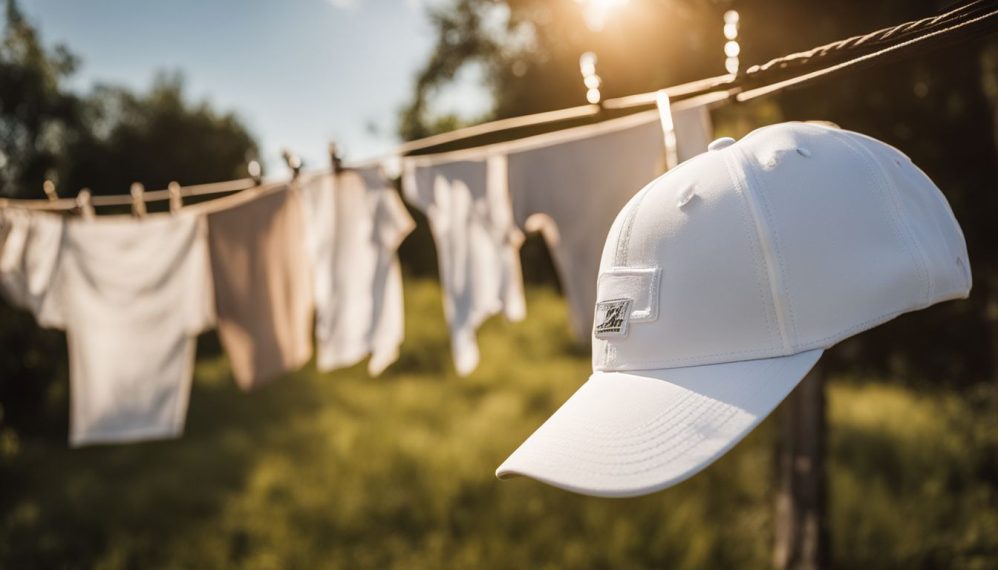
Take your freshly washed clothes outside and let them bask in the sunshine for a naturally fresh scent. Sunshine isn’t just good for brightening fabrics; it also helps to infuse your laundry with that incomparable sun-dried freshness.

As the breeze moves through, it whisks away moisture and any lingering odors, leaving behind nothing but clean.

Using a clothesline or suitable outdoor drying rack can significantly enhance the natural aroma of your garments. The sun’s UV rays have mild bleaching properties that work wonders on white clothing without harsh chemicals.

Moreover, this linedry method not only imparts longer-lasting freshness but is gentle on fabrics too, preserving their texture and colors over time. Embrace the simplicity of this age-old technique to add a touch of nature’s essence to every fiber.

Create Homemade Fabric Softener with Essential Oils

Craft your own aromatic and nontoxic fabric softener using essential oils for an ecofriendly laundry scent. This DIY approach leaves your clothes feeling soft and smelling fresh without the use of harsh chemicals.

  • Choose your favorite essential oils to begin the process. Lavender, lemon, orange, lemongrass, and eucalyptus are excellent options for a homemade laundry scent.
  • Combine a quart of white vinegar with 30 – 40 drops of the essential oil you’ve selected. This mixture will be your natural laundry freshener.
  • Use ¼ to ½ cup of this scented vinegar solution in place of regular fabric softener during the rinse cycle to infuse your clothing with a non-toxic fragrance.
  • Prepare additional absorbent cloths or old rags by soaking them in your homemade mixture. Place these directly in the dryer for an extra boost of aroma.
  • Store the remaining fabric softener in a sealed jar or bottle to preserve its potency for future loads.

Add a Few Drops of Lavender Oil to Each Load

Continuing the theme of using natural essences, consider the simple addition of lavender oil to your laundry routine. Just a few drops can transform an ordinary wash into an aromatic experience.

Lavender’s essential oil doesn’t just leave your clothes smelling fresh; it also acts as a gentle fabric softener. This means you get softer clothes with the calming scent of lavender infused throughout.

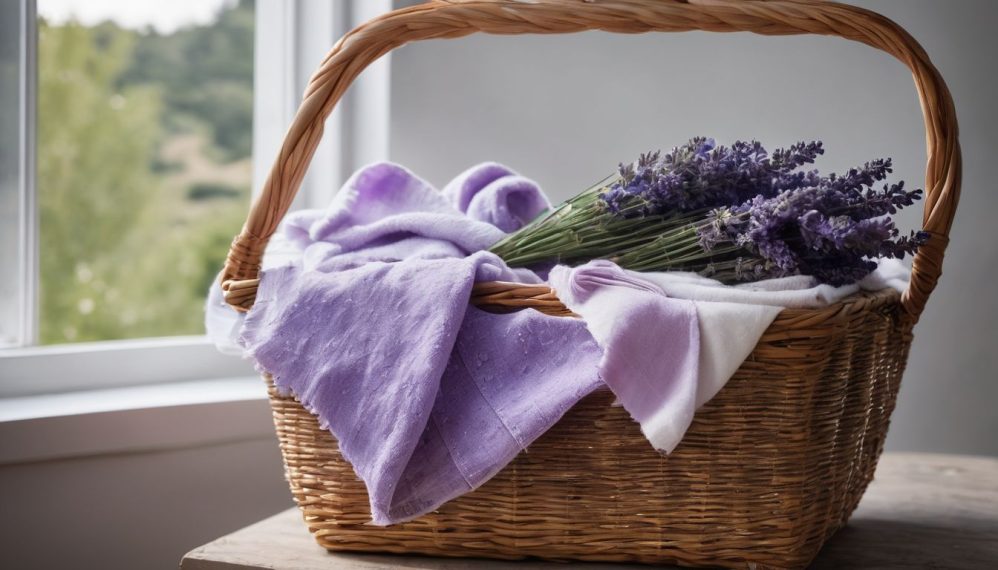
Spritzing some diluted lavender water on your linens before they go into the machine is another smart move for those seeking a more subtle fragrance. The versatility of this aromatic laundry solution makes it suitable for bedding and workout gear alike, ensuring everything from pillowcases to yoga pants comes out smelling clean and eco-friendly.

Embrace this nontoxic laundry fragrance option not only for its refreshing scent but also for its aromatherapy benefits that help promote relaxation after a long day.

Use Dryer Balls Infused With Scented Oils

Spice up your laundry routine by tossing in dryer balls laced with your favorite essential oils. Imagine pulling warm clothes from the dryer, enveloped in the gentle embrace of lavender or invigorated by a zesty lemon zest.

These wool spheres do more than just perfume your pants and fluff your fleeces; they also shorten drying time and smooth out wrinkles, making them an eco-friendly addition to any wash day.

Switching to essential oil infused dryer balls means you’re not only giving clothes a fragrant upgrade but also leveraging natural antibacterial properties to ward off bacteria. Rosemary’s refreshing scent could be that perfect pick-me-up for tired towels while lime adds a dash of tropical breeze to your bedding.

Adopt this natural fabric fragrance technique and watch as each load turns into an aromatherapy session for your senses without relying on artificial scents or chemicals.

Line-dry Clothes With Fragrant Herbs

Switching from dryer balls to a more traditional drying method, consider infusing your laundry with the natural scents of herbs by line-drying them. This eco-friendly approach not only reduces energy usage but also embeds your fabrics with the delightful aromas of nature.

Take some freshly washed clothes and hang them amongst your herb garden or simply include sprigs of rosemary, lavender, or mint among the garments as they dry. The gentle breeze will help transfer the aromatic essence directly into the fibers.

Outdoor air drying combined with these fragrant companions offers a dual benefit: you get to delight in sun-kissed, botanical laundry fresh scent while avoiding artificial perfumes and chemicals often found in commercial products.

Clothes take on an organic laundry fragrance that’s subtle yet pleasantly noticeable every time you wear them. It’s a simple step towards creating a chemical-free laundry aroma that is kind to both your skin and environment.

Tips to Keep Your Laundry Smelling Fresh

Tips to Keep Your Laundry Smelling Fresh

Maintaining that just-washed fragrance in your clothes goes beyond the wash cycle; it’s about smart, natural storage and care habits. Discover ingenious methods to prolong the clean scent of your laundry without relying on artificial enhancers, keeping garments smelling garden-fresh long after they’ve been folded.

Properly Store Laundry

To keep your laundry smelling fresh after you’ve washed it, be smart about how you store it. Make sure clothes are completely dry before folding and putting them away; dampness can lead to musty odors.

Choose a cool, dry place for storage and avoid stuffing clothes into drawers or closets where air can’t circulate. This will help maintain the natural scent achieved from air-drying.

Opt for breathable containers like cloth bins or baskets if you need to store items long term. These allow airflow which prevents odor build-up, ensuring that when you reach for a stored item, it smells just as clean as when you first put it away.

Regularly cleaning your washing machine also contributes to keeping those fresh scents lasting longer in your stored laundry.

Use Scented Sachets and Scent Bars

After making sure your laundry is properly stored, take freshness to the next level by incorporating scented sachets and scent bars into your storage spaces. These aromatic accessories can be strategically placed in dresser drawers or closet shelves, where they quietly work their magic, emitting a subtle yet delightful fragrance that envelops your clothes.

Think of it as giving your wardrobe a continuous breath of fresh air — with perfumed sachets tucked between folded stacks of shirts and scent bars resting alongside hanging garments, every item you pull out will carry an inviting scent.

Opting for scented drawer liners not only adds a pleasant aroma but also provides an additional layer of protection against mustiness. Whether choosing traditional lavender or venturing into more exotic fragrances, these scented solutions are simple ways to maintain that just-washed smell long after laundry day.

Skip the synthetic smells from commercial products; using natural aroma-infused clothing storage options ensures you’re met with fresh laundry scent every time you open a drawer or step into your closet.

Use Baking Soda to Absorb Odors

Baking soda is not just a staple for baking; it’s also a powerful tool in your laundry arsenal. Sprinkle half a cup into your washing machine along with your regular detergent, and you’ll notice its magic.

It dives deep into fabrics to neutralize those stubborn smells, leaving behind nothing but freshness. This simple household ingredient is superb at tackling the acids that give life to foul odors in clothes.

By adding it to each load, you can say goodbye to any unpleasantness without using harsh chemicals.

For an extra whitening boost or to soften hard water minerals that could be making your towels stiff, let baking soda come to the rescue. Clothes come out softer and brighter as this multitasking powder works overtime during the wash cycle.

Not only does it help maintain freshness, but it also offers fabric softening benefits naturally. Moving beyond simply keeping things smelling nice — on top of all these perks — next up: exploring how regularly cleaning your washing machine contributes to odor-free laundry.

Common Causes of Bad Odors in Laundry

Common Causes of Bad Odors in Laundry

Unpleasant smells in your laundry can often be traced back to a handful of culprits that disrupt the clean and fresh vibe we all strive for. Ignoring these root causes might mean your fabrics continually carry a less-than-ideal scent, despite how often they’re washed.

Leaving Laundry in the Washer too Long

If you forget your laundry in the washer, it creates a perfect storm for musty odors. Wet clothes bunched together become a breeding ground for bacteria, and that damp smell takes over.

To combat this, transfer your clothes to the dryer or hang them up as soon as the wash cycle finishes. If you’ve already let time slip by and are dealing with that mildew stink, running another wash with vinegar can work wonders in freshening them up.

Maintaining a clean washing machine is also key in preventing these funky smells from taking root in your fabrics. Regularly cleaning out your washer ensures there’s no leftover residue or water where bacteria can flourish.

And now that we’ve tackled how leaving laundry too long can cause problems, it’s time to look at what happens when we don’t keep our washing machines themselves spick-and-span.

Not Cleaning the Washing Machine Regularly

Neglecting your washing machine’s cleanliness might be the hidden culprit behind laundry that doesn’t smell as fresh as it should. Dirt, detergent residues, and trapped moisture can create a breeding ground for mold and mildew.

This unpleasant mix often results in a musty odor transferring to your clothes, despite them being freshly washed. To combat this, incorporate a regular cleaning routine into your laundry care to prevent bacteria buildup and ensure your appliance is helping rather than hindering your efforts at sanitation.

Regular upkeep of your washing machine isn’t just about eliminating odors; it extends the life of your appliance too. Without proper maintenance, lingering dampness within the washer can lead to more persistent issues like mold growth—leaving you with an even bigger problem than smelly clothes.

Moving on from ensuring a clean machine will allow us to explore another common misstep: using too much detergent or fabric softener.

Using Too Much Detergent or Fabric Softener

It’s a common misconception that using extra laundry detergent or fabric softener will make your clothes come out cleaner and fresher. However, the opposite is often true—overdoing it with these products can actually trap odors in textile fibers instead of washing them away.

A surplus of surfactants from too much detergent fails to rinse out completely during the wash cycle, leaving behind soapy residue which attracts dirt and creates an unpleasant smell over time.

Moreover, while fabric conditioners may promise softness and a pleasant scent, they can deposit a greasy coating onto fabrics that locks in smells rather than eliminating them. These chemical additives don’t just cling to your clothing; they could also be impacting your health and our environment negatively.

To sidestep these issues, consider reducing the amount you use or switching to natural alternatives that keep clothes smelling clean without unwanted side effects. Moving forward with better practices helps ensure our routine contributes positively both to cleanliness and sustainability—a step beyond fresh scents toward responsible care for our garments and planet alike.

Build-up of Body Soil on Clothing

The clothes we wear absorb body oils, sweat, and dead skin cells every day. Over time, this collection of body soil can lead to a persistent musty odor in your laundry that’s hard to get rid of.

Regular washing sometimes isn’t enough to remove the buildup, especially if you’re not using adequate cleaning methods or tackling stains promptly. This doesn’t just make your clothes smell; it creates an ideal environment for bacteria growth which contributes further to unpleasant smells.

To combat these odor-causing residues effectively, ensure you treat areas like collars and underarms with a pre-wash treatment designed to break down oils and perspiration before they set in.

Paying attention to hygiene habits also plays a crucial role; changing outfits after heavy sweating can prevent excessive soiling of fabrics. After addressing the build-up on clothing, maintaining freshness becomes much easier by following smart laundry practices such as those outlined above.

Now let’s explore how storage can impact detergent effectiveness over time.

Conclusion

Embrace nature’s bounty to keep your laundry smelling delightful and fresh. Infuse each load with the essence of essential oils or let the sun work its magic as a natural disinfectant.

Remember, freshening up your garments doesn’t require harsh chemicals; simple household items like vinegar and baking soda do wonders. With these green tips in hand, every wash brings you closer to an eco-friendly routine that leaves clothes with a clean, invigorating scent! Now go ahead, make your next laundry day a naturally fragrant success.

FAQs

1. What natural ingredient can I use to make laundry smell fresh?

Add baking soda to your wash cycle for naturally fresh-smelling laundry.

2. Can vinegar remove odors from my clothes without leaving a scent?

Yes, white vinegar is effective at odor removal and won’t leave a lasting scent on fabrics after washing.

3. Is it possible to use essential oils in the laundry for fragrance?

Essential oils can be used on wool dryer balls or added to the rinse cycle for a natural fragrance boost.

4. Does line drying outside help with making laundry smell good?

The fresh air and sunshine of outdoor line drying can impart a clean aroma to your clothes naturally.

5. What’s an easy way to keep my closet smelling nice without chemicals?

Place dried lavender sachets or cedar blocks in your closet for a chemical-free pleasant scent.

What Is Professional Wet Cleaning: Everything You Need To Know

What Is Professional Wet Cleaning: Everything You Need To Know

Dry Cleaning , Fabricare Center Blog

Have you ever worried about how to clean “dry clean only” garments without damaging them? It turns out there’s a method called professional wet cleaning that safely cleans these delicate items.

This blog post will unveil the wonders of wet cleaning, showcasing its benefits and why it trumps traditional methods. Dive in for a refreshing take on garment care!

Key Takeaways

  • Professional wet cleaning uses water and biodegradable detergents instead of harsh chemical solvents, making it a safer and more eco-friendly garment care option.
  • It is particularly suitable for delicate fabrics that can be damaged by traditional dry cleaning methods; the process effectively removes stains while being gentle on clothing.
  • Wet cleaning promotes better air and water quality, reduces exposure to toxic chemicals, conserves energy, and is less likely to cause allergic reactions than conventional dry cleaning.
  • The method has become more accessible as its popularity increases with both professional cleaners and consumers seeking sustainable alternatives for laundry services.
  • Despite the use of water, wet cleaning systems are designed to optimize water usage and often result in garments feeling softer with a pleasant scent compared to those treated with dry cleaning.

What is Wet Cleaning?

What is Wet Cleaning

Wet cleaning is a gentle yet effective alternative to traditional dry cleaning, utilizing water and specialized detergents to clean clothes without the harsh chemicals. This eco-friendly approach not only preserves the quality of garments but also promotes a healthier environment, making it an increasingly popular choice among professional garment cleaners.

Definition and Explanation

Professional wet cleaning is an ecofriendly approach to laundering clothes that’s gentle on fabrics and kind to the environment. Instead of relying on harsh chemical solvents used in traditional dry cleaning, this water-based method employs specialized detergents and technology to safely clean all types of garments, even delicate ones.

Tailored for various textiles, it promises nontoxic dry cleaning without compromising on effectiveness.

This sustainable garment-cleaning process uses minimal water and carefully chosen soaps that are less aggressive than conventional options. The technique meticulously controls temperature, moisture levels, and agitation to ensure a deep clean that maintains the integrity of the fabric.

It’s not just about being environmentally friendly; professional wet cleaning services also deliver impeccable results with every garment they handle – offering peace of mind for both your wardrobe and the planet.

How it Differs From Traditional Dry Cleaning

Professional wet cleaning marks a significant departure from traditional dry cleaning practices by shunning the use of chemical solvents. Instead, it harnesses water-based solutions that are gentler on fabrics and the planet.

This green cleaning technique mirrors home laundry methods but elevates them with advanced equipment and specialized detergents designed to handle delicate garments with care. Wet cleaners also utilize technology that precisely controls water levels, temperature, and agitation to ensure thorough yet safe garment cleaning.

Unlike its older cousin dry cleaning, which often relies on perchloroethylene—a solvent linked to environmental and health concerns—wet cleaning opts for eco-friendly alternatives.

These nontoxic approaches not only reduce potential harm to workers handling clothes but also prevent chemical residues from lingering in your wardrobe or being released into the ecosystem.

The philosophy behind sustainable cleaning is simple: clean clothes shouldn’t come at an unreasonable cost to our well-being or surroundings.

Advantages and Benefits

Wet cleaning stands as a champion of eco-friendly cleaning, offering a myriad of benefits that traditional methods can’t match. It merges the gentle touch needed for natural fabric care with the power to get clothes spotlessly clean.

  • Preserves air and water quality: Wet cleaning slashes the risk of air and water pollution by steering clear of harmful chemicals, making it an environmentally safe dry cleaning alternative.
  • Provides softer clothes with a fresh scent: Not only does wet cleaning leave garments feeling incredibly soft, but it also imparts them with a pleasant smell without any chemical odors.
  • Conserves water smartly: Despite its name, wet cleaning is a waterefficient laundry technique. It optimizes water usage better than conventional laundry practices.
  • Protects your health and the planet’s: With its nontoxic cleaning approach, wet cleaning ensures that neither you nor the environment suffers from exposure to hazardous substances.
  • Works wonders on various textiles: Whether it’s silk or wool, wet cleaning is known for being safe and effective across different types of clothing without causing damage or shrinkage.
  • Cuts down on energy consumption: This sustainable cleaning method often requires less energy than traditional dry cleaning processes because it operates at lower temperatures.
  • Offers peace of mind for sensitive skin: For those with allergies or sensitivity to chemicals, wet cleaning is a godsend, ensuring no irritants come into contact with skin through cleaned fabrics.

The History and Process of Wet Cleaning

The History and Process of Wet Cleaning

Tracing its roots back to the evolution of garment care, professional wet cleaning merges traditional techniques with modern technology to gently cleanse textiles. This method unfolds through a meticulous sequence where specialized equipment and nontoxic detergents ensure garments emerge impeccably clean without harming delicate fabrics or the environment.

How Wet Cleaning Originated

Wet cleaning took shape in the hands of skilled dry cleaners as a last resort, when traditional cleaning techniques hit a wall. It was a novel approach, relying on water-based methods instead of harsh chemicals to treat delicate fabrics and challenging stains.

These pioneers would only proceed with wet cleaning after discussing it with clients, who had to understand that this method carried certain risks due to the lack of established practices.

Gradually, this alternative cleaning method evolved beyond an experimental technique into a refined process. Its origins reflect a desire for gentler solutions and showcase the industry’s adaptability in response to customer needs and environmental considerations.

As wet cleaning proved its worth by safely reviving garments without toxic solvents, it started transforming from an obscure backup plan into standard practice among forward-thinking professionals.

The Steps Involved in the Process

Wet cleaning is a modern method that combines technology with eco-friendly practices. It transforms how we care for our clothes through a meticulous series of steps.

  • Initially, professionals inspect garments to identify fabric types and stains, ensuring the correct treatment.
  • They then pre – treat any spots or areas requiring special attention using biodegradable cleaning products.
  • Next, clothing goes into advanced cleaning equipment specially designed for wet cleaning procedures.
  • The machine uses water and environmentally friendly detergents in a gentle cycle that preserves the integrity of the fabrics.
  • After the wash, professionals use state-of-the-art dryers or air-drying techniques suited for each garment type.
  • Post – drying, items are finished with specialized ironing and pressing equipment that adds crispness without harm.
  • Throughout this process, operators leverage their proper training in wet cleaning to ensure optimal results safely.

Requirements for Proper Wet Cleaning

Mastering the art of wet cleaning goes beyond just adding water to fabrics. It demands a keen understanding and the right approach from start to finish. Trained professionals must have a thorough grasp on how different materials react to water-based solutions, necessitating a comprehensive knowledge base.

They also need advanced equipment designed for precise control over moisture, temperature, and agitation—factors crucial in preserving garment quality during cleaning.

Equally important are the supplies; gentle yet effective detergents and spot cleaners that can tackle stains while maintaining fabric integrity form the cornerstone of any successful wet clean operation.

Adhering strictly to industry guidelines ensures each piece comes out looking its best without compromising environmental or health standards. Implementing these methods with an unwavering commitment sets apart top-notch providers in this ever-evolving sector of garment care.

Wet Cleaning vs. Dry Cleaning

Wet Cleaning vs. Dry Cleaning

Let’s look into the distinctions between these two garment-cleansing heavyweights, uncovering which method might just revolutionize your approach to fabric care and maintenance.

Comparison of Methods and Techniques

When it comes to freshening up our clothes, the methods we choose can have significant implications for the quality of cleaning and environmental impact. Let’s take a closer look at how wet cleaning stacks up against dry cleaning in terms of methods and techniques.

AspectWet CleaningDry Cleaning
Cleaning SolventUses water and biodegradable detergentsRelies on chemical solvents like perchloroethylene
Environmental ImpactMore eco-friendly; reduces toxic wastePotentially harmful to the environment due to chemical use
Cleaning QualityOften results in a better quality cleanEffective on grease and oil but can be harsh on fabrics
Fabric SafetyGenerally safer for a wide range of fabricsCan cause damage to delicate fabrics over time
Health ConsiderationsLower risk of allergic reactions due to non-toxic substancesUse of chemicals poses potential health risks
ProcessSimilar to at-home laundry with advanced equipmentRequires specialized machinery and expertise
Water UsageEfficient water use with modern machinesNo water used, but chemical waste must be managed
AvailabilityBecoming more widely availableWide availability; traditional method
CostCompetitive pricing; may vary by locationCan be more expensive due to chemical usage and disposal

Comparing wet cleaning with dry cleaning reveals significant differences that can influence your choice. Wet cleaning’s gentle approach ensures that your garments are not only clean but are cared for in a way that prolongs their life. It’s a method that combines efficacy with responsibility, embracing advances in technology to deliver an eco-friendlier solution to garment care.

Pros and Cons of Wet Cleaning

Wet cleaning offers an innovative approach to garment care that blends environmental responsibility with fabric sensitivity. As customers become more conscious of their ecological footprint, they often weigh the advantages and disadvantages of wet cleaning.

  • Environmentally Friendly: Wet cleaning stands out as an eco-friendly alternative to traditional dry cleaning. It avoids harsh chemical solvents, making it a nontoxic and green cleaning method.
  • Gentle on Clothes: This process is gentle on garments, reducing wear and tear in comparison to dry cleaning, which promotes sustainable clothing care.
  • Health Benefits: Choosing wet cleaning means less exposure to toxic chemicals for both customers and workers, leading to a healthier environment.
  • Water Conservation: Despite using water, wet cleaning systems are designed to use less water than standard laundry methods, contributing positively to water conservation efforts.
  • Safe for Various Fabrics: Wet cleaning’s tailored detergents and conditioners can safely clean a wide range of fabrics without damaging them.
  • Potential Water Waste: While it uses less water than traditional laundry methods, there’s still potential for water waste if not managed correctly.
  • Requires Specialized Equipment: Not all cleaners have the specialized equipment needed for wet cleaning, which can make it less accessible in some areas.
  • Expertise Needed: Proper wet cleaning requires trained professionals who understand how to handle delicate fabrics with this method.
  • Availability Issues: Although growing in popularity, wet cleaning services may not be as widely available as conventional dry cleaners.
  • Hygienic Concerns in Food Industry: In contexts such as the food industry where hygiene is paramount, there are concerns about whether wet cleaning can meet sanitation standards without chemical solvents.

Pros and Cons of Dry Cleaning

Dry cleaning has been the go-to method for preserving and refreshing clothes that are labeled “dry clean only.” It’s a process that involves specific techniques and chemicals, but it’s important to weigh its advantages and disadvantages.

  • Superior Stain Removal: Dry cleaning excels at removing oil and grease-based stains from fabrics without causing damage.
  • Less Abrasive: The process is less harsh on clothing than traditional washing, which can help garments maintain their new appearance over time.
  • Convenient for Delicate Fabrics: It safely cleans sensitive materials like silk, wool, and velvet by avoiding water-induced shrinkage or distortion.
  • Professional Finishing Touches: Clothing often comes back pressed, wrinkle-free, and ready to wear with a professional look that’s hard to achieve at home.
  • Effective in Refreshing Garments: Without using water, dry cleaning refreshes clothing by removing odors and giving them a fresh feel.
  • Chemical Usage: This method relies on chemical solvents, such as perchloroethylene (perc), which can pose environmental risks and potential health hazards.
  • Expensive Over Time: Regular reliance on dry cleaning services can become costly due to pricing per item cleaned.
  • Potential for Chemical Residue: Clothes might retain traces of chemicals used during the process. This can be concerning for individuals with sensitive skin or allergies.
  • Risk of Fade and Damage: Despite being gentle on clothes, some garments may fade or get damaged due to repeated exposure to chemicals over time.
  • Environmental Impact: The use of non-biodegradable chemical solvents contributes negatively to our ecosystem, making it less eco-friendly than other methods like water-based wet cleaning.

Why Choose Wet Cleaning?

When considering the care of your garments and the impact on health and environment, wet cleaning emerges as an innovative solution. This water-based method not only promises gentle yet effective cleansing for a variety of fabrics but also aligns with green practices that are becoming increasingly vital in today’s world.

Health and Environmental Benefits

Why Choose Wet Cleaning

Wet cleaning stands out as a champion of eco-friendly cleaning. It sidesteps the environmental pitfalls associated with traditional dry cleaning methods by avoiding toxic chemicals and reducing waste.

This nontoxic cleaning approach relies on water—a renewable resource—and biodegradable detergents that are gentle on the planet. With wet cleaning, clothes are not only impeccably clean but also free from any chemical residue that could harm your health or the environment.

Energy-efficient cleaning is another hallmark of wet cleaning systems; they consume less power and water than their conventional counterparts, making them a sustainable choice for conscious consumers.

By eliminating hazardous substances such as VOCs (volatile organic compounds), wet cleaning ensures a safe working environment for employees while also safeguarding customers’ well-being.

This method reflects an evolution towards nonhazardous and waterefficient practices in garment care—conscientiously preserving resources and protecting health without compromising quality.

Safe and Effective for Different Types of Clothing

Wet cleaning stands out as a game-changer for garment care, especially when it comes to delicate fabrics that could suffer damage from conventional washing methods. This gentle cleaning approach thoroughly removes stains and odors without the harshness of traditional dry cleaning chemicals, making it suitable for everything from silk blouses and wool suits to intricate bridal wear and beaded gowns.

Because the process is nontoxic, your favorite garments get expertly cleaned with minimal risk of fading or texture alteration.

Garments treated with wet cleaning come out fresh, vibrant, and often feel softer to the touch compared to other methods. It’s an ecofriendly choice not only for your clothes but also for the environment.

Whether you’ve spilled wine on a silk dress or need regular laundering for cotton shirts, wet cleaning technology safely revitalizes various textiles without compromising fabric integrity or color.

With its ability to effectively clean different types of clothing, selecting this water-based method means opting for safe laundering every time.

Availability and Cost

Choosing ecofriendly laundry methods like professional wet cleaning doesn’t just benefit your garments; it can also be gentle on your wallet. This water-based cleaning technique skimps on the expensive chemical solvents that dry cleaners typically use, potentially lowering overall costs.

More and more local cleaners are offering this nontoxic, environmentally friendly cleaning option, making it accessible for those who prioritize sustainable dry cleaning alternatives.

Finding a cleaner that specializes in affordable cleaning options such as wet cleaning is getting easier. Dependable Cleaners offers these services alongside their conventional offerings.

Consumers have the power to support green practices by opting for gentler fabric care that’s kinder to both clothing and nature – all without breaking the bank. As demand increases, the availability of budget-friendly, chemical-free cleaning choices is sure to grow, empowering you to make greener decisions comfortably.

Conclusion

Embrace the tide of change in garment care with professional wet cleaning. This method marries innovation with sustainability, safeguarding your delicate fabrics while protecting our planet.

Trust in the gentle power of water and specialized detergents to revitalize your “dry clean only” garments without harsh chemicals. Witness a fresh, eco-friendly approach to keeping your wardrobe impeccable.

Let professional wet cleaning be your choice for fabric-friendly, green garment care.

FAQs

1. What is professional wet cleaning?

Professional wet cleaning is an eco-friendly method used by cleaners to wash delicate fabrics with water and specialized detergents.

2. Is professional wet cleaning safe for all types of clothes?

Yes, professional wet cleaning is safe for most types of clothing, including those typically labeled as “dry clean only.”

3. Does professional wet cleaning use harsh chemicals?

No, professional wet cleaning does not use the harsh chemicals commonly found in traditional dry-cleaning processes.

4. Can professional wet cleaning remove tough stains?

Yes, expertly performed professional wet cleaning can effectively tackle and remove tough stains from garments.

5. Will my clothes shrink or get damaged with professional wet cleaning?

No, when done correctly by trained technicians, professional wet cleaning minimizes the risk of shrinking or damaging your garments.

How To Get Mud Out Of Clothes A Step-by-step Guide

How To Get Mud Out Of Clothes: A Step-by-step Guide

Fabricare Center Blog , Laundry

Mud stains on your favorite clothes can turn a fun day outdoors into a laundry challenge. Common as they are, these pesky stains often require more than a simple wash cycle to eliminate. Our guide will break down the process of how to get mud out of fabrics and clothes so you can restore your garments to their former glory with ease. Dive in for spotless results!

Key Takeaways

  • Dry mud is easier to remove from clothes—let stains set before brushing off excess and laundering.
  • Treat tough mud stains with a paste of powdered detergent and water, applying directly before washing.
  • Use enzyme-based or heavy-duty laundry detergents for best results in breaking down persistent mud particles.
  • Employ natural remedies like vinegar or baking soda to tackle any lingering odors associated with mud stains.
  • After pretreating, always launder with warm water when possible and check for remaining stains before drying.

How to Remove Mud Stains From Clothing

How to Remove Mud Stains From Clothing

Dealing with mud-stained fabric can feel like a laundry nightmare, but fear not—there’s a strategic approach to tackle these stubborn blemishes. Unlock the secret to pristine garments as we walk through the essential steps for lifting those gritty marks effectively from your clothing.

Let the Mud Dry

Resist the urge to tackle mud stains on your clothing while they’re still wet. It may seem counterintuitive, but waiting for the mud to completely dry makes it much easier to remove.

As unpleasant as it sounds, allowing fabric care to begin with patience ensures that you’re not rubbing the dirt deeper into the threads of your garment, setting yourself up for a more successful stain removal process.

Once the mud has dried thoroughly, take a dull knife or a spoon and gently scrape off the excess from your clothes. This approach prevents damage to delicate fabrics and preps them for an effective treatment with laundry detergent specifically formulated for tough dirt stains.

Patience pays off in fabric cleaning – drier mud comes off cleaner, leaving less of a mark behind after your regular washing routine.

Scrape or Vacuum the Stain

After the mud has had time to dry on your clothing, it’s ready for removal. Gently scrape off as much of the dried dirt as possible using a dull knife or edge of a spoon – this helps to lift away the bulk without pushing it deeper into the fabric.

If you have access to one, running a vacuum attachment over the area can also pick up loose particles, ensuring that less soil remains before you move on to pretreating.

Move forward by preparing a paste with powdered laundry detergent and a bit of water; apply this directly onto what’s left of the stain. This method is particularly effective because it targets residual grime right at its source.

The paste helps break down any stubborn particles still clinging onto fibers so they can be washed away during the laundry cycle.

Pretreat and Wash With High-Performance Detergent

Mud stains can be persistent, but treating them with the right products and methods will make a big difference. A high-performance detergent with enzyme-based cleansers can tackle even the toughest mud stains on clothing.

  • Find a reliable enzyme-based cleanser or a heavy-duty fabric cleaner suitable for the fabric you are treating.
  • Allow the mud to dry completely before attempting any cleaning; this makes it easier to remove without smearing.
  • Once dried, gently scrape off excess mud from the fabric or use a vacuum attachment to lift away particles without pressing them further into the material.
  • Apply a small amount of advanced laundry detergent directly onto the stain, ensuring full coverage for better penetration.
  • Gently rub the detergent into the stain using a soft – bristled brush or cloth, maximizing contact between the cleaner and stain.
  • Let it sit for at least 5 minutes, allowing time for enzymes in your detergent to break down the dirt and grime.
  • Wash the garment according to care instructions with a powerful dirt and grime remover added to your washing cycle.
  • Opt for warm water if permitted by fabric care labels because it helps dissolve stubborn stains more effectively than cold water.
  • Check that all traces of mud have been removed after washing; repeat pretreatment and washing steps if necessary before drying.

Wash and Dry

Once you’ve pretreated the stain, it’s time to move on to your washing machine. Use warm water and a high-performance detergent for the best results with mud stain removal. Ensure you select a cycle that corresponds with the fabric’s care label instructions to avoid damaging your clothes.

After the wash cycle is complete, check the stained area before drying. If any trace of mud remains, repeat the treatment rather than tossing it in the dryer—heat can set stains permanently into fabric making them much harder to remove later on.

Only when every speck of mud is gone should you dry your garment as usual, either by air or using a tumble dryer according to clothing guidelines.

Tips for Handling Mud Stains

Tips for Handling Mud Stains

When faced with stubborn mud stains, a few clever tricks can significantly ease the cleaning process; continue reading to uncover these game-changing techniques.

Perform a Sniff Test

After tending to a mud stain, always conduct a sniff test to check for any lingering odors. This simple step is crucial because your nose can detect whether the smell has penetrated the fabric, indicating if further cleaning may be necessary.

If you catch a whiff of anything earthy or musty after washing, it’s time for additional odor-fighting tactics.

Trust your sense of smell as an effective tool in odor detection and mud removal from clothes. A fresh scent means you’ve successfully treated both the visible stain and any underlying odors that might have been trapped in the fibers of your clothing.

If there’s still a hint of dampness or dirt in the air around your attire, consider using more specialized treatments like vinegar solutions or baking soda before giving them another round in the laundry.

Apply a Vinegar Solution if Odor Persists

If you’ve cleaned your clothes but a musty odor lingers, vinegar can be your next best friend. This natural wonder works wonders on stubborn smells that refuse to leave fabric fibers.

Mix up a simple solution by adding 5 cups of vinegar directly into the washing machine with your garments. It’s not just for salads – vinegar breaks down odor molecules and leaves your clothing smelling fresh without any harsh chemicals.

Run the load as normal and let the acidic properties of the vinegar do their magic, effectively removing any mildew or persistent odors from your attire. Once done, proceed with drying, noting how much fresher everything smells.

If odor was a foe standing in the way of pristine laundry, consider it defeated! Now onto tackling those pesky stains – sprinkle some baking soda over them before you start another wash cycle.

Sprinkle Baking Soda

After tackling persistent odors with vinegar, an extra freshness boost may be needed. Sprinkle baking soda directly onto mud stains for a natural laundry remedy that also neutralizes stubborn smells.

This versatile household staple works wonders by absorbing the unwanted scents and breaking down dirt particles left in your clothes.

Create a simple paste from baking soda and water to specifically target those heavy-duty mud spots. Gently massage the mixture into the fabric — this helps lift the grime out of the fibers without harsh chemicals.

Leave it on as long as overnight if you’re dealing with a particularly challenging stain before washing. Baking soda’s gentle yet effective cleaning power will aid in making sure those clothes come out looking and smelling great after laundry day.

Launder as Usual

Once you’ve sprinkled baking soda on the mud stain, it’s time to move onto a familiar routine: laundering as usual. Toss your treated garment into the washing machine with other clothes if it fits the load’s fabric and color profile.

Choose a heavy-duty laundry detergent known for tackling tough spots and stains; this will help break down any remaining dirt particles embedded in the fabric. Ensure that you use the warmest water recommended for the clothing type to maximize cleaning efficiency.

Set your washer cycle to provide sufficient agitation to whisk away grime without damaging garments. With today’s high-performance detergents and efficient washers, simply running a regular cycle can often restore clothes marred by mud stains back to their former glory.

Resist overloading your machine—spacing allows your clothes ample movement, ensuring each item receives thorough treatment during the wash cycle.

Additional Tips for Removing Mud Stains

Additional Tips for Removing Mud Stains

While the above steps provide a robust approach for tackling mud stains, there are a few more tricks that can enhance your stain-fighting arsenal. These extra bits of wisdom ensure even the most stubborn mud doesn’t stand a chance against your laundry skills.

Soak in Detergent Before Washing

Give those stubborn mud stains a serious battle by soaking them in warm, soapy water. Grab your powder detergent and stir it into a tub of warm water to create a powerful pre-treat solution.

Submerge your dirtied clothing and let the fabric soak for at least an hour before you move on to the next step. This extra time allows the detergent to penetrate deep into the fibers, loosening up all that caked-on soil.

After the soak, take an old toothbrush or soft-bristled brush and gently work the suds into any lingering spots of grime. Make sure to use enzyme-rich detergent if you can; these enzymes are champs at breaking down complex stain molecules like those found in mud.

Your clothes will come out looking fresh after machine washing because you gave them this thorough pre-wash attention—they’ll thank you by staying vibrant and clean!

Use Heavy-Duty Laundry Detergent

For those stubborn mud stains that just won’t budge, a heavy-duty laundry detergent can be your best ally. Get your hands on a tough stain remover and apply it directly onto the dried dirt spots.

Gently rubbing this potent formula into the fabric will start breaking down even the most persistent grime.

Take a wet toothbrush, add a few drops of water and scrub the heavy-duty detergent into each stained area with care. This intense laundry cleaner works diligently to penetrate deep within fibers, ensuring that no trace of outdoor play or gardening work lingers on in your wardrobe after laundering.

Let Mud Stains Sit Before Washing

Letting mud stains dry before tackling them may feel like a delay, but it’s a strategic move. It ensures the muddy mess isn’t smeared deeper into fabric fibers during cleaning. After your outdoor adventure leaves clothes splattered with mud, resist the urge to wash them immediately.

Give time for the dirt and mud stains to set; this paradoxically helps in the long run.

Once these stubborn spots have dried completely, brush off what you can—this preps the garment for more effective laundering later on. Trust that allowing mud marks to set before washing is not neglect; it’s about letting nature do some of the heavy lifting for you.

So let those dirty jerseys or pants sit until they’re good and ready for a spin in your washing machine.

Conclusion

Wave goodbye to those stubborn mud stains on your favorite clothes. With these straightforward tips and effective cleaning methods, you’ve got all the tools needed for sparkling clean garments.

Remember, timely attention and the right approach can make a world of difference in laundry outcomes. Now go ahead, enjoy life’s messy adventures without worrying about the cleanup!

FAQs

1. What’s the first step to getting mud out of clothes?

Let the mud dry completely, then brush off as much as possible before washing.

2. Can I use my regular detergent to remove a mud stain?

Yes, you can use your regular detergent along with cold water for initial washing.

3. Should I scrub the stained area right away?

No, avoid scrubbing immediately; instead soak the garment after brushing off dried mud and then launder it normally.

4. Is it okay to put muddy clothes in the dryer afterward?

Do not place muddy clothes in the dryer until the stain is completely gone or it may set permanently.

5. Will vinegar help in removing a tough mud stain from clothes?

Vinegar can be effective on tough stains; apply it directly on the spot and launder as usual after soaking.

The Best Fabrics For Hot Weather: Breathable Fabric For Summer

The Best Fabrics For Hot Weather: Breathable Fabric For Summer

Fabricare Center Blog

Dressing for the summer heat can be tricky, leaving you feeling overheated and sticky. Cotton stands out as a top choice for hot weather clothing due to its breathable nature. This article will guide you through selecting the best fabrics that keep you cool and comfortable, even in the hot summer weather.

Stay chilled with our fabric tips!

Key Takeaways

  • Cotton and linen are top choices for summer fabrics because they’re lightweight, breathable, and help to keep the body cool by allowing air to circulate.
  • Breathable fabrics like rayon, chambray, and certain types of silk are also good for hot weather as they absorb moisture quickly and allow sweat to evaporate, keeping you dry.
  • Avoid synthetic materials such as polyester and nylon in the heat; they can trap heat and moisture close to your skin which may cause discomfort or skin irritations.
  • Loose – fitting clothes made from light natural fibers will enhance comfort during hot days by promoting better airflow around your body compared to tight clothing.
  • Always prioritize breathability over style in high temperatures—well – chosen materials like bamboo or Tencel can wick away sweat while ensuring you feel fresh throughout the day.

The Top Fabrics for Hot Weather

The Top Fabrics for Hot Weather

As the mercury rises, dressing comfortably becomes pivotal; hence, selecting the right fabrics is essential for staying cool and composed. Discovering materials that cater to both comfort and style can transform your summer wardrobe into a haven of breathability and ease.

Cotton

Cotton stands out as a top-notch choice for scorching summer days. Its unique fiber structure not only lets your skin breathe but also absorbs perspiration, leaving you comfortably dry.

This natural fabric is famous for its softness and lightweight feel, which contribute to its ability to keep you cool while the mercury rises. The adaptability of cotton extends beyond just beating the heat—it offers insulation during colder months, making it a versatile option in any wardrobe.

Opting for cotton means selecting apparel that’s designed to let your body heat escape rather than trapping it close to your skin. Clothes made from this breathable material support maintaining a lower body temperature even when outdoors under the sun’s glare.

Now that we’ve seen how cotton can combat the heat, let’s explore linen – another fabric well-suited to warm weather conditions.

Linen

Linen stands out as a top choice for hot weather, boasting some of the best qualities for summer comfort. Known for its exceptional breathability, linen fabric allows air to circulate freely, keeping you cool as temperatures rise.

This natural fiber is not only lightweight but also excels in heat regulation. It adapts to your body’s needs, providing a refreshing barrier against the sweltering heat.

Wearing linen translates into staying dry and comfortable; thanks to its high wicking properties, it swiftly pulls moisture away from your skin. People often reach for this airy material because it feels soft and gentle against their bodies even on the most humid days.

You can step out confidently under the sun knowing that linen’s insulation and breathability ratio will work tirelessly to maintain your comfort throughout the day. With these benefits in mind, let’s explore how rayon holds up as another fabric suitable for beating the summer heat.

Rayon

Rayon stands out as a stellar choice for summer clothing with its quick-drying and absorbent properties. It’s crafted to be more absorbent than cotton, which is perfect for those steamy, humid days when you need your clothes to help keep you dry.

Imagine the comfort of wearing something that feels light as a breeze on your skin — that’s rayon for you. Its fabric lets air circulate close to your body, making it one of the most breathable textiles appropriate for hot weather.

Choosing rayon means selecting a garment that not only keeps moisture at bay but also offers cool and comfortable wear even under the blazing sun. Plus, this drapey fabric has antibacterial properties which contribute to feeling fresh all day long.

Whether heading out for an afternoon picnic or attending an outdoor event, incorporating rayon pieces into your wardrobe ensures both style and comfort in any hot climate situation.

Chambray

Chambray stands out as a superior choice for summer clothing, offering the perfect blend of style and functionality. Its composition is primarily cotton, which contributes to its lightweight feel, making it an ideal fabric for beating the heat.

Unlike heavier materials like denim, chambray is softer to touch and drapes well on the body, ensuring comfort even on exceptionally warm days.

This fabric excels in providing a cool wearing experience due to its higher thread count and finer weave. Air flows freely through chambray’s breathable threads, aiding in moisture-wicking and keeping you dry under the sun’s relentless rays.

Sporting that classic light blue hue reminiscent of a clear summer sky, chambray garments are not only practical but also effortlessly chic – embodying coolness in every sense of the word.

Silk

Silk’s claim to fame as a top choice for hot weather comes from its lightweight and breathable qualities. Luxurious to the touch, it effortlessly combines comfort with an opulent feel, making it a go-to material for high-end summer wardrobes.

Designers frequently turn to silk when crafting airy pajamas and casual shirts designed for staying cool during those sweltering summer months.

Keep in mind that while silk allows your skin to breathe, it can show sweat stains on particularly warm days; choosing darker colors or patterned silks can help mask any potential marks.

This fabric’s versatility means that you can dress up or down with silk pieces, blending elegance with practicality in your seasonal outfits.

Why These Fabrics Work Well in the Heat

Why These Fabrics Work Well in the Heat

Understanding the science behind fabric selection for sweltering conditions can be a game-changer for your summer wardrobe. The key lies in how these fabrics manage heat and moisture, creating a cooling effect that makes them ideal contenders for battling high temperatures.

Natural Fibers and Their Properties

Natural fibers like cotton and linen reign supreme in hot weather because they are masters of breathability. These environmentally friendly fibers allow air to circulate freely, which helps to release trapped heat and maintain a cool feeling against the skin.

Their lightweight nature is another winning feature, making garments feel almost weightless on sweltering days.

Among their many qualities, natural textiles such as silk provide a luxurious smoothness while proving highly resistant to summer’s scorching temperatures. Silk stands out for its ability to absorb moisture while still keeping you dry and comfortable, which is essential during a heatwave.

Hypoallergenic clothing made from organic fabrics offers respite for sensitive skin since these materials seldom irritate or cause allergies, ensuring comfort beyond just temperature regulation.

Breathability and Air Flow

Breathability is essential in hot weather because it allows air circulation close to the skin, keeping you feeling fresh and cool. Fabrics with good breathability help to release heat away from your body rather than trapping it, which can make a significant difference in your comfort level during warmer months.

Think of breathable materials as personal climate control; they work by permitting moisture to escape and preventing humidity build-up.

Air flow through fabric is crucial for managing sweat and maintaining a stable body temperature. Clothes made from lightweight textiles that feature open weaves offer superior ventilation, helping you avoid overheating even on the hottest days.

Breathable fabrics like cotton are designed for maximum air passage, promoting cooling effects and making them ideal choices for summer wear. They also absorb moisture well, ensuring that dampness doesn’t stick to your skin when temperatures climb.

Hypoallergenic Options

Hypoallergenic options in summer fabrics are a must for those with sensitive skin. Cotton leads the pack as an allergen-free choice that won’t irritate your skin when temperatures rise.

Its natural fibers provide a smooth and gentle touch, reducing the risk of rashes and discomfort during long, sweltering days.

Turn to bamboo fabric for its remarkable ability to wick away moisture while offering a breathable texture ideal for humid conditions. Linen deserves praise too; it’s not only lightweight but also minimizes allergy triggers thanks to its eco-friendly and biodegradable nature.

Choosing these materials ensures comfort without compromising on health-conscious needs in hot weather clothing alternatives.

The Benefits of Choosing the Right Fabric for Hot Weather

The Benefits of Choosing the Right Fabric for Hot Weather

Selecting the ideal fabric for sweltering temperatures can transform your summer experience, offering more than mere comfort. Embracing materials tailored to beat the heat not only elevates your well-being but also enhances your overall functionality during those long, sun-drenched days.

Lightweight

Wearing lightweight fabrics in the summer makes all the difference. These materials, like cotton and chambray, don’t weigh you down as heavier fabrics do. They are airy and ventilated, allowing your skin to breathe easily when the temperatures soar.

A breezy cotton shirt not only feels cool but helps wick moisture away from your body, keeping you dry and comfortable even under the blazing sun.

Opting for items made of light materials can transform a sweltering day into an easy-breezy experience. Imagine walking through a park or sitting at an outdoor café without feeling trapped in your clothes; that’s what choosing summer-friendly textiles offers.

This freedom is essential for staying well-ventilated and maintaining comfort throughout hot days. Moving on to breathable fabrics is key for those seeking relief from heat while remaining active and stylish during warmer months.

Breathable

Alongside being lightweight, the unparalleled advantage of breathable fabrics is their ability to promote air flow. This quality means that materials like cotton not only keep you cool but also permit sweat to evaporate off your skin, making them highly effective for those scorching summer days.

Breathable fabrics are ingeniously designed to be airy and ventilated, ensuring a comfortable experience even as temperatures rise.

Choosing clothes made from fabrics like linen and rayon can make a significant difference, as they offer excellent breathability. These types of fabric allow for continuous air circulation that helps in maintaining body temperature by allowing heat to escape easily.

Textile experts consistently highlight the importance of these permeable textures in hot weather wardrobes due to their moisture-wicking capabilities which contribute greatly to overall comfort under the sun.

Moisture-Wicking

Shifting from breathable qualities, moisture-wicking capabilities take summer fabric performance to the next level. Fabrics with this feature are a game-changer for those sweltering days when you can’t stop sweating.

They pull perspiration away from your skin and expel it through the material, allowing it to evaporate quickly. This process keeps you dry and cools you down, which is why moisture-managing materials are essential in hot weather.

Unlike cotton that can hold onto moisture, high-tech fabrics designed for sweat-wicking offer continuous comfort no matter how high temperatures climb. These performance fabrics aren’t just for athletes—they provide relief during everyday activities under the sun or dealing with intense heat indoors.

By preventing dampness on your skin, they also help ward off bacteria and fungus that thrive in moist environments, keeping your clothes fresher longer. So whether you’re tackling a busy workday or enjoying an outdoor event, choosing clothing made of quick-drying and hydrophobic fabrics means staying cooler and more comfortable all day long.

Fabrics to Avoid in Hot Weather

While lighter, breathable fabrics are a go-to for summer, steering clear of certain materials can be just as crucial in maintaining comfort; discover which ones to keep out of your warm-weather wardrobe by reading on.

Synthetic Materials (polyester, nylon)

Synthetic materials like polyester and nylon might seem convenient, but they’re not your friends during a heatwave. These manmade textiles trap heat close to your body, making it hard for your skin to breathe.

Polyester, while popular for its durability, is notorious for locking in sweat and bacteria which can lead to discomfort and even skin irritations. Nylon goes a step further by holding onto odors and increasing the risk of chafing when you move around in the sweltering heat.

Health experts suggest steering clear of these nonbreathable fabrics on hot days because they don’t allow air circulation. Your body needs to release heat effectively through perspiration – a process that synthetic clothes hinder due to their nonporous nature.

So instead of reaching for that stylish polyester outfit or durable nylon sports gear as temperatures climb, choose smarter summer attire made from fabrics that actually let you keep cool under the sun’s relentless rays.

Heavyweight Fabrics (wool, cashmere)

Heavyweight fabrics like wool and cashmere might be cozy for cold weather, but they’re not the best choice when temperatures rise. Wool clothing often feels too warm and can make you feel overheated in hot conditions.

Cashmere, while luxurious, is usually too thick to wear during summer months unless it’s specially woven to be lightweight and breathable. These fabrics trap heat close to your body because of their density, which is great for insulation during winter but can become uncomfortable as the mercury climbs.

Despite being natural fibers known for quality and comfort, wool and cashmere aren’t ideal for hot weather clothing. They’re typically used in layering pieces or suit fabrics that are better suited for cooler climates or air-conditioned environments.

If you must wear these materials in warmer weather, opt for pieces with a looser fit that allow more air flow. And remember to store your cashmere wool fabric correctly—never use plastic bags as they prevent the material from breathing.

Moving on from heavy options leads us directly into considering thick materials like corduroy and leather which also pose challenges in hotter seasons.

Thick Materials (corduroy, leather)

Corduroy stands out for its distinctive ridged texture and durability, but it’s a heavyweight champion you don’t want in the ring when temperatures rise. This thick material traps heat and hinders air circulation, making it far from ideal for summer clothing.

Leather shares a similar fate during the warmer months; despite its stylish appeal, leather’s dense nature turns it into an insulator that can cause discomfort in hot climates. Instead of these thick fabrics, opt for light-weight materials that let your skin breathe.

Choosing cool clothing is crucial as the mercury climbs. Swap out corduroy pants and leather jackets for garments made with breathable fabrics like cotton or linen to ensure comfort under the sun.

Remember to steer clear of anything that feels heavy or suffocating—a mistake that could keep you sweating instead of enjoying those sunny day adventures!

Conclusion

Choosing the right fabrics for summer heat doesn’t just elevate your comfort; it’s a smart move for staying cool and collected. Embrace lightweight cotton, linen, and other breathable materials to navigate the hottest days with ease.

Remember that your clothing can be both stylish and functional when you pick the appropriate textiles. Making informed choices about summer wear will have you enjoying every sun-soaked moment without breaking a sweat.

Let the season’s warmth bring joy, not discomfort—the power is in your wardrobe!

FAQs

1. What fabrics are best for staying cool in hot weather?

Lightweight cotton, linen, and moisture-wicking synthetics are great choices for keeping cool in hot weather.

2. Are synthetic materials good for summer wear?

Certain synthetic materials designed to wick away moisture can be suitable for summer if they allow your skin to breathe.

3. Can I stay comfortable in humid conditions with the right fabric?

Yes, picking lightweight and breathable fabrics like linen can help you stay more comfortable in humid weather.

4. Is silk a good option for hot weather clothing?

Silk is not typically ideal for very hot weather as it may stick to the skin and not absorb sweat efficiently.

5. How do breathable fabrics help during summer?

Breathable fabrics allow air to circulate close to your skin, helping sweat evaporate faster and keep you cooler.

How To Eliminate Static Cling In Clothes Expert Tips And Solutions

How To Eliminate Static Cling In Clothes: Expert Tips And Solutions

Fabricare Center Blog , Laundry

Are you tired of clothes that stick together like glue straight out of the dryer? You’re not alone—static cling in clothes is a pesky problem many people face, especially during dry seasons.

This article offers expert tips and solutions to help free your wardrobe from the grip of static electricity. Keep reading to turn clingy outfits into comfortable wear!

Key Takeaways

  • Static cling is caused by the buildup of static electricity, often due to friction between clothes and dry skin or different fabric types in the dryer.
  • Fabric softeners and dryer sheets can help minimize static cling by coating clothing fibers, reducing electrical charges, and balancing ions.
  • To prevent static cling naturally, increase home humidity with a humidifier or houseplants, separate natural from synthetic fabrics when washing and drying, use vinegar as a natural fabric softener, and keep your skin moisturized.
  • For quick fixes on-the-go against static cling: use antistatic sprays, gently rub clothes with metal objects to distribute charges or lightly apply hairspray on affected areas.
  • Long-term strategies for eliminating static include reducing dryer time possibly using dryer balls for agitation; air-drying clothes outside; using fabric conditioner; wearing moisturizer and choosing clothing made from natural fibers.

Understanding Static Cling

Understanding Static Cling: Diving deep into the mysteries of static cling reveals that it’s not just about clothes sticking together; it’s a phenomenon rooted in scientific principles.

While various myths suggest otherwise, we’ll dismantle misconceptions and offer clarity on what really causes your garments to become a magnet for unwanted attraction.

What Causes Static Cling

Static cling sneaks up when dry skin and clothing create a show of sparks. As you pull on that favorite sweater or slip into those cozy pajamas, friction happens. This rubbing generates static electricity, culminating in your garments sticking together as if magnetized by an invisible force.

Many are surprised to learn about the triboelectric effect, where varying materials interact to produce electrical charges. Imagine synthetic fabrics dancing in the dryer’s warmth; they’re unknowingly building up an electrostatic charge with every tumble and turn.

It is this buildup that transforms your laundry into a stage for clinging clothes drama.

Common Myths About Static Cling

Many people believe that static cling comes from certain fabrics being more prone to it, but this is not true. It’s the electrostatic charge, not the fabric properties, that leads to those annoying zaps and clinging clothes.

Another widespread myth suggests that dryer sheets add moisture to clothes to combat static electricity buildup. In reality, they work by coating fibers with substances that reduce electrical charges.

Some also think repeated rubbing of materials in a tumble dry creates static; however, friction isn’t the direct culprit. Humidity levels play a much bigger role than most realize – higher humidity can prevent static cling because water conducts electricity and helps dissipate electric discharge before it builds up in your clothing.

Additionally, moisturizing your skin might seem like an effective way to tackle static on clothes you’re wearing but it doesn’t address the actual issue at hand within the garments themselves.

Tips to Eliminate Static Cling

Tips to Eliminate Static Cling

Banish the annoyance of clothes that stick and crackle with unexpected zaps; here’s a trove of expert-backed strategies to eliminate static cling from your wardrobe. Dive into these savvy solutions to keep your garments flowing freely and comfortably without the unwanted electric embrace.

Use Fabric Softeners When Washing Clothes

Fabric softeners are your go-to ally in the battle against static cling. Tossing some into your wash can work wonders, coating your clothes fibers with a slick layer that not only amps up the softness but also takes charge of static control, making each piece more comfortable to wear and easier to handle post-laundry.

This antistatic solution acts like a protective shield during washing cycles, preventing friction and reducing the electric charge that builds up.

Improve fabric care by adding this softness enhancer during the rinse cycle; it’s one simple step for smoother fibers and far fewer wrinkles. Clothes treatment with fabric conditioner means you step out both looking sharp and free from the pesky grip of static cling – it’s an easy fix for a daily annoyance yet makes all the difference in how you experience your wardrobe day after day.

Utilize Dryer Sheets

Dryer sheets are like a magic wand for your laundry, effortlessly banishing static cling. Toss one into the dryer with your clothes, and it works by evening out the ion balance in fabrics.

This clever trick helps to keep shirts from sticking to your skirt and socks from staying stubbornly attached to pants. The positively-charged ions in dryer sheets neutralize loose electrons, stopping that annoying zapping sound or sensation you get when pulling clothes apart.

But they’re not just for throwing in with the wash; take a dryer sheet and rub it along the inside of an outfit to tame any unexpected static. It’s like an antistatic shield, giving you smooth sailing throughout your day – no more clothing clinging where it shouldn’t! Regular use ensures every piece of attire comes out feeling soft and clingfree, showing static electricity who’s boss without complicating your laundry routine.

Keep Your Clothes Moist

Ensuring your clothes remain slightly moist can be a game-changer in battling static cling. Just like using dryer sheets, this technique helps to minimize the electrical charge that builds up.

A simple way to do this is by tossing a small, damp washcloth into the dryer with your laundry. The little bit of moisture from the washcloth will work wonders and keep everything soft without any stiffness or stickiness.

Another home remedy involves vinegar, which acts as a natural fabric softener while also combatting static electricity. Place a cloth dampened with vinegar into the dryer for an eco-friendly and effective approach to maintaining moisture in your clothes.

This method prevents static buildup, keeps your garments feeling fresh, and avoids harsh chemicals found in some conventional products. Keep these strategies in mind during your next laundry day for less stress over clinging clothes!

Increase Home Humidity

Boosting the humidity in your home is key to combating static cling. Dry air is a magnet for static electricity, which makes clothes stick together and zap you with tiny shocks. Install a humidifier to steadily infuse moisture into your indoor air; this simple step can make a world of difference by minimizing electrostatic charges that build up on fabrics.

Don’t overlook the power of house plants either—they’re not just for decoration. As natural humidifiers, plants release water vapor during transpiration, subtly increasing room humidity levels.

By maintaining balanced moisture through plant care or using a mechanical humidifier, you’ll improve indoor air quality while keeping your wardrobe free from the grips of static cling.

Separate Natural and Synthetic Fabrics

While maintaining a balanced home humidity plays a crucial role in reducing static, another effective strategy is to sort your laundry by fabric types before washing and drying. Mixing natural fibers like cotton, wool, and linen with synthetic ones such as polyester and rayon can create a perfect storm for static electricity to build up.

The different properties of these materials cause them to rub against each other, generating an electrical charge that results in clothes clinging together or sticking to your skin.

To prevent this annoying phenomenon, separate your garments into two piles—naturals and synthetics—prior to starting the wash cycle. This will minimize the friction between varying fabric types when they tumble around in both washer and dryer.

If you don’t have enough for full loads, consider using mesh laundry bags to keep them segregated inside the machine. Also remember hang drying clothes on a clothesline lets fabrics avoid all that tumbling action altogether which not only saves energy but also wards off potential cling issues due to static buildup.

Quick Fixes for Static Cling

Quick Fixes for Static Cling

Caught in a clingy situation with no time for laundry hacks? Fear not — we’ve got some rapid rescue techniques to combat static on the spot, ensuring your clothes behave before you head out the door.

Use a Static Reducing Spray

Having trouble with clothes sticking together or to your body can be a real hassle. Grab a bottle of static reducing spray, such as Sprayway Anti-Static Spray, and watch that annoyance vanish in seconds.

These sprays are specially designed to tackle the pesky problem of electrostatic discharge by neutralizing the charges that cause fabrics to cling.

For an instant fix, simply spray a light mist over your garment before putting it on or even after you’re already dressed. You’ll find this handy solution at many pharmacies; it’s a fast and effective method for calming down static electricity.

Spraying your clothing can turn any outfit from frustratingly clingy to comfortable and smooth in no time—giving you one less thing to worry about during your day. Keep a travel-sized static guard in your bag or car for those unexpected moments when static decides to strike!

Rub Clothing with Metal

Grab a metal hanger or any metal object you have handy; it’s time to get rid of that annoying static cling. Simply glide the metal slowly over your garment where it’s clinging, and watch how this simple trick dispels the electric charge that’s causing the problem.

Metals have conductive properties which neutralize static electricity, offering you an on-the-spot solution without needing special tools.

Feel free to use everyday items like a spoon or even aluminum foil in a pinch. The key is to create contact between the fabric and the metal, allowing electrons to transfer and balance out.

This method can be especially convenient when you’re away from home or need an immediate fix before stepping out. Keep in mind, rubbing gently is essential – being too vigorous could damage delicate fabrics!

Run a Hanger or Aluminum Foil Along Clothes

Moving from the metallic touch, another simple trick to combat static cling involves everyday items you may have at home. Glide a metal hanger across your garments to neutralize the electric charge causing those pesky clings.

The metal helps to distribute and remove the static electricity that’s built up.

Alternatively, aluminum foil is not just for wrapping leftovers! Crumple a piece of foil into a ball and toss it in with your laundry during the dryer cycle. This surprisingly effective method allows the foil to absorb electrical charges as clothes tumble together, keeping your outfits free from clinging without any extra hassle.

Using aluminum foil in this way ensures you’re less likely to experience jolts of static when folding and handling clean clothes.

Moisturize Your Skin

Moisturize your skin to tackle static cling head-on. Rubbing lotion into your skin increases the humidity on its surface, creating an invisible barrier that keeps clothes from sticking.

It’s a quick fix you can use anytime and anywhere. Plus, it helps keep your skin soft and hydrated during those dry months when static is at its worst.

Choose a moisturizer that works well for your skin type, preferably one without strong perfumes or additives that could stain clothes. After applying the lotion, glide your hands over any problematic clothing to transfer some of that moisture and eliminate static electricity almost instantly.

This natural remedy not only serves as a preventive measure but also acts as an immediate solution to reduce fabric cling and ensure you have static-free clothing throughout the day.

Spritz Hairspray on Clothes

Spritzing a bit of hairspray on your clothes can be a lifesaver when static cling strikes. It’s especially handy if you’re out and about, with nary a dryer sheet in sight. Just grab an aerosol hairspray, give it a quick shake, and lightly spritz the areas where the fabric is sticking.

Make sure to spray from a distance to avoid any wet spots or stains.

For those garments that seem to charge up with static electricity like they’re storing lightning—a dress or skirt often made of polyester—hairspray becomes your go-to solution.

A brief mist between layers will do wonders in calming down those unruly fabrics that love to cling at every step you take. Keep this trick in mind for moments when you need an instantaneous antistatic fix without having access to specialty products designed for this very issue.

Preventing Static Cling

Preventing Static Cling

Preventing static cling goes beyond just quick fixes; it involves adopting habits and methods that ensure your clothing remains free from the annoying grip of static electricity. Explore strategies tailored to maintaining the natural equilibrium in your fabrics, making each laundry day a step towards lasting, static-free bliss.

Decrease Dryer Time

Cutting down on dryer time is a smart move for several reasons. It helps prevent static cling by reducing the over-drying of clothes, which can cause those pesky electric charges to build up.

Plus, less time in the tumble dryer saves energy and spares your garments from excessive wear. To make this happen, toss anti-static dryer balls into the dryer with your laundry; they work wonders by separating fabric and allowing hot air to circulate more efficiently.

Another method to slash drying time involves removing clothes while they’re still slightly damp—not soaking wet but just short of completely dry. This trick also minimizes wrinkles and saves you ironing time! After pulling them out of the dryer, give shirts and pants a quick snap before hanging them up or laying them flat to finish air-drying naturally, effectively sidestepping additional static buildup that could occur if left longer inside the machine.

Using Dryer Balls

Reducing dryer time is a good start, but adding dryer balls into the mix takes static elimination to another level. These nifty gadgets work through agitation, bouncing around and separating clothes in the dryer for more even airflow and less chance of clothes sticking together.

They’re like little laundry masseuses, kneading your fabrics to prevent them from locking up with static electricity.

Choose wool dryer balls as a natural alternative that not only minimizes static cling but also softens your clothes without synthetic chemicals found in commercial fabric softeners.

Their reusability makes them an eco-friendly choice for regular laundry care. Even everyday tennis balls can serve as an inexpensive fix against pesky static build-up, ensuring that each piece of clothing comes out of the dryer feeling fresh and free of clinginess.

Air Dry Clothes

Air drying clothes offers a straightforward solution to prevent static cling. By skipping the dryer and hanging your garments on a clothesline or laundry drying rack, you’re avoiding the tumbling action and heat that often lead to an electric charge building up in your fabrics.

This is especially true for synthetic fibers, which are more prone to generating electricity. Opting for air drying means these materials can lose their charge naturally as they dry in the open air.

Choosing to hang dry not only reduces static but also extends the life of your clothing by reducing wear from the dryer’s rigorous cycle. To amplify this effect, use fabric conditioner when you wash; it will add another layer of defense against static electricity before you even reach for those clothespins.

Ensure garments have ample space on an air drying rack so moisture can evaporate efficiently, making way for softer and less charged fabrics ready for wear. With all pieces now clinging-free, let’s consider how washing with fabric softener contributes further to stopping static in its tracks.

Use Fabric Softener

Slipping fabric softener into your wash cycle is like giving your clothes a ticket to the no-static zone. As it swirls through the water, this laundry hero coats each fiber of your garments, ensuring they come out not just with reduced static but also extra cuddly and smooth.

Think of it as a soothing balm that calms all those pesky electric charges that build up as fabrics rub together. Your sweaters and shirts emerge from the wash ready to wear without clinging awkwardly or sparking little jolts.

For an earth-friendly twist, white vinegar can stand in for traditional fabric conditioners, bringing down the static without chemicals. Just pour it into the rinse compartment and let it work its natural magic—your clothes will thank you by staying shock-free and comfy against your skin.

This simple switch helps keep static at bay while also pampering your wardrobe with gentleness only nature can provide.

Line-Dry Clothing

Line-drying your clothes is a superb strategy to prevent static cling. This natural drying process allows air to circulate between fibers, minimizing the friction that can lead to static electricity.

Synthetic materials especially benefit from being hung on a clothesline, as they are more prone to developing static. By choosing to line-dry fabrics instead of tossing them into an electric dryer, you’re not only cutting down on energy usage but also reducing the likelihood of clothes sticking together after they dry.

Hanging laundry outside gives another advantage; the sun’s ultraviolet rays have a natural bleaching effect on whites and help eliminate bacteria. Ensure garments made from natural fibers get ample time on the line since these materials hold moisture that helps dissipate any charge buildup.

Laundry care doesn’t have to be about high-tech solutions – sometimes, age-old methods like using a fabric softener coupled with air-drying can provide excellent antistatic treatment while keeping your clothing in top shape.

Wear Moisturizer and Natural Fabrics

Rubbing lotion on your skin before getting dressed can work wonders in keeping clothes from sticking. The moisture from the lotion adds a protective layer that helps prevent static electricity buildup.

This simple step increases your skin’s surface humidity, creating an invisible barrier between you and your garments.

Choose clothing made of natural fibers like cotton or wool to minimize static cling further. These materials inherently reduce fabric friction, ensuring that each piece drapes comfortably without adhering to your body.

By wearing moisturizer and opting for clothes crafted with natural fabrics, you ensure all-day comfort free from the annoyance of clinging clothing.

Conclusion

Wave goodbye to the nuisance of static cling with confidence and ease. Embrace these expert strategies in your laundry routine and experience the comfort of static-free clothing. Every tip offered promises simplicity and effectiveness, ensuring you can tackle this common annoyance without a hitch.

Step out the door with clothes that drape gracefully, free from the grip of static electricity. Let’s make sticking socks and shocking handshakes history!

FAQs

1. What’s a quick way to get rid of static cling in clothes?

To quickly remove static cling, run a metal hanger or dryer sheet over your clothes.

2. Can humidity levels affect static cling in clothing?

Yes, higher humidity can help reduce static cling in clothing.

3. Is there a specific fabric that’s less likely to develop static?

Natural fibers like cotton tend to have less static than synthetic materials.

4. Do certain laundry products help prevent static cling?

Using fabric softener or dryer sheets when washing and drying clothes can help prevent static cling.

5. Could wearing different layers reduce the chances of getting static cling?

Layering clothing made of different types of fabrics can sometimes minimize the risk of developing static cling.

What To Do If Color Bleeds In The Wash: Effective Solutions And Tips

What To Do If Color Bleeds In The Wash: Effective Solutions & Tips

Fabricare Center Blog , Laundry

Discovering colors running riot in your laundry can be a heart-sinking moment. Color bleed turns what should be a simple task into a tricky challenge, potentially ruining favorite garments.

This article unveils practical tips and proven solutions to stop color bleed in its tracks, restoring your clothes to their former glory. Keep reading for the rescue plan you need.

Key Takeaways

  • Treat color bleed stains in clothes as quickly as possible to prevent colors from setting into the fabric, using cold water for immediate rinses.
  • To remove color bleed, avoid using a dryer which can set the stain; instead soak garments with laundry detergent, vinegar or oxygen-based bleach depending on fabric type and dye strength.
  • For white items affected by color bleed, use hydrogen peroxide as a fabric brightener and gentle bleach alternative to help lift the unwanted dye.
  • Prevent future incidents of color bleeding by sorting laundry properly, incorporating color catchers into wash cycles, and pre-washing new clothing before it enters your regular laundry mix.
  • Care for clothes after treating them for color bleed by air – drying flat or on a rack away from direct sunlight and iron using correct settings with a barrier cloth between iron and garment. Store cleaned items properly to maintain their condition.


Understanding Color Bleed

Understanding Color Bleed

Understanding Color Bleed begins with recognizing the mishap—a vibrant garment turns your laundry water into a swirling palette, and suddenly other items are sporting unintended hues.

Acting quickly is crucial, as fresh color bleed stands the best chance of being reversed before it settles into a new home on your favorite fabrics.


How Color Bleeds Happen

Color bleeds occur during the laundry process when dyes from one item of clothing transfer to another. This is more likely when hot water loosens the dye’s grip on fabric fibers, allowing them to mingle with other garments.

Clothes that aren’t colorfast are particularly prone to this problem, releasing their colors into the wash water. As a result, your bright red sock might turn your white t-shirts pink.

To minimize the risk of bleeding, sorting clothes based on color and washing temperature is crucial. Reds should stay with reds, blues with blues, and so forth—especially in cold water cycles that better protect against dye loss.

Color-catcher sheets can be a wardrobe saver by trapping errant dyes before they cause mischief on other fabrics. Make sure you separate new items until you’ve tested their colorfastness since these are often the worst offenders for unexpected color runs in your laundry.


The Importance of Treating it Immediately

Acting quickly to treat color bleed in fabrics is crucial. As soon as dyes transfer from one garment to another, they begin to set into the fibers of your clothing. The longer these errant colors sit, the harder it becomes to remove them, risking permanent discoloration and ruining your apparel’s pristine look.

Cold water can be a first line of defense; it helps prevent dye molecules from bonding with fabric, increasing your chances of successful stain removal.

Immediate attention also preserves the longevity and appearance of clothes by maintaining fabric quality and color fastness. Laundering instructions often underscore prompt treatment for any textile discoloration due to its efficacy in preserving fabric integrity.

After you’ve dealt with the color bleed, proper laundry care steps like sorting clothes and using color catchers can help you avoid future mishaps—moving on to how we can remove those stubborn stains effectively.


How to Remove Color Bleed from Clothes

How to Remove Color Bleed from Clothes

When color bleed muddies your favorite garments, don’t despair. Uncovering the right techniques and household remedies will restore your clothes to their vibrant best without setting the stains in stone.


Do Not Put Clothes in the Dryer

If you’re dealing with color bleed on clothes, keep them out of the dryer. The heat can set stains and lock in unwanted dye, making it much more difficult to restore garments to their original state.

Always air dry these items until the issue is fully resolved.

Handle wet clothes that have bled with care by laying them flat or hanging to dry. This approach prevents additional stress on the fabric which can occur from tumbling in a hot dryer.

Plus, allowing fresh air and time to do the work sets the stage for successful stain removal later on.


Make a Laundry Detergent Solution and Soak

Avoiding the dryer is crucial, but moving forward with stain removal is equally important. After taking the clothes out of the wash, your next step involves dealing with the color bleed directly and effectively.

  • Choose a gentle laundry detergent that is suitable for the fabric type that has been affected by dye bleeding.
  • Fill a sink or bucket with cold water, ensuring there’s enough to submerge your stained clothing completely.
  • Mix in a half – cup of laundry detergent to create a consistent soapy solution.
  • Submerge your color – stained clothes in this mixture and let them soak. A period of 30 minutes should be enough for light stains, but heavier stains may require up to several hours.
  • Gently agitate the water every now and then to help loosen the fugitive dyes from the fabric.
  • Keep an eye on your soaking items; you don’t want colors from different items to transfer amongst each other.
  • Once soaked, check if the stain remains. If it does, you may need a stronger treatment such as oxygen bleach or vinegar.
  • After soaking, rinse thoroughly with cold water until all soap suds are gone.


Try Vinegar or Oxygen-Based Bleach

Vinegar and oxygen-based bleach are effective solutions for tackling color bleed on clothes. They work well to restore fabric dyed unintentionally without causing further damage.

  • Mix white vinegar with an equal part of water to create a solution capable of reversing color bleed.
  • Submerge the affected garment in this mixture, ensuring it’s fully soaked for optimal stain treatment.
  • Leave the clothing in the vinegar – water solution for up to 30 minutes, occasionally agitating gently to help loosen the fabric dye.
  • Rinse the item thoroughly with cold water after soaking to remove any lingering vinegar scent and residue.
  • To utilize oxygen bleach, identify a non – metal tub or basin that’s suitable for soaking your garments.
  • Fill the tub with warm water and add a recommended amount of oxygen bleach according to package instructions.
  • Place the stained clothing into the solution, making sure it is completely immersed for effective dye removal.
  • Allow it to soak for around 30 minutes; this allows time for oxygen release which breaks down unwanted dye bonds on fabric fibers.
  • After soaking, check the stain. If necessary, repeat the process until you achieve satisfactory results before regular washing.
  • Wash the treated clothes as usual but separate them from other laundry to prevent any possible color transfer from happening again.


Hydrogen Peroxide for White Items

Hydrogen peroxide is a versatile laundry additive that can rescue your white items from color bleed mishaps. It’s a fabric brightener and bleach alternative that has the power to tackle stains without harsh chemicals.

  • Start by identifying any white clothing affected by color bleed.
  • Remove these pieces from the rest of your laundry to avoid spreading the stain.
  • Fill a sink or bucket with cool water and add half a cup of hydrogen peroxide.
  • Submerge the white garments in the solution, making sure they’re fully soaked.
  • Allow them to sit in this oxygenating agent for up to one hour, checking on them periodically.
  • Gently scrub any persistent stains with extra hydrogen peroxide using a soft brush or cloth.
  • Rinse the clothes thoroughly under cold water to wash away any remaining dye or cleaning solution.
  • Machine wash the items with a regular dose of laundry detergent and an added cup of hydrogen peroxide for enhanced colorfastness and whitening effects.
  • Air – dry the clothes away from direct sunlight, which can help prevent further bleaching or damage to the fibers.


Preventing Color Bleed in the Wash

Discover simple yet effective strategies that safeguard your vibrant wardrobe against the mishaps of color bleeding, ensuring your favorite garments maintain their brilliance wash after wash.


Sorting Clothes Properly

Sorting clothes properly is a key step in preventing color bleed and preserving the quality of your garments. Start with separating your dirty laundry into piles: one for whites, another for darks, and a third for brights.

This simple act goes a long way toward protecting fabrics from dye transfer during wash cycles. Make sure to check labels for colorfastness too; some clothes are more likely to bleed than others.

Turn clothes inside out before tossing them into the washing machine, especially brightly colored items or jeans. Wash them on a gentle cycle with cold water to further safeguard against bleeding and fading.

Taking these preventive measures can extend the lifespan of your wardrobe, keeping colors vibrant wash after wash. As you load up the washer with properly sorted clothes, consider how using color catchers could add an extra layer of protection against accidental dye runs.


Using Color Catchers

Incorporate color catchers into your laundry routine to shield your garments from unexpected dye transfer. These innovative sheets readily snatch up any floating dyes in the water, keeping them far away from other clothes.

As a proactive step, particularly with new items or those notorious for bleeding like red fabrics, tossing a dye trapping sheet in the wash can save you countless hours of frustration and keep your whites bright and colors true.

Utilize these dye absorbers each time you’re faced with mixing various colored clothes in one load. They serve as laundry guardians that trap excess dye and ensure it doesn’t settle on other pieces.

This smart washing tactic significantly lessens the risk of color bleed and extends the life and vibrancy of all your clothing items. With this technology at hand, each wash cycle becomes an opportunity to preserve the pristine look of your wardrobe without fear of colors running wild.


Pre-Washing New Clothes

After catching those rogue dyes with color catchers, take a further proactive step by pre-washing new garments. This simple act of laundry care can be crucial in maintaining the integrity of your clothing’s hues.

It not only tests for colorfastness but also removes excess dye that could cause bleeding during subsequent washes. Make it a habit to pretreat your fresh-off-the-rack apparel: run them through a gentle cycle with cool water and mild detergent before mixing them in with the rest of your wardrobe.

Pre-washing isn’t just about fabric protection; it also contributes to garment care by ensuring any chemicals or residues left from the manufacturing process are washed away before they touch your skin.

By treating each new piece individually, you set up strong defenses against unwanted dye transfers, ensuring your clothes stay vibrant and pristine after every launder. Remember to check washing instructions on tags—some items might benefit from hand washing or special detergents designed for preserving fabric dyeing—and adhere strictly to these guidelines for optimal clothing maintenance.


Tips for Caring for Color-Bleed Affected Clothes

Once you’ve successfully tackled the issue of color bleeding, maintaining the pristine condition of your clothes is crucial. Let’s explore strategic ways to dry, iron, and store your garments that ensure the vibrancy and longevity of each piece in your wardrobe.


Drying Tips

Drying color-bleed affected garments requires careful attention to avoid further damage. Here’s how to handle your laundry to maintain the quality and appearance of your clothes after treating color bleed.

  • Lay flat to dry: Spread the garment out on a clean, dry towel and roll it up to gently squeeze out excess moisture without wringing, which can distort the fabric’s shape.
  • Use a drying rack: Hang color-bleed stained items on a drying rack where air can circulate around them, speeding up the drying process without causing additional stress to the fabric.
  • Avoid direct sunlight: While natural light can help some stains fade, direct sunlight might set other types of color bleed deeper into fabrics. Instead, opt for indirect light or a well-ventilated shade.
  • Tumble dry on low heat: If you must use a dryer, opt for the lowest heat setting. Excessive heat may fix stains and cause shrinkage or further bleeding.


Ironing Tips

Moving from drying to ironing, it’s crucial to handle color-bleed affected clothes with care. Before you reach for the iron, make sure the garment is clean and free of any color bleed; otherwise, heat may set the stains permanently.

Select the correct temperature setting for your fabric type—delicate fabrics require a lower heat setting to prevent damage. For items that have suffered from color bleeding, lay a pressing cloth or white towel on top to act as a barrier.

This simple step helps protect against unwanted dye transfer during ironing.

Keep in mind that each material needs its own approach: clothing care advice often includes using steam or dry heat depending on what you’re ironing. Avoid letting the iron sit too long in one spot, which can scorch some fabrics and worsen existing issues with color bleed areas.

The goal is not only to remove wrinkles but also to preserve the integrity of your colorful wardrobe without creating new problems. With patience and attention to detail, following these fabric care tips ensures your garments remain vibrant and well-maintained after every wash-and-iron cycle.


Properly Storing Clothes

After ironing clothes to perfection, ensuring they’re correctly stored will preserve their color and shape. Hang garments on sturdy hangers inside a closet where they aren’t crammed against each other; this prevents fabric from getting wrinkled or transferring colors onto adjacent pieces.

For knitted items like sweaters that can stretch out of shape, fold them neatly and stack on a shelf or in a drawer away from direct sunlight which could cause fading.

Keep your drawers and closets dry because moisture can lead to mildew, which not only damages fabrics but can cause unwanted color changes. If you’ve treated clothes for color bleed, it’s crucial to store them in optimal conditions to maintain their newfound colorfastness.

Use breathable garment bags for delicate or seldom-worn outfits as an extra layer of protection against dust and potential color transfer from other textiles. Remembering these simple yet effective storage techniques ensures that your laundry efforts result in long-lasting vibrant clothing ready for any occasion.


Conclusion

Color bleed in the wash can turn a simple chore into a headache, but armed with these strategies, you’re now ready to tackle it head-on. Remember to act quickly and use gentle methods to save your clothes from stubborn stains.

Embrace the habit of sorting and pre-treating garments as your first line of defense against dye transfer. With these tips at your disposal, every load of laundry has the potential to come out looking as vibrant and spotless as when you first fell in love with those pieces.

Keep color where it belongs—in your fabrics, not mixed up in the wash!


FAQs

1. What should I do if colors bleed onto other clothes in the wash?

Remove the stained clothes from the washer and rinse them under cold water as soon as possible to tackle color bleeding.

2. Can vinegar help prevent colors from bleeding in the future?

Yes, adding a half-cup of white vinegar to the wash can help to set dyes and reduce future color bleeding.

3. Are there any specific laundry detergents that prevent color bleed?

Look for detergents labeled “color-safe” or “for colors” which are designed to lessen the risk of color bleeding.

4. Is it necessary to sort my laundry by color every time I wash?

Sorting laundry by similar colors helps prevent color bleed and keeps your garments vibrant.

5. If my clothing has bled during washing, is it ruined forever?

Not necessarily; acting quickly with proper treatment methods can often save your clothes after a color-bleed incident.

Mastering The Art Of Ironing: How to Iron Clothes

Mastering The Art Of Ironing: How to Iron Clothes

Household , Laundry

Struggling to get that crisp, clean look on your freshly laundered clothes? Ironing is a skill that transforms wrinkled fabric into polished attire. This guide will take you step by step through everything from setting up your ironing station to handling different materials with ease.

Read on for the secrets of crease-free clothing—it’s simpler than you think!

Key Takeaways

  • Use the correct temperature for each fabric, like high heat and steam for cotton and linen, but low heat without steam for delicate silks.
  • Keep your ironing tools handy, including a sturdy board, adjustable iron, spray bottle, pressing cloth, timer or clock and distilled water.
  • Iron clothes while they are slightly damp to make it easier to smooth out wrinkles; use a spray bottle to moisten dry garments if needed.
  • Always move the iron constantly over the garment and hang items immediately after ironing to prevent new wrinkles from forming.
  • Practice safe ironing by testing the iron’s temperature on a small area of the fabric first and using features such as automatic shut-off.

The Importance of Ironing Clothes

The Importance of Ironing Clothes

Ironing your clothes does more than just smooth out the wrinkles; it’s a vital step in garment care that enhances their overall look and feel. Neat, crease-free clothing boosts confidence and ensures you present yourself in the best possible light whether at work or social events.

Tackling those pesky folds with a hot iron not only improves fabric texture but also helps to preserve the structure of your outfits for an extended period.

A crisp shirt collar, precision-creased pants, and smoothly flowing skirts send a message of attention to detail and professionalism. Making use of an ironing board allows for effective crease removal, contributing to clothing maintenance that ultimately saves money by reducing the need for frequent replacements.

Regular ironing is crucial in clothing preservation because it aids in keeping fabrics fresh and extends their wearable life span while maintaining a wrinkle-free appearance that resonates with meticulous personal style.

Steps for Proper Ironing Technique

Steps for Proper Ironing Technique

To achieve a crisp, professional look for your garments, mastering the art of ironing is essential. We’ll delve into techniques that ensure every press and glide of your iron results in smooth, wrinkle-free fabric without damage—transforming this household chore into an effective tool for clothing maintenance.

What you need for ironing

Ironing transforms wrinkled garments into polished attire. You’ll need the right tools to ensure your clothes come out smooth and crease-free.

  • An iron: Select one with adjustable temperature settings and a steam function for versatile fabric care.
  • Ironing board: A sturdy, flat surface covered with a heat-resistant pad promotes efficient ironing.
  • Water spray bottle: Misting clothes lightly makes them easier to press.
  • Pressing cloth: Use this to protect delicate fabrics from direct heat.
  • Laundry starch: Spritz on shirts to achieve a crisp, professional finish.
  • Iron cleaner or descaler: Regularly clean your iron’s plate and remove mineral buildup for optimal performance.
  • Distilled water: This prevents mineral deposits in your iron that can stain clothing.
  • Timer or clock: Keep track of ironing time to avoid scorch marks on garments.
  • Hangers or clothing rack: Hang items immediately after ironing to prevent new wrinkles from forming.

Prepare your ironing space

Setting up the right environment for ironing can transform it from a chore into a smooth, swift process. Ensuring that you have all your tools and the space properly prepared will make a big difference in your garment care routine.

  • Choose an ironing board that is sturdy and of a comfortable height to prevent back strain.
  • Place the ironing board in a well – lit area to easily spot wrinkles and creases on your clothing.
  • Always ensure your ironing surface is clean and free of any objects that could snag or stain fabrics.
  • Use an iron with adjustable heat settings so you can cater to various fabric types without causing damage.
  • Fill the iron’s steam function reservoir with water if you anticipate needing steam for wrinkle removal.
  • Keep a pressing cloth handy, especially when working with delicate fabrics to protect them from direct heat.
  • Consider using an ironing mat for quick touch-ups or if you lack space for a full-size board.
  • Maintain a spray bottle filled with water or ironing spray nearby to help dampen clothes for easier wrinkle release.
  • Organize your clothes by fabric type before starting, streamlining the process and reducing the need for constant temperature adjustments.

Iron while clothes are damp

Ironing clothes when they’re still slightly damp can make a huge difference in the ease of smoothing out wrinkles. For fabrics like cotton and linen, which are notorious for deep creases, this method allows the heat to more effectively soften the fibers.

A quick spritz from a water bottle can dampen dryer garments just enough. If you’re dealing with a linen shirt or cotton dress, it’s best to iron them while they retain some moisture; high temperatures during ironing will work wonders on these materials.

Keep your spray bottle handy for those drier items that require a little moisture. The slight dampness helps the iron glide over stubborn wrinkles and press the fabric into crisp perfection without scorch marks.

This technique not only enhances wrinkle reduction but also contributes significantly to proper garment care and longevity. Moving forward, we’ll delve into how to handle different types of clothing and their specific needs during ironing.

Ironing different categories of clothing

Ironing your clothes can transform them from wrinkled to polished, showcasing meticulous apparel care. Proper garment pressing techniques cater to different types of clothing, ensuring they look their best without damage.

  • Gather your ironing essentials, including the iron, an ironing board, and distilled water for steam.
  • Set up a comfortable space with good lighting and enough room to move around the ironing board.
  • Tackle shirts starting with the collar, moving on to the cuffs and sleeves before laying the shirt flat to press the front and back.
  • Press pants by aligning seams; begin with waistbands and pockets before moving down each leg.
  • For skirts and dresses, start at the waist, iron in a circular motion around pleats or designs, and carefully work towards the hemline.
  • Delicate fabrics like silk should be ironed from the inside out to prevent shiny marks.
  • Use lower heat settings for synthetic materials such as polyester to avoid melting or distorting fibers.
  • Heavier textiles like cotton and denim benefit from higher temperatures for sharp creases and smooth finishes.

Using steam and avoiding scorch marks

Using steam while you iron can take your garment maintenance to the next level. It helps smooth out stubborn wrinkles and ensures that clothes look freshly pressed without damage.

  • Gather all necessary items before starting, including a steam iron, water for the iron’s reservoir, and a pressing cloth.
  • Fill up your iron’s steam function to its recommended level with distilled water to minimize buildup within the steam vents.
  • Preheat the iron according to the type of fabric you’re working with; selecting the right setting prevents scorch marks.
  • Lay out your clothing item on an ironing board, making sure the surface is clean and free of any debris that could transfer onto your fabric.
  • Test the steam function on a small area or similar scrap piece of fabric to make sure it doesn’t leave wet spots or cause any discoloration.
  • Begin with lighter fabrics like silks and synthetics that require lower heat, gradually progressing to sturdier materials like cottons and linens.
  • Apply gentle pressure as you glide the iron over areas with wrinkles, allowing the steam to penetrate fibers and relax them.
  • Use protective cloth barriers for extra delicate fabrics or garments prone to shiny marks; this method adds another layer of scorch protection.
  • Keep the iron moving constantly, focusing on one section at a time; lingering too long in one spot can result in scorch marks or even burns.
  • Implement vertical steaming for garments that are too delicate or cumbersome to lay flat; hold them upright and let the steam work its magic without direct contact.

Mastering the Technique of Ironing

Mastering the Technique of Ironing

Mastering the art of ironing isn’t just about removing wrinkles; it’s an essential skill that elevates your clothing’s appearance and showcases meticulous care. Unlock the secrets to flawless garments as you learn how to expertly navigate your iron across different textiles, transforming crumpled fabrics into crisply pressed masterpieces with ease.

Start with the collar or neckline

Getting that crisp, professional look for your shirts begins right at the top. The collar and neckline set the tone for your garment’s appearance, making them essential starting points in the ironing process.

  • Lay the shirt flat on the ironing board with the collar or neckline spread out.
  • Press down firmly with a hot iron to eliminate any creases, moving from one point of the collar to the other systematically.
  • Flip over and repeat on the other side, ensuring both sides are equally smooth.
  • For dress shirts with a stiff collar, use extra steam to shape it properly, but avoid soaking it.
  • Gently smooth out any wrinkles along the seam where the fabric meets while maintaining firm pressure.
  • Adjust your grip as needed to navigate around buttons and ensure they are not damaged by direct heat.
  • Ensure consistent movement of the iron across every inch of fabric for an even finish without leaving any marks.
  • Check your progress frequently to prevent overheating and potential scorch marks on delicate areas.

Work from top to bottom

Mastering the technique of ironing involves a strategic approach, like tackling clothes by working from top to bottom. This method ensures an organized process and prevents re-wrinkling areas you’ve already smoothed out.

  • Lay the garment flat on your ironing board to start. Begin with the collar or neckline, making sure it’s unbuttoned if dealing with a shirt.
  • Smooth out the fabric of the collar with your hands first, then press with the iron. Flip and repeat on the other side for an even look.
  • Move down to the shoulders and yoke, sliding each section over the narrow end of your ironing board to keep everything flat.
  • Press down firmly but gently as you go along each sleeve. Pay special attention to cuffs, where wrinkles often hide.
  • Engage in garment care by ironing the front panels next, navigating around buttons or any embellishments carefully.
  • Slide your iron smoothly across the back panel of shirts or blouses ensuring no new creases form in what you’ve already pressed.
  • Finish up by pressing any remaining details such as pockets or pleats for that crisp, professional appearance.

Use steam and damp cloth

Transitioning from working your way from top to bottom, let’s tackle the significance of steam and a damp cloth in perfecting your ironing technique. Steam is the secret weapon that loosens fibers and eradicates wrinkles with ease.

  • Select the appropriate setting on your steam iron for the fabric you’re working with. This ensures optimal temperature and steam output.
  • Preheat your iron until it reaches the desired setting. A well – heated iron produces consistent steam.
  • For stubborn wrinkles, use the iron’s burst-of-steam feature. Short, sharp bursts target deep creases, smoothing them quickly.
  • Keep a spray bottle handy for fabrics that have dried out. Spritz water lightly to reintroduce moisture for easier wrinkle removal.
  • Lay a damp cloth over delicate fabrics like wool before pressing. This provides an extra layer of protection against heat damage.
  • Glide the iron gently; let the steam penetrate fibers without applying too much pressure.
  • Re – moisten the cloth as necessary during lengthy ironing sessions to maintain adequate dampness.
  • After steaming, allow clothes to dry completely before wearing or storing them. This prevents new wrinkles from forming immediately.

Ironing Safety Measures

Ironing Safety Measures

5. Ironing Safety Measures: Discover how to shield your favorite garments and yourself from heat mishaps with essential ironing safety tips that promise a burn-free experience—stay tuned for expert guidance on secure pressing practices.

Tips for ironing safely

Ironing safely is essential for protecting both your clothes and yourself. Following these guidelines will help you iron without accidents or damage to your garments.

  • Always test the iron’s temperature on a small, hidden part of the garment to ensure it won’t burn the fabric.
  • Keep your ironing board stable and secure to prevent it from collapsing while you’re using it.
  • Ensure good ventilation in your ironing area to keep fabric fumes at bay and breathe easily.
  • Use an iron with automatic shut – off features to reduce the risk of fire if left unattended.
  • Never leave a hot iron face down on any surface; always rest it on its heel or in its stand.
  • Keep cords untangled and away from the edges of the ironing board where they can be pulled.
  • Avoid water drips by draining leftover water from your steam iron after every use to prevent calcium buildup.
  • Stay mindful of hot surfaces, including the soleplate of the iron, which can cause serious burns upon contact.
  • Store irons out of children’s reach, making sure they cool down completely before putting them away.

Understanding iron temperature settings

Getting to know your iron’s temperature settings is key to achieving perfectly smooth clothes without damage. Different fabrics require specific heat levels; for example, cotton sheets can handle high temperatures but are best ironed while slightly damp for outstanding results.

Always begin with a lower setting and increase the heat gradually as you gauge how the fabric responds. This approach ensures that delicate materials aren’t subjected to excessive heat right away, which could ruin them.

Familiarizing yourself with the symbols on clothing labels will guide you in selecting the correct temperature. These symbols provide essential information about textile temperature tolerance and help prevent mishaps like scorching or melting fibers.

Mastering these settings translates into professional-quality care for your garments, extending their life and keeping them looking their best longer. It’s a straightforward step toward becoming proficient at proper clothing maintenance and wrinkle removal without resorting to guesswork or risking harm to your wardrobe favorites.

How to remove scorch marks

If you accidentally leave your iron on clothes for too long and end up with scorch marks, don’t worry; there are several household remedies to tackle this common ironing mishap. Start by mixing a solution of water and lemon juice, which is often effective in reducing the discoloration caused by burnt fabric stains.

Apply this mixture gently to the affected area then rinse with clean water. This simple yet effective method can help restore your clothing without harsh chemicals.

For tougher scorch marks that don’t respond to lemon water, hydrogen peroxide can be a fabric-safe option. Soak a cloth in hydrogen peroxide and dab at the stain until it begins to lift from the textile—be sure not to rub forcefully as it might damage delicate fibers.

In cases where your iron itself has been left with scorch marks, applying white toothpaste (the plain variety, not gel) can aid in cleaning off those stubborn burns without harming the iron’s surface.

Keep in mind that gentle handling is essential during these processes for successful stain removal and fabric maintenance.

Tips for Ironing Different Fabrics

Tips for Ironing Different Fabrics

Navigating the nuances of fabric care is critical in ironing; each material demands a unique approach to heat and technique. We’ll delve into how to effectively press a range of fabrics, from sturdy cottons to delicate silks, ensuring your garments look impeccably smooth without causing damage.

Ironing by fabric type

Understanding how to iron by fabric type is crucial for garment care. Different textiles require unique approaches to avoid damage and ensure a crisp appearance.

  • Cotton and Linen:
  • Wool:
  • Polyester and Synthetic Blends:
  • Silk:
  • Denim and Heavy Fabrics:
  • Satin:
  • Delicate Fabrics:

Choosing the right temperature for each fabric

Choosing the right temperature for each fabric is crucial for both wrinkle removal and fabric care. Irons come equipped with a variety of settings to cater to the heat tolerance of different textiles.

  • Start by sorting your laundry into groups based on their ironing needs, ensuring delicate fabrics aren’t exposed to excessive heat.
  • For synthetics like acetate, set your iron at 290°F to smooth out wrinkles without causing damage.
  • When working with acrylic or nylon, a slightly lower temperature of around 275°F is sufficient to effectively press these materials.
  • Cotton garments, known for heavier wrinkles, require a hotter setting near 400°F for a crisp finish.
  • Linen, highly resistant to heat, can be ironed at the highest setting of about 445°F for best results.
  • Polyester and silk blend items should be pressed within their specified ranges with caution to avoid melting or burning.
  • If you’re ironing wool pieces, adjust the temperature between 275 – 300°F; this range is warm enough to tackle creases while being gentle on fibers.
  • With silk’s delicate nature in mind, dial down the heat to between 280 – 300°F for a smooth touch without shine or scorching.
  • Handle rayon attentively by selecting a moderate heat setting around 325-375°F so that it becomes wrinkle-free without losing its shape.

Tips for stubborn wrinkles

Tackling stubborn wrinkles can feel like a battle, but with the right ironing technique, it’s one you can win. Use your steam iron effectively by holding it just above the fabric and pressing the steam button; this blasts hot moisture into the fibers.

The combination of heat and moisture relaxes them, making it easier for your next move. Follow up by placing a thin cloth over these pesky areas and press down firmly with your hot, dry iron in straight motions.

This provides an extra layer of heat that helps flatten even the most persistent creases.

For those exceptionally tenacious wrinkles that don’t seem to budge, repeat ironing over them multiple times if needed—but always apply gentle pressure to avoid damaging the fabric.

Remember that garment smoothing takes patience; let your iron work its magic slowly across each wrinkled zone without rushing. If direct contact is too much for delicate fabrics, hovering just above them while steaming offers a safer alternative—allowing you to smooth out wrinkles without compromising on care for your clothing items.

Keep gliding your device across each section until every wrinkle has been defeated, leaving behind nothing but crisp, well-pressed garments ready for wear or storage.

Ironing delicate fabrics

Ironing delicate fabrics demands a gentle hand and keen attention to detail. Separate these fine materials from more robust clothing to prevent any harm. For best results, iron them in smaller sections, which helps maintain their shape and integrity.

Be especially careful with fabrics like lace or chiffon that can easily snag or stretch.

When dealing with satin, always turn the item inside out before you start ironing. Make sure it’s damp but avoid using steam as it can leave watermarks or cause damage. Iron silk with the lowest temperature setting and consider placing a pressing cloth between the fabric and iron to add an extra layer of protection.

These careful steps ensure your delicate garments stay pristine and wrinkle-free without any unwanted shine or pressing marks.

Cotton, polyester, silk, wool, and more

Transitioning from ironing delicate fabrics, it’s essential to understand how different materials like cotton, polyester, silk, and wool each demand unique care and attention during the ironing process.

  • Each type of fabric has its own set of rules for ironing. Here’s how to handle a variety of common textiles:
  • Set your iron at a high temperature; cotton can tolerate more heat.
  • Use steam liberally to remove wrinkles easily.
  • Don’t let the iron sit in one spot for too long to prevent scorch marks.
  • Keep the iron’s setting on low to medium heat because polyester is heat – sensitive.
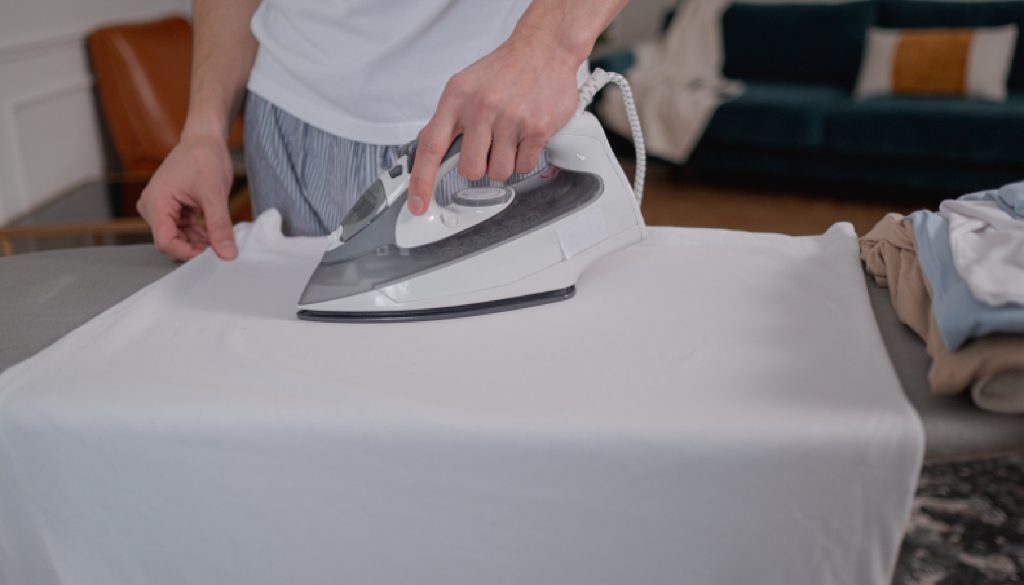
  • Press down lightly and avoid pulling or stretching the garment.
  • Quick passes with the iron are best to smooth out wrinkles without damage.
  • Use a lower temperature setting to safeguard this delicate material.
  • Always place a damp cloth between the silk and the iron to prevent direct contact.
  • Avoid spraying water directly on silk as it may leave permanent water spots.
  • Use a medium heat setting on your iron.
  • A pressing cloth between your wool garment and the iron helps preserve its texture and prevents shiny marks.
  • Steam helps wool fibers relax, so light steam can be beneficial.
  • Research specific guidelines for any unusual or mixed fabrics before you start.
  • Test your iron on an inconspicuous part of the garment first if unsure about temperature settings or fabric resistance.
  • Remember that embellished or textured items might need additional protection, such as using a pressing pad or avoiding direct contact altogether.

Conclusion

Ironing doesn’t have to be a chore you dread. With the right tools and techniques, you’ll glide through those wrinkles with ease. Remember, practice makes perfect and soon you’ll press your clothes like a pro.

Keep these tips handy for every laundry day — smooth, crisp garments are just an iron away. Your wardrobe will thank you, looking sharp has never been simpler!

FAQs

1. What is the first step to ironing clothes properly?

Start by setting up your ironing board and preheating the iron to the appropriate temperature for your fabric.

2. Can I iron clothes that are completely dry?

For best results, clothes should be slightly damp or you can use a spray bottle with water to moisten them before ironing.

3. How do I prevent my clothes from getting shiny marks when ironing?

To avoid shiny marks, do not press too hard and consider using a pressing cloth between the iron and garment.

4. Is starch necessary when ironing garments?

Starch is not required but it can be used to add crispness and help certain items like shirts maintain their shape longer.

5. What’s an effective way to remove wrinkles from delicate fabrics?

Use a steam function on your iron or hang the garment in a bathroom during a shower for gentle wrinkle removal without direct heat contact.