Household Archives - Page 2 of 2 - Fabricare Center

Category Archives for "Household"

How To Dry Clean At Home Without A Kit: Effective Methods For Cleaning Your Clothes

How To Dry Clean At Home Without A Kit: Effective Methods For Cleaning Your Clothes

Dry Cleaning , Fabricare Center Blog , Household

Do you have clothes that need dry cleaning, but the thought of going out and finding a professional cleaner seems daunting? Did you know that there are practical ways to dry clean your garments at home without using a special kit? This article will guide you through efficient methods for safely washing and reviving delicate items, from careful handwashing strategies to clever steam freshening tactics.

Get ready to explore how simple it can be to keep your wardrobe looking sharp while staying within your comfort zone.

Key Takeaways

  • Certain clothes can be dry cleaned at home, including sweaters, mesh bags, mesh fabrics, silks, wool garments, and some special care fabrics. Always check the label and perform a patch test before attempting to clean.
  • Fabrics like silk, lace, and wool should be sent to professional cleaners for optimal results due to their delicate nature and specialized handling requirements.
  • Delicate items like silk, wool, lace clothing should be handwashed with gentle detergent and cool water. Avoid twisting or wringing the fabric to prevent damage.
  • Leather and suede items can be cleaned at home using specific methods; however, it’s important to follow the necessary steps and use appropriate products for proper care.

At-Home Dry Cleaning vs Professional Dry Cleaning

Certain clothes can be dry cleaned at home, while others are best left to the professionals. It’s important to know which garments are suitable for DIY dry cleaning and when it’s better to send them to a professional cleaner for optimal results.

What clothes can be dry cleaned at home

Taking care of your garments at home requires knowing which items can handle the dry cleaning process and which ones cannot. Several types of clothes fall into the category that you can safely dry clean at home.

  1. Sweaters: Many sweaters are made from wool or synthetic blends, making them ideal candidates for home dry cleaning.
  2. Mesh bags: These items are often sturdy enough to withstand a careful handwash followed by air drying.
  3. Mesh fabrics: Like mesh bags, other mesh clothing items respond well to gentle home cleaning methods.
  4. Silks: With caution, certain silk pieces can be washed at home using a mild detergent and avoiding harsh wringing or twisting.
  5. Wool garments: If treated with care, these products may undergo a light hand wash and steaming instead of professional dry cleaning.
  6. Special care fabrics: Depending on the fabric type and if the label permits, some special care materials might tolerate home dry cleaning methods.

What clothes should be sent to a professional

Determining which clothes should be sent to a professional for dry cleaning instead of being cleaned at home is crucial in maintaining your wardrobe’s quality.

  • Fabrics like silk, lace, and wool require special care and cannot be dry cleaned at home with soap or DIY methods.
  • Certain “dry clean only” garments, as indicated on their labels, often need the expertise of a professional to retain their premium quality.
  • Items that are heavily soiled or stained prove difficult to handle with standard spot treatment solutions and might benefit more from professional cleaning services.
  • Any clothing made out of leather or suede demands specialist handling to avoid damaging their material during the cleaning process.
  • If you possess valuable items or clothes that hold sentimental value, consider entrusting them to a professional. They are equipped with effective cleaning methods that ensure the longevity and preservation of these special pieces.

What Can and Cannot Be Dry Cleaned at Home

What Can and Cannot Be Dry Cleaned at Home

Certain fabrics, such as cotton, linen, polyester, and silk, can typically be dry cleaned at home with the proper equipment and materials. However, delicate items like lace or embellished garments should always be sent to a professional for cleaning.

Additionally, leather and suede should never be dry cleaned at home due to their unique care requirements. Finally, heavily soiled or stained items may also require professional attention for optimal results.

Dry cleanable fabrics

Certain fabrics handle the dry cleaning process better than others. Here’s a list:

  • Wool stands among the most common dry cleanable fabrics. It can maintain its shape and appearance when handled correctly during dry cleaning.
  • Cashmere, another popular choice for dry cleaning, retains softness and warmth without being damaged in the process.
  • Silk, unlike wool and cashmere, may lose its sheen if not properly cared for. Using mild detergent and cool water works well.
  • Rayon represents a unique case. While it is often considered a washable fabric, some types of rayon demand professional hand washing to avoid shrinking or losing color.

Delicate items

Taking care of delicate items requires special attention and care. Here are some important tips to consider when dry cleaning delicate clothes:

  • Silk: Handwash silk garments using a gentle detergent and lukewarm water. Avoid twisting or wringing the fabric to prevent damage.
  • Wool: Use a mild wool-specific detergent and cold water for handwashing wool items. Gently squeeze out excess moisture and reshape while damp.
  • Lace: Handwash lace items in cool water with a mild detergent, carefully avoiding any rubbing or scrubbing that can cause tears.
  • Beaded or sequined clothing: Spot clean small areas using a gentle spot treatment solution. To fully clean, handwash inside out in cold water, being careful not to snag or pull on the beads/sequins.
  • Cashmere: Handwash cashmere sweaters with a gentle detergent in cold water. Avoid excessive agitation and squeezing while washing.
  • Embroidered clothing: Turn embroidered garments inside out before handwashing in cool water with mild detergent. Gently squeeze out excess moisture without twisting or stretching the embroidery.

Leather and suede

Leather and suede items can be cleaned at home using hand-washing methods. For spot cleaning, delicate garments with small stains can also be treated at home. To remove wrinkles and freshen suede clothes, steaming is an effective method.

However, it’s important to note that only UGGs made of suede can be washed at home, while other suede clothing should be taken to a leather cleaner for proper care. It’s crucial to follow the necessary steps and use appropriate products when cleaning leather and suede items to maintain their quality and prevent damage.

Heavily soiled or stained items

Dry cleaning at home can effectively remove stains from heavily soiled items. Whether it’s deeply embedded dirt, stubborn stains, or tough grime, you can tackle these challenging discolorations without having to send your clothes to a professional cleaner.

Pre-treating the stains is an important first step in this process. By using a spot treatment solution and gently working it into the fabric, you can start breaking down those set-in stains and persistent dirt.

Then, with the help of a steam cleaner or an iron with steam function, you can lift away ground-in dirt and create crisp lines on your garments. At-home dry cleaning provides a cost-effective solution for managing heavily soiled or stained items without compromising on cleanliness and quality.

Necessary Equipment and Materials

Necessary Equipment and Materials home dry cleaning materials

To successfully dry clean your clothes at home, you’ll need a few essential items. Don’t worry; we’ve got you covered. Keep reading to find out what you’ll need and how to use them effectively.

Dry Cleaning Solvent

Dry cleaning solvent is a key component for at-home dry cleaning. These non-water-based solutions, such as chlorinated solvents like perchloroethylene (perc), are commonly used by professional dry cleaners in the U.S. They effectively remove dirt and stains from fabrics without the need for water, making them ideal for delicate or dry-cleanable items. Choosing the right dry cleaning solvent is crucial to ensure effective and safe cleaning of your clothes at home.

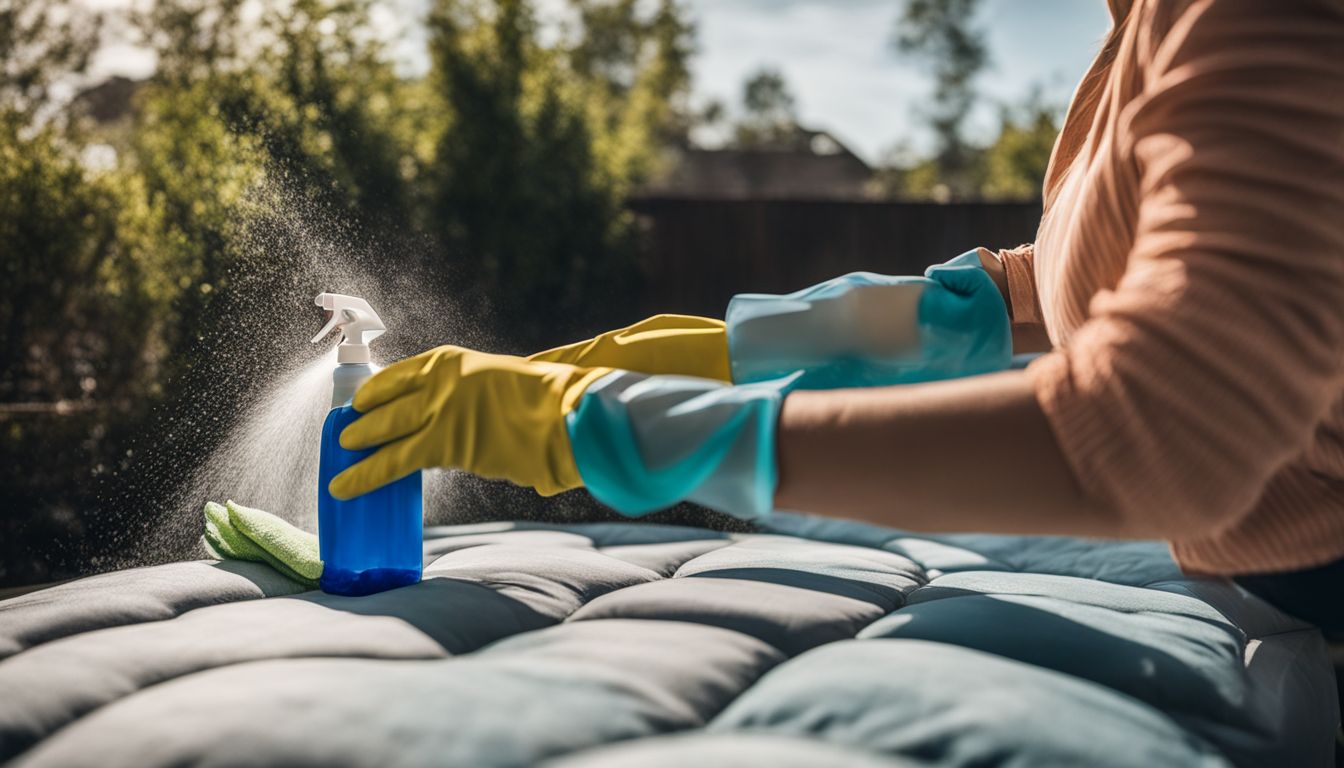
Spot Treatment Solution

To effectively remove stains from your clothes during the dry cleaning process, a spot treatment solution is essential. This solution is specifically formulated to target and break down stubborn stains, ensuring that your garments come out looking fresh and clean.

The spot treatment process involves applying a small amount of the solution directly onto the stained area before washing or handwashing. By gently rubbing the solution into the fabric, you can effectively lift and dissolve the stain, allowing for easier removal in subsequent steps. Just remember to check for any discoloration or changes in fabric appearance after spot treatment and drying to ensure optimal results.

In order to pre-treat stains before washing them, it’s recommended to create a paste using baking soda and water. This paste can be applied directly onto stubborn stains to help loosen them up before laundering.

Steam Cleaner

A steam cleaner is a necessary tool for at-home dry cleaning. It uses the power of heat and water to effectively clean clothes without the need for chemicals or harsh detergents. The high temperature of around 200 degrees helps to disinfect surfaces and kill bacteria, making it an ideal choice for refreshing and sanitizing your garments.

Whether you have stubborn wrinkles that need to be removed or simply want to freshen up your clothes between washes, a steam cleaner can be a convenient and effective solution.

Iron

Ironing is an essential step in the at-home dry cleaning process, helping to remove wrinkles and create crisp lines in your garments. To iron “dry clean only” clothes, you will need an iron, ironing board, a pressing cloth, and water in a spray bottle.

Simply set your iron to the appropriate temperature for the fabric and use the pressing cloth as a barrier between the garment and the hot iron. Gently glide the iron over the fabric to smooth out any wrinkles, taking care not to apply too much pressure or leave the iron on one spot for too long to avoid damaging delicate fabrics. Ironing can help give your clothes that fresh-from-the-dry-cleaner look without ever leaving your home.

Stain Remover

To effectively remove stains from your clothes at home, you will need a reliable stain remover. There are various options available such as chlorine bleach, color-safe bleach, color remover, and dry-cleaning fluid or petroleum-based pretreatment solvent. These stain removers work by breaking down and removing the stain particles from the fabric. You can apply them directly to the stained area before washing or follow the product instructions for best results. With the right stain remover in hand, you can easily tackle tough stains and keep your clothes looking fresh and clean.

Step-by-Step Guide: How to Dry Clean at Home Without a Kit

Pre-treating Stains, Handwashing, Steam Cleaning, and Removing Wrinkles – Learn how to effectively dry clean your clothes at home without a kit. Read on for the complete step-by-step guide!

Pre-treating Stains

To ensure the best results when dry cleaning your clothes at home, it’s important to pre-treat any visible stains before starting the process. This step can help lift and remove stubborn stains, making them easier to clean during the dry cleaning process.

One recommended stain remover for dry-clean garments is Amodex Ink, which is effective in removing various types of stains. To pre-treat a stain on a dry-clean only item, apply an All-Purpose solution and gently agitate the area with a soft brush or cloth.

Rinse the pre-treated stain to check if it has lifted before proceeding with the rest of the dry cleaning steps.
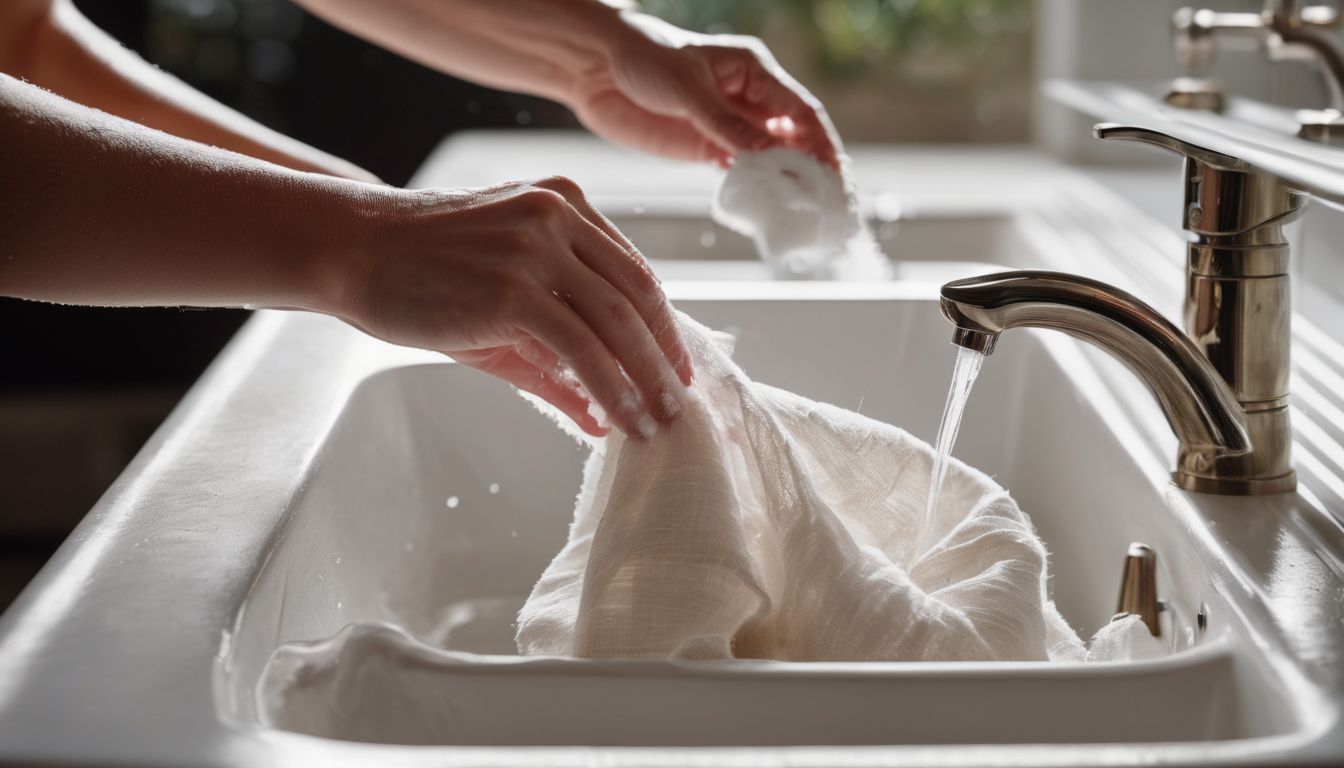
Handwashing

Handwashing clothes is an effective and gentle way to clean delicate garments. It can be a simple process, and there are step-by-step guides available to help you wash your clothes at home. However, it’s important to note that handwashing is not suitable for garments labeled as “dry clean only.”

When handwashing, use a mild detergent and gently agitate the clothes in a sink or basin filled with lukewarm water. Rinse thoroughly, removing all soap residue. Finally, carefully wring out excess water and hang the items up to dry. By following these steps, you can effectively clean your delicate fabrics without the need for a dry cleaning kit or professional service.

Steam Cleaning

Steam cleaning is a crucial step in the process of dry cleaning clothes at home without a kit. It helps remove stubborn stains and body oils that may not be easily tackled by other methods.

By using a steam cleaner on your garments, you can effectively eliminate deep-seated dirt and grime, leaving your clothes fresh and clean. Steam cleaning works by applying high-temperature steam to the fabric, which loosens and lifts away impurities.

This method is particularly useful for delicate items that cannot withstand rough handling or harsh chemicals. So when it comes to achieving professional-level results at home, don’t forget the power of steam cleaning.

Removing Wrinkles and Creating Crisp Lines

One effective method for removing wrinkles and creating crisp lines when dry cleaning at home is by using a clothes steamer or an iron. Steam cleaning with a handheld steamer can effectively remove wrinkles from clothes, making them look fresh and neat.

Another method is to brush the clothes with a soft-bristle brush or clothing brush, which helps to smooth out any creases and create sharp lines for a polished appearance. By utilizing these techniques, you can achieve professional-looking results without the need for a dry cleaning kit.

Tips for Dry Cleaning Clothes at Home

Read the label on your garments carefully to determine if they can be dry cleaned at home.

Read the Label

To effectively dry clean your clothes at home without a kit, it is crucial to carefully read the label on each garment. Clothing care instructions provide valuable information about the fabric and any specific cleaning methods that should be followed. Some items may require delicate handling or professional dry cleaning due to their sensitive nature, while others can be safely cleaned using gentle DIY methods. By understanding and following the guidelines on clothing labels, you can ensure proper cleaning techniques and maintain the quality of your garments for longer periods of time. Remember, reading the label is the first step towards successful at-home dry cleaning.

Test a Small Area First

Before attempting to clean your clothes at home, especially those that are labeled as “dry clean only,” it is crucial to test a small area first. This simple step can help you avoid any potential damage or discoloration of the garment caused by the cleaning solution. By spraying a small amount of an All-Purpose cleaner and wetting it on a small, inconspicuous area, you can assess if there will be any adverse reactions or harm. Wait for about 15 minutes after applying the cleaning solution before proceeding with cleaning the entire garment. Taking this precautionary measure ensures that your clothes stay safe during the cleaning process and helps maintain their quality and effectiveness.

Do Not Use Regular Detergent

Using regular detergent to clean your “dry clean only” clothes can lead to disastrous results. Regular detergents are not designed to effectively clean delicate fabrics and may cause damage, shrinking, or fading. This is because regular detergents do not provide the same cleaning and degreasing power as a dry cleaning solvent. It is crucial to use a detergent specifically made for delicates when washing your “dry clean only” clothes at home. By avoiding regular detergent, you can ensure that your clothes remain in great condition without any unwanted mishaps. Remember, always follow the care instructions on the label and treat your delicate items with extra care.

Store Items Properly

To keep your clothes in good condition after dry cleaning at home, it’s essential to store them properly. This helps prevent any damage or wrinkles and keeps them ready for future use. One way to store your cleaned items is by using Mylar bags specifically designed for clothing storage. These bags provide a protective barrier against dust, moisture, and pests, keeping your garments fresh and clean. Additionally, always inspect your clothes before storing them to address any holes or loose threads that may require mending. By storing your dry-cleaned items properly, you can prolong their lifespan and ensure they stay in great shape between wears.

Consider Professional Dry Cleaning for Complicated or Valuable Items

Professional dry cleaning is highly recommended for complicated or valuable items. Delicate fabrics, specialized cleaning techniques, and fragile materials require the expertise of experienced professionals to ensure they are properly cleaned without any damage. High-end garments with intricate designs, difficult stains, vintage clothing, expensive textiles, fine linens, and embellished items should all be entrusted to professional dry cleaners who have the knowledge and resources to handle them with care. By opting for professional dry cleaning for these types of items, you can rest assured that they will be treated with the utmost attention and expertise they deserve.

Conclusion

This article has provided valuable insights into how to effectively dry clean your clothes at home without a special kit. By understanding which garments can be safely cleaned at home and which should be entrusted to professional cleaners, you can maintain the quality of your wardrobe while staying within your comfort zone. The key takeaways emphasize the importance of reading garment labels, conducting patch tests, and using the right equipment and materials to achieve optimal results. Whether you’re dealing with delicate silks, woolens, or heavily soiled items, the step-by-step guide and essential tips offered here will empower you to keep your clothes looking fresh and clean, right in the convenience of your own home. So, get ready to revitalize your wardrobe and enjoy the benefits of at-home dry cleaning.

FAQs

1. Can I dry clean my clothes at home without a kit?

Yes, it’s possible to dry clean your clothes at home without a kit using alternative methods that can help remove stains and freshen your garments.

2. What are some effective methods for dry cleaning clothes at home?

Some effective methods for dry cleaning clothes at home include using vinegar and water solution, steam-cleaning with a garment steamer, or spot-treating stains with specialized cleaners.

3. How do I use vinegar to dry clean my clothes at home?

To use vinegar for DIY dry cleaning, mix equal parts of white vinegar and water in a spray bottle, then gently mist the garment’s problem areas before brushing or blotting away any residue.

4. Can I steam-clean my clothes without a garment steamer?

Yes, you can steam-clean your clothes without a garment steamer by hanging them in the bathroom while taking a hot shower or by using an iron with the steam function on low heat.

5. Are there any risks involved in attempting to dry clean clothes at home?

While it is generally safe to try DIY dry cleaning methods, it’s important to read clothing labels and test any products on inconspicuous areas first to avoid potential damage or color bleeding.

How To Clean Table Linens: Spotless And Fresh Looking Tablecloths, Napkins, And Placemats

How To Clean Table Linens: Spotless And Fresh Looking Tablecloths, Napkins, And Placemats

Fabricare Center Blog , Household

Stained or dingy table linens can be an embarrassing eyesore at family dinners or special events. Proper care of these versatile home essentials often gets overlooked, but it’s vital for their longevity and appearance. This blog post is a step-by-step guide on how to clean tables lines, tablecloths, napkins, and place mats spotless and fresh-looking using various techniques tailored to your linen type. Ready? Let’s make those stains disappear!

Key Takeaways

  • Different types of table linens require specific cleaning methods. For cotton and cotton blends, machine washing on the lowest temperature with regular laundry detergent is typically sufficient.
  • Linen fabric requires more delicate care and can be washed by hand or in a gentle cycle with mild detergent. Stains should be treated promptly using hydrogen peroxide or soaking them in a bucket before laundering.
  • To wash table linens effectively, use the washing machine on the gentle cycle with regular laundry detergent. Set the appropriate temperature, select the correct cycle, and consider adding vinegar or baking soda for stubborn stains.
  • Proper storage is essential to maintain the freshness and quality of your table linens. Fold them neatly, iron before storing to prevent creases from setting in, and store them in a cool, dry place away from direct sunlight.

Choosing the Right Cleaning Method based on Linen Type

Choosing the Right Cleaning Method based on Linen Type

Different types of table linens require specific cleaning methods to ensure they remain spotless and fresh-looking. Let’s explore the optimal cleaning methods for cotton and cotton blends as well as linen fabrics:

Cotton and Cotton Blends:

Cotton and cotton blend fabrics are popular choices for table linens due to their soft texture, durability, and high absorbency. Maintaining these materials is relatively straightforward:

  • Washing: Machine washing is typically sufficient for cotton and cotton blends. Use the normal cycle with regular laundry detergent.
  • Stain Removal: Address stains promptly. Pre-treat stains with a stain remover, and consider soaking them if necessary before laundering.
  • Ironing: The advantage of cotton is that it’s easier to iron. This makes it simpler to keep your napkins and placemats smooth and fresh-looking.

It’s essential to follow these guidelines diligently to preserve the longevity of your cotton and cotton blend table linens.

Linen:

Linen tablecloths and napkins add an elegant touch to any dining setting. However, they require more delicate care and attention:

  • Washing: Linen can withstand higher thermal pressure, allowing for washing at temperatures up to 90 degrees for whites and natural colors. Machine washing is permitted for linen napkins and tablecloths. Opt for a gentle cycle with mild detergent to help maintain the fabric’s integrity.
  • Sorting and Drying: To prevent entanglement or color bleeding, group similar linen items together during wash cycles. Proper drying techniques are essential for caring for these fabrics.
  • Ironing: For a pristine appearance over time, it’s recommended that linens be dried until nearly dry before ironing them flat.

Caring for your linens with these specific guidelines will ensure that they remain in excellent condition, showcasing their elegance and beauty with each use.

Stain Treatment

Keeping your table linens spotless begins with proper stain treatment. Here are some simple steps to treat various types of stains effectively:

  • Identify the fiber content and nature of the stain before you start. This information will guide you in choosing the right cleaning method.
  • Attack faint rust stains with a spray stain remover. Follow this up by washing the linen with your regular laundry detergent.
  • Always test the stain remover on a small hidden part of your delicate linens before applying it all over.
  • Dry cleaners can often provide specific treatments for stains, especially if you’re unsure about the fiber content or type of stain.
  • Deal carefully with food spills on linen tablecloths. Scrape off and soak up any leftovers before directly applying a grease-cutting dish soap to the stain.
  • Use recognized brand – name stain removers like Shout on cotton and linen tablecloths and napkins, as they are typically safe for these materials.
  • Have tough, stubborn stains? Try mixing 1 cup bleach diluted in 2 cups of water. Soak stained parts for five minutes, then gently rub out the remaining mark.

Washing and Drying Table Linens

Washing and Drying Table Linens

To wash table linens, use the washing machine on the gentle cycle with regular laundry detergent.

Washing Machine Settings and Detergent

To clean table linens effectively, it is important to use the right washing machine settings and detergent. Here are some tips to help you achieve spotless and fresh-looking tablecloths:

  • Set the washing machine to the appropriate temperature: Linen can be washed at temperatures up to 90 degrees Fahrenheit, but it’s best to wash on the lowest temperature needed. This will help prevent shrinkage and damage.
  • Select the correct cycle: For most polyester tablecloths, a regular or gentle cycle will suffice. Check the care label on your linens for specific instructions.
  • Use regular detergent: Most polyester tablecloths are machine washable with regular laundry detergent. Avoid using bleach or harsh chemicals that could damage the fabric.
  • Consider adding vinegar or baking soda: If your table linens have stubborn food stains, pre-treating them with vinegar or baking soda can help loosen and remove the stains. Add a cup of vinegar or half a cup of baking soda to the wash cycle along with your detergent.

Drying Techniques

To ensure your table linens are completely dry and ready for use, follow these drying techniques:

  1. Air-drying: Hang your tablecloths, napkins, and placemats on a clothesline or drying rack outdoors. This method allows the fabric to breathe and prevents shrinkage.
  2. Machine drying with low heat: If you prefer using a dryer, set it on the lowest heat setting to avoid damaging the fibers. Remove linens while they are slightly damp to prevent over-drying.
  3. Pressing with a warm iron: For a crisp finish, use a warm iron to press out any wrinkles or creases in your dried table linens. Be sure to follow the specific ironing instructions for each type of fabric.

Tips for Maintaining and Storing Table Linens

Iron table linens before storing to remove any wrinkles and prevent creases from setting in. Fold them neatly and place them in a cool, dry place away from direct sunlight to maintain their freshness and quality.

Ironing Techniques

To keep your table linens looking their best, follow these ironing techniques:

  1. Fold in thirds: After ironing, fold your linen tablecloths in thirds and hang them on a hanger for storage. This helps prevent creases from becoming permanent.
  2. Spray and iron: When ironing table linens, spray a small section with water or fabric spray and then iron that section before moving on to the next. Repeat this process on the other side as well. This technique ensures even heat distribution and helps avoid a center crease.
  3. Use proper heat settings: Adjust your iron’s heat setting based on the type of fabric you are ironing. Higher heat may be suitable for cotton blends, while lower heat is better for delicate linens.
  4. Iron inside out: For embroidered or embellished tablecloths, turn them inside out before ironing to protect the design while still achieving a smooth finish.
  5. Avoid pressing hard: Apply gentle pressure when ironing to prevent damaging the fabric or leaving imprints from the iron.
  6. Pre-iron dampness: If your tablecloth is slightly damp after washing, it can make the ironing process smoother and less time-consuming.

Proper Storage

To keep your table linens in top shape and ready for your next gathering, proper storage is essential. Here are some tips to ensure your linens stay fresh and wrinkle-free:

  1. Softness, space, and protection: Softness, space, and protection are key elements of proper table linen storage. Keep creases soft and leave ample space for air circulation to prevent wrinkles and extend the lifespan of your linens.
  2. Ideal storage for tablecloths: The ideal way to store tablecloths is to wrap them around large, sturdy cardboard roller tubes, similar to rolled gift wrap. This helps maintain their shape and keeps them free from unnecessary creasing.
  3. Repurpose a dresser: Get creative with storage solutions by repurposing a hand-me-down or outgrown dresser with smaller drawers. These can be perfect for organizing napkins, placemats, napkin rings, and trivets neatly.
  4. Seasonal linen storage: Consider different ideas for organizing and storing linens based on the seasons. For example, use vacuum-sealed bags to save space during off-seasons or designate specific storage bins for each season’s linens.
  5. Wrinkle prevention: To minimize wrinkles when storing linens that aren’t frequently used, fold them carefully using acid-free tissue paper between the folds. This technique helps prevent permanent creases while keeping the linens protected.

Troubleshooting and FAQ

Removing stubborn stains from table linens can be a challenge, but there are effective methods you can try. Additionally, if you’re unsure about washing white linens or dealing with shrinkage, we have the answers to your frequently asked questions.

And if all else fails, consider professional cleaning services for those extra tough stains.

Removing Stains

To keep your table linens spotless and fresh-looking, it’s important to know how to effectively remove stains. Follow these tips:

  1. Treat stains promptly: Don’t let stains sit on your table linens for too long. The sooner you address them, the easier they will be to remove.
  2. Identify the stain type: Different stains require different treatment methods. Determine whether the stain is from food, drink, oil, or other substances before proceeding with a specific removal technique.
  3. Pre-treat the stain: Before washing your table linens, pre-treat any visible stains with a stain remover or liquid dish soap. Apply it directly to the stained area and gently rub it in.
  4. Soak white linens: For white tablecloths or napkins that have been stained by candle wax drippings, wine, fruit, tea, or other difficult-to-remove substances, soak them in a mixture of cold water and hydrogen peroxide for about 30 minutes before laundering.
  5. Use cold water wash: When washing your table linens in a machine, opt for a cold water wash setting instead of hot water. Cold water helps prevent color fading and fabric shrinkage.
  6. Choose gentle cycle: Select the gentle cycle option on your washing machine to ensure that your table linens are washed delicately without being subjected to harsh agitation.
  7. Use regular laundry detergent: Most table linens can be cleaned with regular laundry detergent. Choose a mild detergent that doesn’t contain bleach or harsh chemicals.
  8. Air dry or tumble dry on low heat: After washing, either air dry your table linens by laying them flat or hang them up to dry naturally. If you prefer using a dryer, set it on low heat to prevent shrinkage and maintain the softness of your linens.

Washing White Linens

To keep your white linens looking their best, follow these simple steps:

  1. Use cold water: Washing white linens in cold water helps prevent fading and keeps them looking bright.
  2. Gentle cycle: Choose the gentle cycle on your washing machine to ensure that delicate white linens are not damaged during the wash.
  3. Mild detergent: Use a mild detergent specifically designed for white fabrics to avoid discoloration or yellowing.
  4. Stain removal: Treat any stains on your white linens before washing. Allow stain removers to sit on the fabric for 3 to 5 minutes before washing for effective removal.
  5. Delicate fabric care: If your white linens are made of delicate fabrics, such as silk or lace, hand wash them in cold water with a gentle detergent.
  6. Household bleach: For heavily stained white linens, you can use household bleach, but be sure to follow the instructions on the product label carefully.

Dealing with Shrinkage

Fine linens, such as linen tablecloths and napkins, can experience shrinkage when not properly cared for. When washed and dried naturally, these linens may shrink by around 4% to 5%.

However, tumble drying them can increase the shrinkage to up to 10%. To prevent excessive shrinking, it is recommended to avoid tumble drying linen tablecloths and napkins. Instead, opt for air-drying them or using low heat settings in the dryer.

By taking these precautions, you can keep your fine linens looking their best without worrying about unwanted shrinkage.

Professional Cleaning Services

Avon Dry Cleaning and Laundry Service offers professional cleaning services for your table linens. With their expertise, you can ensure that your linens will be spotless and fresh-looking after every use.

Their convenient pickup and delivery service make it easy for you to have your tablecloths, napkins, and placemats professionally cleaned without any hassle. Avon’s professional dry cleaning process is especially beneficial for delicate fabrics that require special care, as it helps to extend the life of your linens while keeping them in pristine condition.

Plus, keep an eye out for promotional discounts or coupons that could help you save on their top-notch tablecloth cleaning services.

Conclusion – How To Clean Table Linens

Maintaining spotless and fresh-looking table linens is a key element in elevating your dining experience, whether it’s a casual family dinner or a special event. This comprehensive guide has provided you with valuable insights into caring for different types of table linens. From choosing the right cleaning method based on the fabric type to effective stain treatment and proper washing and drying techniques, you now have the tools to ensure your linens always look their best.

Additionally, the tips on ironing, storage, and addressing common concerns like stains, white linens, and shrinkage have equipped you with the knowledge needed to keep your table linens in pristine condition. And for those extra tough stains or delicate fabrics, professional cleaning services like Avon Dry Cleaning and Laundry Service can come to your rescue. By following these guidelines, you’ll enjoy the elegance and beauty of your table linens at every gathering, leaving your guests impressed and your table settings impeccable. So, let’s embark on this journey of linen care and make those stains disappear for good!

FAQs

1. Can I machine wash table linens?

Yes, most table linens can be safely machine washed. However, it is important to check the care instructions and use a gentle cycle with mild detergent.

2. How do I remove stains from tablecloths?

To remove stains from tablecloths, treat them as soon as possible by blotting the stain with a clean cloth and applying a stain remover or liquid laundry detergent before washing.

3. Can I put napkins and placemats in the dryer?

Yes, napkins and placemats can usually be dried in the dryer on a low heat setting. Alternatively, you can hang them up to air dry for best results.

4. What’s the best way to store table linens?

For long-term storage of table linens, it is recommended to clean and completely dry them before folding them neatly and storing them in a cool, dry place away from direct sunlight.

5. Do I need to iron my table linens after washing?

Ironing your table linens can help achieve a crisp and polished look but it’s not necessary if they are properly folded or hung immediately after drying; however, stubborn wrinkles may require light ironing on low heat setting.

How To Properly Wash A Duvet: A Complete Guide

How To Properly Wash A Duvet: A Complete Guide

Dry Cleaning , Fabricare Center Blog , Household

Are you struggling to keep your duvet fresh and clean? You’re not alone, as many people find washing a duvet an intimidating task. This guide will walk you through the process of how to properly washing a duvet, unraveling each step in straightforward terms. Let’s get started; your fresh, fluffy duvet awaits!

Key Takeaways

  • To properly wash a duvet, start by pre – treating stains using a gentle detergent and warm water before placing it in the washing machine on a gentle cycle.
  • Avoid using bleach or fabric softener when washing your duvet to prevent damage. Instead, use a delicate detergent specifically designed for bedding.
  • Air drying is recommended to preserve the quality of your duvet. If you choose to use a dryer, set it on low heat and add tennis balls to help fluff up the duvet.
  • Regularly fluff and maintain your duvet by giving it a good shake every few weeks, rotating it while drying, and storing it in a breathable bag away from direct sunlight and moisture.

Understanding Duvets

Understanding Duvets

A duvet is a plush and comforting bedding accessory designed to provide warmth and coziness during sleep. Duvets come in various styles, including those filled with down, synthetic materials, or feathers.

What is a Duvet? 

A duvet is a type of bedding consisting of a soft, flat bag filled with materials such as down, feathers, wool, or synthetic alternatives. It plays an essential role in your bedding ensemble, enveloping the duvet insert and shielding it from dirt.

Think of it as an oversized pillowcase for your quilt! This cover can be easily removed and laundered, much like bed sheets. When selecting a duvet, your choice largely hinges on personal preference and practicality. Some may require specific care based on their fillings, while others offer easier maintenance.

Silk duvets have become less favored due to their demanding upkeep requirements, such as dry cleaning or hand washing. This cozy layer not only adds warmth during colder seasons but also contributes color, pattern, and texture to your room’s decor.

Types of Duvets 

Duvets are available in a variety of materials, each with its unique features and benefits. The primary types include down duvets, feather duvets, and synthetic duvets. Silk duvet covers have waned in popularity due to the challenges associated with cleaning, while the other options remain favored due to their distinctive attributes.

Type of DuvetDescriptionBenefits
Down DuvetsThese are filled with the soft, fluffy feathers from the underside of a bird, typically a goose or a duck.Down duvets are warm, lightweight and provide excellent insulation.
Feather DuvetsFeather duvets are filled with the outer feathers of birds, which are larger and heavier than down.They are less expensive than down duvets and provide good warmth and weight.
Synthetic DuvetsSynthetic duvets are filled with man-made materials like polyester.They are ideal for people with allergies as they are hypoallergenic. Plus, they are easy to clean and dry quickly.

Step-by-Step Guide to Washing a Duvet

To properly wash a duvet, start by pre-treating any stains using a gentle detergent. Then, place the duvet in the washing machine on a gentle cycle with warm water and an extra rinse.

Make sure to use a delicate detergent specifically for bedding. Once washed, remove the duvet immediately and let it air dry or put it in the dryer on a low heat setting with tennis balls to help fluff it up.

Pre-treating Stains

Handling the unsightly spots on your duvet begins with pre-treating stains. This step is vital in washing a duvet effectively, as it requires careful attention to detail. First, identify the areas with stains and isolate them from the rest of the duvet by gently pushing away any stuffing or filling.

Then, apply a gentle stain remover – preferably one that is free from harsh chemicals that can damage your bedding material. The use of lukewarm water paired with this cleaner aids in preliminary loosening up and lifting off of stubborn marks before they undergo a thorough cleanse in the washer’s cycle.

An optional but highly recommended approach involves soaking your stained duvet in a concocted cleaning solution ahead of actual washing; this allows more time for those tough blotches to break down and dissolve entirely! So go forth armed with these valuable tips on how you can turn an otherwise frustrating experience into an achievable chore all while preserving your beloved bedding!

Best Duvet Washing and Drying Methods

To wash a duvet properly, it’s important to use the best washing and drying methods. Start by pre-treating any stains before washing. Then, choose a mild detergent and cold water for a gentle wash cycle.

Avoid using bleach or fabric softener as they can damage the filling of the duvet. When it comes to drying, air drying is recommended instead of using a dryer to prevent shrinking or clumping of the filling.

If you prefer using a dryer, set it on low heat and add some clean tennis balls or dryer balls to help fluff up the duvet. By following these methods, you can ensure that your duvet stays fresh and clean for a long time.

Tips for Fluffing and Maintaining the Duvet

Regularly fluffing and maintaining your duvet is essential to keep it cozy and in top condition. One tip for fluffing your duvet is to give it a good shake or two every few weeks. This helps redistribute the filling and restore its loftiness.

Additionally, rotating your duvet while drying can help prevent clumping and ensure even distribution of moisture. Another important aspect of maintenance is properly storing your duvet when not in use.

Make sure to store it in a breathable bag or cover, away from direct sunlight and moisture, to protect its quality and extend its lifespan.

To maintain the quality of your duvet, avoid overstuffing it with other bedding items. Over time, this can cause compression, affecting its ability to provide warmth and comfort. It’s also advisable to avoid sitting or standing on the duvet as this can flatten the filling.

Duvet Spot Cleaning and Stain Removal

Duvet Spot Cleaning and Stain Removal

To spot clean a duvet, gently dab the stain with a mild detergent solution and a clean cloth.

How to spot clean a duvet

To spot clean a duvet, follow these steps:

  1. Move the down/feather/fiberfill away from the stained area.
  2. Gently rub a solution of mild soap or spot cleaner onto the stain.
  3. Use lukewarm water and a clean rag to blot the stain, starting from the outside and working your way in.
  4. Continue blotting until the stain is removed or significantly lightened.
  5. Allow the cleaned area to air dry completely before using or storing the duvet.

Common stains and how to remove them

One of the most essential parts of duvet maintenance is knowing how to deal with common stains. Stains can come from a variety of sources, and each type requires a unique approach to ensure their successful removal.

Type of StainMethod of Removal
Food or BeverageBlot the stain with lukewarm water and a gentle stain remover. Use a clean rag to gently work the stain remover into the fabric.
Old or Set In StainsDampen the stained area with cold water and cover it with a stain remover. Gently rub the stain remover into the material to help break down the stain.
BloodUse hydrogen peroxide or a special enzymatic cleaner designed for removing protein-based stains such as blood.
InkUse alcohol-based hand sanitizer or hairspray. Apply it to the stain, let it sit, then gently blot it away.
Oil-Based Stains (like makeup or grease)Use a laundry detergent, OxiClean, or a similar stain remover. Apply it to the stain, gently work it in, then wash as usual.
WineWhite vinegar can be used on these types of stains. Moisten a soft cloth or cotton ball with white vinegar, blot the stained area thoroughly, and then cover the stain with a layer of salt.

Each stain removal method should be followed by a regular wash cycle to ensure that all remnants of the stain and stain remover are washed away. Always test any stain removal method on an inconspicuous area of the duvet first to ensure it doesn’t damage or discolor the fabric. The American Cleaning Institute (ACI) provides a more comprehensive stain removal guide if needed.

Maintenance and Care Tips

To ensure your duvet remains in pristine condition, it’s crucial to adhere to proper maintenance and care guidelines. Here are some tips to help you maintain your duvet’s quality and longevity.

How Often to Wash Your Duvet

Regularly washing your duvet is essential for upholding cleanliness and hygiene in your bedding. While duvet covers should be laundered once a month to remove sweat, dirt, and oils, the duvet itself can go 5 to 10 years without requiring a wash.

Nevertheless, it is advisable to give your duvet a thorough cleaning at least once a year to keep it fresh and free from allergens. By following these washing frequency recommendations, you can ensure that your duvet remains in prime condition for years to come.

When to Replace Your Duvet

Routine maintenance and care are paramount, but there may come a point when replacing your duvet becomes necessary. Over time, duvets can lose their loft, becoming lumpy or flat, which diminishes their ability to provide warmth and comfort.

If you observe that your duvet is no longer as fluffy or cozy as it once was, even after washing and fluffing, it might be time to contemplate acquiring a new one. Furthermore, if you notice visible signs of wear and tear, such as holes, frayed edges, or an uneven distribution of filling material, these are clear indicators that your duvet requires replacement.

Remember, investing in a high-quality duvet will not only ensure its longevity but also enhance your overall sleep quality in the long run.

Proper Storage and Handling Tips

The correct storage and handling of your duvet are vital for preserving its quality and extending its lifespan. Here are some essential tips to follow:

  1. Clean and Dry: Prior to storage, ensure that your duvet is impeccably clean and completely dry. This prevents the growth of mold, mildew, and unpleasant odors.
  2. Use a Breathable Bag: Store your duvet in a breathable fabric bag or cover to shield it from dust, dirt, and insects. Avoid using plastic bags, as they can trap moisture and cause damage.
  3. Avoid Compression: Refrain from placing heavy objects on top of your stored duvet or compressing it tightly. This can flatten the filling and affect its fluffiness.
  4. Keep Away from Direct Sunlight: Protect your duvet from direct sunlight, as UV rays can break down the fabric fibers over time. Store it in a cool, dark place to prevent damage.
  5. Rotate Periodically: To prevent uneven wear and maintain an even distribution of filling, periodically rotate your duvet while it’s in storage.
  6. Consider Vacuum Sealing: If you have limited storage space, vacuum-sealed bags can help save space while still safeguarding your duvet from dust and pests.

Conclusion

Maintaining a clean and cozy duvet doesn’t have to be an intimidating task. With the comprehensive guide provided here, you now have the knowledge and confidence to properly care for your duvet, ensuring it stays fresh and comfortable for years to come. Key takeaways from this guide include understanding the various types of duvets and their features, a step-by-step washing guide, tips for regular fluffing and maintenance, spot cleaning and stain removal techniques, and essential care tips like when to wash, replace, and how to store your duvet properly. By following these recommendations, you can keep your duvet fresh, comfortable, and in prime condition, making duvet care a simple and rewarding part of maintaining a clean and cozy bedroom environment. Your fresh, fluffy duvet is just a few easy steps away!

Duvet Cleaning FAQs

1. Can I wash a duvet in a regular washing machine?

Yes, you can wash a duvet in a regular washing machine as long as it is large enough to accommodate the size of the duvet and has a delicate or gentle cycle option.

2. How often should I wash my duvet?

It is recommended to wash your duvet every 6-12 months, or more frequently if it becomes visibly dirty or if you have allergies.

3. Can I use regular detergent to wash my duvet?

Yes, you can use regular laundry detergent to wash your duvet. However, avoid using excessive amounts of detergent as it may not rinse out completely and leave residue on the duvet.

4. Is it necessary to dry clean my duvet?

Not all types of duvets require dry cleaning. Check the care label on your specific duvet for instructions on whether it can be machine washed or needs professional dry cleaning.

5. How do I dry my duvet after washing?

After washing your duvet, tumble drying on low heat is generally recommended. Add dryer balls or clean tennis balls to help fluff up the filling and ensure even drying.

The Ultimate Guide To Storing Patio Cushions

The Ultimate Guide To Storing Patio Cushions And Keeping Them Safe All Year Round

Fabricare Center Blog , Household

Wave farewell to faded and moldy patio cushions with our comprehensive guide. Often, people underestimate the importance of properly storing patio cushions during the off-season, which can result in premature wear and tear. But fear not! Our step-by-step guide will take you through every aspect, from cleaning your cushions effectively to selecting the ideal storage solutions and maintaining them throughout their storage period.

Stay with us because you’re just one read away from enjoying fresh and vibrant patio cushions year-round!

Key Takeaways

  • Proper cleaning practices are essential for maintaining the longevity and appearance of patio cushions.
  • When storing patio cushions indoors, consider using airtight containers, deck boxes, or clear plastic storage bins to protect them from moisture and pests.
  • Folding techniques can help maximize storage space and prevent damage to different cushion sizes.
  • Packaging cushions in plastic storage totes with a tight seal, using protective covers or fabric bags, and avoiding direct contact with the ground can help prevent dirt, dust, and water damage during storage.

Proper Cleaning and Preparation of Patio Cushions

Proper Cleaning and Preparation of Patio Cushions

To ensure the longevity of your patio cushions, it is essential to clean them properly before storing them away.

How to clean fabric cushions

Cleaning fabric patio cushions requires a step-by-step approach to ensure optimal results. First, you should consult the manufacturer’s washing instructions. Next, remove any excess debris by vacuuming the cushions thoroughly. If your cushion covers are removable, hand wash or machine-wash them based on the manufacturer’s guidance.

Removing excess moisture

Soaking up excess moisture from your patio cushions is a key part of the cleaning process. By using towels, you can pat down and absorb as much water as possible. This initial drying technique plays a crucial role in preventing future damage to your cushions.

After dabbing them with towels, place the cushions in an airy space or under direct sunlight for thorough drying. Sunlight not only ensures complete moisture removal but also helps kill any lingering bacteria.

However, be mindful to avoid prolonged exposure as it could lead to sun damage over time.

Importance of proper cleaning practices

Proper cleaning practices play a pivotal role in keeping your patio cushions in top shape. This includes regularly shaking out the cushions to eliminate debris, which helps reduce stains over time.

If greasy spots show up, pre-treating your outdoor cushions with a degreaser and gently rubbing it is highly recommended.

Fabric choice is another element that impacts proper cleaning. Not all fabrics are equal when it comes to embracing the outdoors! With suitable fabric for outdoor cushions, thorough wash-and-rinse routines become easier and yield better results.

Finally, ensure your outdoor cushions air-dry completely before replacing their covers – this step prevents trapping moisture inside, warding off mold and mildew dangers!

Choosing the Right Storage Area and Containers

Choosing the Right Storage Area and Containers for Patio Cushions

When it comes to storing your patio cushions, selecting the optimal storage area and containers is paramount to ensure their year-round safety and longevity.

Indoor Storage Options

Patio cushions require proper storage to shield them from potential damage during the off-season. Here are some indoor storage solutions:

  • Airtight Containers: Utilize airtight containers for indoor patio cushion storage. These containers effectively ward off moisture and pests, safeguarding your cushions.
  • Deck Boxes: If you possess sufficient space, consider employing weatherproof deck boxes as storage for your patio cushions. They can accommodate multiple cushions while providing protection.
  • Trash Bags: Large, heavy-duty trash bags serve as a temporary storage option for patio cushions. Ensure a tight seal to prevent dust and moisture infiltration.
  • Clear Plastic Storage Bins: Opt for sturdy, waterproof clear plastic bins. Their transparency allows you to identify contents without opening them, offering enhanced protection.
  • Heavy-Duty Garage Totes: Garage totes with reinforced bottoms are ideal for indoor patio cushion storage. They offer durability and moisture resistance.
  • Waterproof Storage Options: Seek out waterproof storage bags or cases specifically designed for outdoor furniture cushions. These ensure maximum protection against water damage.

Airtight containers, deck boxes, and trash bags are recommended choices for winter indoor storage of patio cushions. Meanwhile, clear plastic storage bins, heavy-duty garage totes, and specialized waterproof storage options are among the top recommendations for safeguarding outdoor cushions indoors.

Outdoor Storage Options

When considering outdoor storage, prioritize covered storage areas or units that shield against UV rays. Here’s how to protect your outdoor cushions effectively:

  • Solid and Secure Storage Shed: Invest in a sturdy and secure storage shed to safeguard outdoor cushions from the elements. This will help maintain their condition over time.
  • Outdoor Furniture Storage: Employ outdoor furniture storage options like bins, boxes, and totes to keep patio cushions clean and dry.
  • Upper Shelves: Store outdoor cushions on elevated shelves to extend their lifespan by preventing contact with damp surfaces.
  • Fabric Storage Bags: Use fabric storage bags to shield outdoor cushions from potential damage.
  • Creative Solutions: Explore inventive storage options, such as mouse-proof storage containers or leaving cushions on covered outdoor furniture.

By implementing these storage suggestions, you can ensure the durability and longevity of your patio cushions, whether indoors or outdoors, throughout the seasons.

Techniques for Folding and Packaging Cushions

To maximize storage space and safeguard your patio cushions, it’s essential to master the art of proper folding. Here are various folding techniques tailored to different cushion sizes:

  1. Square or Rectangular Cushions: Begin by folding these cushions in half lengthwise, bringing the top edge down to meet the bottom edge. Next, fold them in half again horizontally, aligning the left side with the right side.
  2. Round Cushions: Start by folding the cushion in half to create a semi-circular shape. Then, fold it in half once more, joining the straight edges together.
  3. Irregularly Shaped Cushions: When dealing with oddly shaped cushions, strive to maintain their original form as closely as possible. This may entail folding them into thirds or quarters, depending on their unique contours.

Effective Patio Cushion Packaging Tips

Ensuring the safety of your patio cushions during storage involves more than just folding techniques. Here are some valuable tips to prevent any damage:

  1. Choose Plastic Storage Totes: Opt for plastic storage totes equipped with a secure seal to shield your patio cushions effectively.
  2. Mindful Folding: Exercise caution while folding cushions to prevent unsightly creases and potential damage during storage.
  3. Protective Covers: Place your cushions inside protective covers or fabric bags to safeguard them from dirt and dust.
  4. Elevated Storage: Avoid storing cushions directly on the ground to mitigate the risk of water and dirt damage.
  5. Innovative Storage Solutions: Consider alternatives such as mouse-proof or waterproof storage options to prolong the lifespan of your cushions.
  6. Ideal Storage Conditions: Keep your cushions in a cool, dry area away from direct sunlight to prevent sun damage.
  7. Regular Moisture Checks: Routinely inspect the storage area for any signs of moisture and address any issues promptly.
  8. Clear Labeling: Clearly label storage containers to facilitate easy retrieval of specific cushions when needed.
  9. Avoid Overpacking: Refrain from overloading storage containers to maintain cushion shape and prevent compression damage.
  10. Pest Vigilance: Periodically inspect stored cushions for signs of pest infestation and take necessary measures to prevent damage.

Remember, proper packaging plays a crucial role in protecting your patio cushions during storage. Utilizing plastic storage totes with secure seals will safeguard them from dirt, dust, and pests. By meticulously folding your cushions and employing these tips, you can ensure their safety throughout the year.

Tips for Maintaining Patio Cushions During Storage

Regularly Monitor Moisture Levels

Frequent moisture checks are essential when storing patio cushions to safeguard against damage and ensure their durability. Unaddressed moisture can lead to unsightly stains, mold, and mildew on the cushions.

Action Steps:

  • Promptly remove any water accumulation.
  • Thoroughly clean and dry the cushions before storing them to prevent dirt and moisture from causing stains or damage.
  • By consistently inspecting for moisture and promptly addressing it, you can ensure your cushions remain in optimal condition year-round.

Pest Prevention Measures

To shield your patio cushions from pests during storage, adopt the following pest prevention strategies:

Action Steps:

  • Store cushions in airtight containers: Utilize plastic storage totes or vacuum-sealed bags to keep pests out and maintain cushion quality.
  • Maintain a clean storage area: Regularly clean the storage space to eliminate food crumbs or debris that may attract insects or rodents.
  • Implement natural deterrents: Consider using cedar chips, lavender sachets, or dried citrus peels to discourage pests from approaching your cushions.
  • Avoid proximity to food sources: Keep stored cushions away from areas with food, as this can attract pests and elevate the risk of damage.
  • Monitor for infestation signs: Routinely inspect stored cushions for any indications of pest activity, such as droppings or fabric damage. If signs are detected, take immediate action to prevent further harm.
  • Elevate the storage location: Position your cushion containers on shelves, racks, or pallets to thwart pests from accessing them at ground level.

Tips for Prolonging Cushion Lifespan During Storage

To extend the life of your cushions while in storage, consider these suggestions:

Action Steps:

  • Thoroughly clean and dry your outdoor cushions before storing them.
  • Wrap the cushions in a protective layer or place them in an airtight fabric bag to prevent the accumulation of dirt and debris.
  • Utilize a protective cover when storing the cushions to shield them from dust, moisture, and pests.
  • Store the cushions on elevated surfaces or upper shelves to mitigate the risk of damage from flooding or leaks.
  • Periodically clean and shake out the cushions while in storage to eliminate any accumulated dust or debris.

By following these comprehensive guidelines, you can ensure your cushions remain in pristine condition, ready for use whenever needed.

Conclusion

Maintaining the longevity and vibrancy of your patio cushions year-round is achievable with the right care and storage strategies. Proper cleaning practices, including following manufacturer guidelines, moisture removal, and fabric choice, set the foundation for preserving their appearance and preventing issues like mold. Whether you opt for indoor or outdoor storage, selecting the right containers, such as airtight options or deck boxes, and employing protective covers ensures your cushions stay safe from moisture and pests. Mastering folding techniques, using plastic storage totes, and conducting regular moisture checks further safeguard your cushions.

Additionally, don’t overlook pest prevention measures, like keeping a clean storage area and utilizing natural deterrents. By diligently following these guidelines, including thorough cleaning, protective wrapping, and elevated storage, you’ll extend the lifespan of your patio cushions, ensuring they remain in pristine condition and ready for use whenever you need them. Say goodbye to faded and moldy cushions, and welcome years of comfort and style in your outdoor sanctuary.

FAQs

1. How should I clean my patio cushions before storing them?

Before storing your patio cushions, you can clean them by spot cleaning any stains with a mild detergent and water solution or by using a fabric cleaner recommended for outdoor use.

2. Can I leave my patio cushions outside all year round?

It is not recommended to leave your patio cushions outside all year round as they may be exposed to harsh weather conditions that can cause damage. It’s best to store them in a safe place when not in use.

3. What is the best way to store patio cushions during the off-season?

The best way to store patio cushions during the off-season is to keep them in a dry and well-ventilated area, such as a storage shed or garage. Make sure they are protected from dust and pests by using covers or plastic bags.

4. Should I remove the filling from my patio cushions before storing them?

If possible, it’s best to remove the filling from your patio cushions before storing them as this helps prevent mold and mildew growth. Place the cushion covers and foam inserts separately in storage containers.

5. How often should I check on my stored patio cushions?

It is recommended to check on your stored patio cushions periodically, especially if they are stored for an extended period of time, to ensure there is no moisture buildup or signs of damage that may require immediate attention.

How To Wash A Weighted Blanket

How To Wash A Weighted Blanket

Dry Cleaning , Fabricare Center Blog , Household

Are you finding it challenging to clean your weighted blanket? It’s perfectly normal to feel a bit perplexed, as these blankets need special care compared to standard ones. Fear not, for this guide is here to assist you, offering step-by-step advice on how to wash a weighted blanket without risking any harm.

Keep reading to unveil the secrets of maintaining your cozy sleep companion in a clean and refreshing state!

Key Takeaways

  • Wash your weighted blanket as often as regular comforters or blankets. Usually once every few weeks, if used nightly.
  • Spot clean stains before washing the entire blanket to prevent them from setting in and causing permanent marks.
  • Choose the right washing method based on fabric and filler materials, such as machine washing for some blankets or hand washing for others.
  • Use a gentle cycle with cold water and mild detergent when machine washing a weighted blanket.

Tips for Washing a Weighted Blanket

To maintain the cleanliness and quality of your weighted blanket, it’s essential to understand both the frequency of washing and the proper stain pre-treatment techniques. Selecting the correct washing method is equally crucial in preserving its overall quality.

How Often to Wash a Weighted Blanket

As a general guideline, weighted blankets should be cleaned as regularly as standard comforters. Typically around once every few weeks if used on a nightly basis. In the event of accidental spills or unexpected stains, immediate spot cleaning is essential.

Proper maintenance of a weighted blanket involves following washing instructions diligently to preserve its quality and extend its lifespan. Depending on the fabric and filler material, machine washing may be suitable for some blankets. While hand washing methods might be more appropriate for others.

The key to ensuring the longevity of your weighted blanket and keeping it fresh and cozy is consistency in maintaining its cleanliness. Frequent cleaning prevents the accumulation of dirt and helps your blanket stay comfortable for longer!

Pre-treating Stains

Pre-treatment of stains is a crucial step in the process of cleaning a weighted blanket. Initially, it is imperative to determine the nature of the stain. Which can vary from common food spills to organic stains such as bodily fluids. Each type of stain necessitates a tailored approach for effective removal.

For minor stains, a spot-cleaning method employing a mild soap or detergent may suffice. However, once you have identified and treated the stain, it is essential to thoroughly rinse it with either cold or warm water. Special attention should be paid to organic stains before proceeding to wash the entire blanket. This initial rinsing of problem areas prevents them from becoming deeply embedded in the fabric fibers. Thus averting the formation of stubborn, permanent marks.

Utilizing an efficient stain remover can significantly simplify this process and guarantee that your weighted blanket maintains its pristine appearance for an extended period.

Choosing the right washing method

It’s important to choose the right washing method for a weighted blanket.

  1. Evaluate the fabric and filler materials of your blanket.
  2. Check the care label on your blanket for specific washing instructions.
  3. Decide between taking it to the cleaners, machine washing or hand washing, depending on the blanket’s construction and weight.
  4. Use a gentle cycle with cold water if choosing machine wash.
  5. Opt for spot cleaning with mild soap and warm water for small stains.
  6. Choose a mild detergent without bleach to protect the integrity of your blanket.
  7. If your blanket is too heavy or delicate, consider using professional cleaning services.
  8. Always air dry your weighted blanket after washing to maintain its structure and prevent damage from high heat.
  9. Wash it 3 – 4 times per year but do more frequent washes when needed, like after spills or stains appear on the fabric.

Taking it to a Professional Cleaner

Taking your weighted blanket to a professional cleaner is the easiest method for ensuring it is properly cleaned and maintained.

This is the Easiest Method

Having your weighted blanket professionally cleaned is the most straightforward and effective method, especially if it exceeds 20 pounds in weight. Professional laundry services possess the expertise and specialized equipment required to handle heavier blankets with precision.

By adhering to their recommended washing instructions and guidelines, you can guarantee that your weighted blanket receives the meticulous care it demands, all without any added inconvenience or exertion on your part.

If you’re seeking a hassle-free and convenient approach to maintaining the cleanliness and freshness of your weighted blanket, seriously contemplate entrusting it to a professional cleaner for regular upkeep.

Machine Washing a Weighted Blanket

To machine wash a weighted blanket, start by selecting a gentle cycle and cold water temperature to prevent damage.

Selecting the Appropriate Cycle and Water Temperature

Machine washing a weighted blanket requires careful consideration of the cycle and water temperature to ensure proper cleaning without causing any damage. It is recommended to use a gentle cycle for washing the blanket, as this will help prevent fabric shrinkage and maintain its overall quality.

When it comes to water temperature, cold water is generally the best option for most weighted blankets. However, if you have a specific type of material or filling that requires warm water, make sure to select an appropriate wash cycle with suitable temperature settings.

By choosing the right cycle and water temperature, you can effectively clean your weighted blanket while preserving its longevity and performance.

Using a Mild Detergent

When washing a weighted blanket, it is crucial to use a mild detergent that is gentle on the fabric and safe for your skin. Avoid using harsh chemicals like bleach or fabric softener, as they can damage the integrity of the blanket and affect its effectiveness.

Look for detergents that are bleach-free and free of harmful chemicals such as chlorine. Mild detergents, like Tide, are recommended for glass bead-filled weighted blankets. Opt for nontoxic, eco-friendly options that are fragrance-free and hypoallergenic if you have sensitive skin or allergies.

A natural, allergen-free, plant-based detergent would also be a great choice. Taking care with your choice of detergent will help ensure that your weighted blanket stays clean without causing any harm or irritation to you or the blanket itself.

Drying the Blanket Properly

Properly drying a weighted blanket is essential to maintain its quality and prolong its lifespan. After machine washing, it is recommended to dry the blanket in a dryer on a low heat setting.

It’s important to monitor the drying process closely because weighted blankets may dry much faster than regular blankets due to their dense filling. Tumble drying at a low setting can also be an effective way to dry the blanket thoroughly.

For those who prefer air drying, laying the blanket flat can help protect it from wear-and-tear while preventing lumps from forming. Ultimately, choosing the right drying method will ensure that your weighted blanket stays soft, comfortable, and ready for use whenever you need it most.

Hand Washing a Weighted Blanket

To hand wash a weighted blanket, start by making a cleaning solution with mild detergent and warm water.

Making a Cleaning Solution

To prepare a cleaning solution for hand washing a weighted blanket, it’s best to use a mild detergent without bleach or fabric softener. Many weighted blankets cannot withstand hot water, so it’s recommended to use cold or warm water for the cleaning solution.

When dealing with glass bead blankets, opt for cold water and a gentle laundry detergent without bleach. Take into consideration the type of filler used in your blanket when choosing the appropriate cleaning method.

Submerging and Cleaning the Blanket

To hand wash a weighted blanket, begin by filling a large basin or bathtub with lukewarm water and adding a mild detergent. Submerge the blanket completely and utilize your hands to massage it for several minutes, with particular attention to any stains or soiled areas.

While massaging, be prepared to replace the soiled water with fresh water as necessary. Once you are confident that the blanket is clean, thoroughly rinse it under running water until all remnants of detergent are eliminated.

Gently squeeze out excess water without wringing or twisting the fabric, and subsequently lay it flat on a clean surface to air dry.

Rinsing and Drying the Blanket

After hand washing your weighted blanket, it’s crucial to thoroughly rinse and dry it to ensure proper cleanliness and maintenance. Start by gently wringing out any excess water from the blanket before moving on to rinsing.

Use lukewarm water to remove any remaining soap or cleaning solution, making sure every part of the blanket is thoroughly rinsed. Once you’re satisfied with the rinse, squeeze out as much water as possible without twisting or pulling on the fabric.

Finally, lay the blanket flat to air dry in a well-ventilated area or use a low-heat setting on your dryer if it’s permissible for your specific weighted blanket. Remember that proper drying techniques are essential for keeping your weighted blanket in top condition for long-term use and enjoyment.

Care Instructions for Different Fabrics and Filler Materials

The care instructions for different fabrics and filler materials in a weighted blanket can vary significantly. It is of utmost importance to consult the care label on your specific blanket to determine the appropriate washing method.

Some fabrics, such as cotton or microfiber, may be suitable for machine washing, while others may require hand washing or even professional dry cleaning.

For machine-washable blankets, follow these steps to preserve the fabric’s integrity:

  1. Machine Selection: Use a gentle cycle and opt for cold water to prevent any potential fabric damage.
  2. Detergent Choice: Use a mild laundry detergent that doesn’t contain bleach or fabric softeners. These additives can harm the fabric and its fillers over time.
  3. Protection During Wash: It’s highly recommended to place the weighted blanket inside a pillowcase or laundry bag. This extra layer of protection safeguards the blanket during the wash cycle.

If you need to hand wash your weighted blanket, follow these guidelines:

  1. Prepare Cleaning Solution: Create a cleaning solution using cool water and a mild detergent.
  2. Submerge and Gently Agitate: Submerge the blanket in the solution and gently agitate it to remove dirt and stains. Take care not to wring or twist the fabric, as this can damage it.
  3. Rinse Thoroughly: Rinse the blanket thoroughly with cold water until all soap residue is gone.

In the case of weighted blankets containing fillers such as rice, beans, or grains, it’s usually best to opt for dry cleaning. These fillers can become damaged or clump together if exposed to water.

By diligently following these care instructions tailored to your fabric type and filler material, you can ensure that your weighted blanket remains clean and in excellent condition for many years to come.

Conclusion

In conclusion, maintaining the cleanliness and quality of your weighted blanket is a crucial part of ensuring a cozy and refreshing sleep experience. Regular cleaning, spot treating stains, and choosing the right washing method based on fabric and filler materials are all essential steps in preserving your blanket’s lifespan. Whether you opt for professional cleaning services, machine washing, or hand washing, the key lies in consistency and attention to detail. Always use a mild detergent, avoid harsh chemicals, and pay heed to drying techniques. By following these guidelines and understanding the unique care requirements of your weighted blanket, you can enjoy its warmth and comfort for many years to come, ensuring a peaceful night’s sleep whenever you need it most.

How To Clean A Goose Down Comforter - Dry Cleaning & at Home Tips

How To Clean A Goose Down Comforter – Dry Cleaning & Home Tips

Dry Cleaning , Fabricare Center Blog , Household

Caring for your precious goose down comforter may seem like a daunting task. However, with the right techniques and products, it’s more manageable than you might think. This article is designed to provide you with clear, step-by-step instructions on how to clean a goose down comforter and maintain it properly, ensuring its longevity for years to come. Are you ready to transform your cleaning routine? Let’s dive right in!

Key Takeaways

  • Dry cleaning a goose down comforter is a top choice for maintaining its pristine condition, although it can be more expensive.
  • Washing a down comforter at home requires the right tools and techniques, such as using a large capacity washing machine and a gentle detergent specifically tailored for down products.
  • Spot cleaning minor stains on a goose down comforter can be done with lukewarm water and mild soap, while tough stains may require vinegar for spot cleaning. It’s important to ensure all soap or vinegar is fully rinsed out afterwards to maintain the loft and warmth of the comforter over time.
  • When washing a goose down comforter, consider factors like water temperature and spin speed, avoid using bleach or harsh chemicals, and wash it regularly to keep it clean and fresh.


How To Clean A Goose Down Comforter

Cleaning Methods for a Goose Down Comforter

There are two main cleaning methods for a goose down comforter: taking it to the dry cleaner or washing it at home.

Taking a Down Comforter to the Dry Cleaner

Dry cleaning a down comforter offers a comprehensive cleansing process while effectively preventing shrinkage. Professionals utilize specialized techniques and products that are challenging to replicate in a home setting. It’s important to note that this method tends to be relatively more expensive, with costs typically ranging between $30 and $50 per comforter.

If you’re willing to invest a little extra for superior outcomes, dry cleaning emerges as the optimal choice for upholding your goose down comforter in impeccable condition.

Washing a Down Comforter at Home

Washing your down comforter at home can be a breeze if you follow the right steps and use the correct tools and techniques. Begin by checking the care label on your comforter to get specific instructions based on its material.

1. Choose the Right Washing Machine

Opt for a large capacity washing machine, whether it’s a front-loading or top-loading machine without an agitator blade. These machines provide enough space for the comforter to move freely and ensure thorough cleaning.

2. Select the Right Detergent

Using a gentle detergent is crucial to preserving the quality of your down comforter during the washing process. Avoid harsh chemicals like bleach, as they could potentially harm the down filler. Instead, choose a cleaner that’s specially designed for down products, as this will maintain the fluffiness and coziness of your comforter.

3. Spot-Treat Stubborn Stains

If you encounter tough stains while preparing your comforter for washing, treat them carefully. Gently pull back the cover from the filling and apply your chosen cleaning product directly to the stained areas. Instead of scrubbing vigorously, dabbing gently should suffice to remove most blemishes without causing any damage.

4. Thoroughly Rinse in Cold Water

Through several cycles of rinsing in cold water, make sure to completely remove any soap residues from your comforter. Lingering cleaning agents can cause clumping, which would affect the even distribution of warmth provided by the down filling.

5. Patience in the Drying Phase

Moving on to the drying phase after ensuring thorough rinsing requires patience, but the time invested is well worth it. When dealing with wet down items, gentle handling matters more than speed. Avoid high spin speeds or excessively hot dryer settings, as these can cause the down to become lumpy. Low heat is generally the best approach. It might take several hours for the comforter to fully dry, so periodically check inside folds to ensure no areas remain damp. Dampness can lead to mold growth if left untreated, compromising freshness and longevity.

Spot Cleaning Tips

Spot cleaning a goose down comforter involves a series of simple yet crucial steps to ensure its longevity and appearance. To begin, pinpoint the area that requires attention and isolate it for treatment. A mild solution of lukewarm water and gentle soap is often remarkably effective in eradicating minor stains.

Exercise caution and refrain from using hot or cold water, as they can potentially harm the delicate down filling. For more stubborn stains, vinegar proves to be an invaluable asset for spot cleaning due to its natural deodorizing and disinfecting properties.

With the use of a soft cloth, delicately dab at the stain until it begins to lift. It’s imperative to ensure that all traces of soap or vinegar are thoroughly rinsed out afterwards. Any lingering residues could gradually diminish the loftiness and warmth of your comforter over time.

By adhering to these meticulous practices, you can uphold the impeccable care of your treasured goose down comforter, eliminating the need for frequent machine washes.


Step-by-Step Guide to Washing a Goose Down Comforter

Step-by-Step Guide to Washing a Goose Down Comforter

To wash a goose down comforter, start by gathering the required materials: a large tub or sink, gentle detergent, and warm water. Submerge the comforter gently in the soapy water and use your hands to agitate it for a few minutes. Be cautious not to twist or wring it during this process.

Thoroughly rinse the comforter with cold water until all traces of soap residue are removed. Afterwards, carefully squeeze out any excess water and proceed to transfer the comforter to a dryer set on low heat.

Preparation and Materials Needed

To prepare for washing your goose down comforter, gather the necessary materials. You will need a large front-loading washer, as top-loading washers can be too rough on the delicate feathers.

Additionally, ensure that you have access to a dryer with sufficient capacity to accommodate the comforter. To safeguard your comforter during the washing process, consider utilizing a duvet cover or a large pillowcase.

Lastly, select a mild detergent specifically formulated for down items and acquire some dryer balls to aid in fluffing up the feathers during the drying cycle. With these materials at the ready, you’ll be well-prepared to give your goose down comforter a thorough cleaning.

How to Hand Wash a Down Comforter

To hand wash a down comforter, begin by filling a bathtub or large basin with warm water. Utilize a mild detergent specifically designed for down or a gentle fabric cleanser. Avoid the use of harsh chemicals like bleach.

Submerge the comforter in the water and softly agitate it to guarantee an even distribution of the detergent. Allow it to soak for approximately 15 minutes.

After soaking, drain the soapy water and replenish the tub with clean lukewarm water for rinsing. Delicately press on the comforter to eliminate excess water without wringing or twisting it, as this could harm the fragile down clusters.

Repeat this procedure until all soap is eradicated and no suds remain.

How to Dry a Goose Down Comforter

To dry a down comforter, place it in a dryer on a low-heat setting. This will help prevent any damage to the delicate feathers. To expedite the drying process, you can include wool dryer balls in the dryer. These balls aid in fluffing up the comforter and distributing heat more evenly. It is crucial to ensure that the down comforter is thoroughly dried before using or storing it again to prevent any potential mold or mildew growth. Keep in mind not to use high heat, as this can lead to damage to the down filling.

Important Considerations

When washing a goose down comforter, it is essential to consider the water temperature and spin speed. Avoid using bleach or harsh chemicals, as they can damage the delicate feathers.

Also, remember to wash your comforter regularly to keep it clean and fresh. Read on to learn more about caring for your down comforter.

Water Temperature and Spin Speed

Optimal water temperature and spin speed are crucial considerations when washing a down comforter. Using warm water is recommended as it effectively cleans the duvet without causing damage. However, hot water should be avoided as it can shrink or harm the delicate down filling. Cold water may not provide sufficient cleaning for the comforter. When selecting a cycle, it’s best to choose a delicate setting with a maximum spin speed of 800rpm to prevent any potential damage to the down. By carefully managing these factors, you can ensure that your goose down comforter receives a thorough yet gentle cleaning process.

Avoiding Bleach and Harsh Chemicals

When cleaning a goose down comforter, it is crucial to refrain from using bleach and harsh chemicals. These substances can inflict damage on both the down filling and the outer cotton fabric of the comforter. Down manufacturers explicitly discourage the use of bleach due to its potential to deteriorate the quality of the down over time. Instead, opt for mild detergents, natural cleaning agents, or non-toxic and eco-friendly cleaners when washing your comforter.

Look for a down wash or detergent that is devoid of harsh chemicals such as bleach and sulfates. By steering clear of these detrimental agents, you can ensure that your goose down comforter maintains its softness, fluffiness, and overall good condition for years to come.

Frequency of Washing

The frequency of washing a goose down comforter depends on several factors. Generally, it is recommended to wash a comforter every 3-5 years if it has a duvet cover, and every 1-2 years without a cover.

However, the frequency should be determined based on wear factors such as stains or damage. If you use a duvet cover, you can clean the comforter more frequently, even a few times a year. It’s important to remember that while the duvet cover should be washed frequently, the comforter itself may only need a thorough cleaning once a year.

When washing your sheets and comforters, you can choose between using the bulky cycle or the delicate cycle for a gentler wash. Wool blankets should also be washed regularly every three months with wool-safe detergent to prevent any potential damage.

Overall, keeping your goose down comforter clean is essential for maintaining its quality and longevity. Pay attention to any stains or damage on your comforter as indicators of when it needs to be cleaned.

Conclusion

Knowing how to Clean a goose down comforter doesn’t have to be a daunting task, and dry cleaning is the preferred and safest method. By following the proper washing methods and considering important factors such as water temperature and detergent choice, you can keep your comforter fresh and fluffy for years to come. Whether you choose to take it to the dry cleaner or wash it at home, with a little care and attention, your goose down comforter will be clean and cozy in no time.

Meet the New Fabricare Center

Dry Cleaning , Fabricare Center Blog , Garment Cleaning , Green Dry Cleaning , Household , Technology , Uncategorized

Meet the New Fabricare Center

At Fabricare Center Cleaners, we are always looking for ways to better serve our customers. Improving our quality and the care of your garments is always our top priority. However, we also strive to broaden our services and our ability to service more people in the community.

We are currently expanding our methods and modes of customer communication. For starters, pay close attention to our Facebook and Twitter accounts, we are stepping up our our presence across both social media channels. Make sure to keep up with us, by liking us on Facebook and following us on Twitter. We will be posting dry cleaning tips and tricks, special services and offerings, along with other exciting updates. Check it out!

You also may have noticed we have a new logo! We have refreshed our overall look and feel. We are excited to announce our new look moving into 2016, it was time for a facelift (we have been in business for almost 40 years). You will see our new logo and branding pop up on social media, in email correspondence, and a variety of other exciting places.

We have a few other tricks up our sleeves! We are launching a number of new technologies that help us serve you better. You’ll see some minor changes in the days to come, all of which will help improve the quality of our service.

Here at Fabricare Center, we are looking for ways to improve our carbon footprint by eliminating twist ties and paper garment covers.

Also, watch out for our referral program. Your friends and family members will be excited to see that we are expanding that too! We are also offering many other great incentives for our customers to take advantage of!

With all of this said, we have found that the absolute best way to improve our company is through your feedback and testimonials. We would love to hear from you, be it in person, on the phone, via email, or even Facebook, Twitter, Yelp Reviews, and Google Reviews.

We’re looking forward to an exciting year ahead! Stay tuned…